The agitation scale you select is not a single RPM—it’s a dispersion regime determined by whether your reaction lives or dies on mass transfer rates.
The scale of agitation for a gas-liquid reactor in a pilot plant is chosen by assessing the process’s mass transfer criticality. If the reaction is not mass-transfer limited and coarse bubbles are acceptable, Scale 1–2 is sufficient. For moderate dispersion where fine bubbles must reach the vessel wall, choose Scale 3–5. When the reaction demands rapid mass transfer and maximum interfacial area, operate at Scale 6–10. You must avoid Scale 0—the flooded impeller regime—entirely. This classification, drawn directly from the primary agitation scale framework, gives you an immediate, objective diagnostic to map process kinetics to agitation intensity.
The agitation scale (1–10) classifies gas dispersion quality in a stirred tank. Matching it to your process means identifying whether the reaction is run-away fast in the liquid film, controllably moderate, or slow in the bulk—and then delivering exactly the interfacial area and bubble recirculation that regime demands. A pilot plant’s purpose is to find that match before scaling, not to guess at an RPM.
The Agitation Scale Framework for Gas-Liquid Reactors
The Five Regimes That Define Your Dispersion
The agitation scale categorizes how a gas is broken up and circulated by the impeller. This is not an arbitrary number—it correlates with bubble size, interfacial area, and gas holdup.
- Scale 0 (Flooded): The gas overwhelms the impeller, creating a continuous gas stream up the shaft. Mass transfer collapses. This is a failure state for chemical process industries.
- Scale 1–2 (Coarse Dispersion): The impeller just disperses the gas enough to avoid flooding. Bubbles are large, interfacial area is low. Suitable when the degree of dispersion is not critical and the system is not mass-transfer limited.
- Scale 3–5 (Moderate Dispersion): Fine bubbles are thrown to the vessel wall and recirculated back into the impeller. This creates a more uniform hold-up and a moderate increase in interfacial area—ideal for moderate mass transfer demands.
- Scale 6–10 (Rapid Mass Transfer): The impeller generates extremely fine bubbles, maximizing the contact area between gas and liquid. Bubble recirculation is intense. This regime is required when the overall reaction rate is controlled by mass transfer.
Why This Scale Matters for Pilot Plants
In a pilot plant, you are not just making product—you are gathering data to scale up. The agitation scale gives you a reproducible language to describe the hydrodynamic environment. When a fast reaction demands Scale 8 in the pilot, the full-scale unit must deliver equivalent mass transfer performance, not an identical impeller speed.
How Process Kinetics Dictate the Required Scale
The Hatta Number as Your Decision Compass
The Hatta number (√M) compares the maximum chemical reaction rate in the liquid film to the maximum mass transfer rate. It tells you where the reaction happens—and that determines your agitation needs.
- For fast reactions (√M > 3): The reaction is virtually complete inside the liquid film. Mass transfer is the rate-limiting step. You must maximize interfacial area, so the stirred tank needs Scale 6–10 to create a vast area of fine bubbles. (If the pilot plant allows, packed columns or spray towers are even more effective, but within a stirred unit operations module, high-scale agitation is your tool.)
- For moderate reactions (√M ≈ 1): Both film and bulk contribute, so a balanced design is needed. Scale 3–5 provides sufficient interfacial area while still maintaining adequate liquid volume for bulk reaction.
- For slow reactions (√M < 0.3): The reaction occurs mainly in the bulk liquid. A large liquid holdup and long residence time are critical, not maximum interfacial area. Here, Scale 1–2 is often perfectly adequate because you simply need to keep the liquid saturated and avoid flooding, not create ultra-fine bubbles.
The kLa Connection: Ensuring the Regime Delivers
The agitation scale is a visual proxy for the volumetric mass transfer coefficient (kLa). A Scale 8 regime generates a high kLa, keeping the dissolved gas concentration near saturation. If you scale down the agitation to a lower scale without compensating, kLa drops, the liquid becomes gas-starved, and reaction kinetics shift unpredictably.
That’s why the scale must be re-determined for each chemistry—it’s not a fixed impeller speed. For a fast hydrogenation requiring near-saturation dissolved H₂, only a scale that delivers a sufficiently high kLa (typically 6–10) will prevent the reaction from becoming mass-transfer-limited and altering selectivity.
Understanding the Trade-offs of Higher-Scale Agitation
The Energy and Shear Penalty
Moving from Scale 2 to Scale 10 is not free. It demands significantly more power input per unit volume, which translates directly into operating costs. In a pilot plant, this energy must be realistically scalable; if the specific power (P/V) cannot be reproduced at scale, the data become unreliable.
High-scale agitation also introduces high shear. While excellent for mass transfer, shear can damage sensitive catalysts, cells, or long-chain polymers. For a shear-sensitive bioprocess with a fast gas demand, a pure Scale 10 stirred tank might destroy the product. That’s where the pilot plant must evaluate alternative geometries (e.g., non-standard impellers) or consider a different reactor module entirely.
The Geometrical Constraints
A Scale 6–10 regime can only be achieved if the vessel geometry supports it. The recommended single-impeller configuration—H/dR = 1, dA/dR = 0.4–0.5, hA/dR = 0.33–0.5, and four 90° baffles (width dR/12 offset by dR/72)—must be respected. Without proper baffling, the high-speed impeller will just vortex and the actual dispersion scale will collapse.
The Scale-Up Trap
A common pitfall is picking an agitation scale in the pilot plant that cannot be matched at commercial scale using a practical criterion. For example, insisting on a constant Reynolds number often leads to impractically low speeds; constant tip speed may under-deliver mass transfer. The most robust path is often constant P/V, as it ties directly to mixing intensity and is easier to engineer. Your pilot plant work must validate that the chosen scale can be reached under the final scale-up rule.
Making the Right Choice for Your Pilot Plant Objective
How you determine the agitation scale ultimately depends on what you are optimizing in the laboratory.
- If your primary focus is teaching classic unit operations: Start students with a modular setup. Demonstrate Scale 1–2 to show flooding avoidance, then Scale 3–5 for moderate dispersion, and finally Scale 6–10 to illustrate the impact on kLa and reaction rate. The scale becomes an observable teaching variable.
- If your primary focus is scaling up a fast, mass-transfer-limited reaction: Immediately target Scale 6–10 and validate that the dissolved gas concentration stays near saturation. Use an agitated contactor and plan to maintain constant P/V and superficial gas velocity on scale-up.
- If your primary focus is a slow reaction in the bulk phase: Don’t over-design. A reliable Scale 1–2 with a high liquid holdup (stirred tank or bubble column) avoids wasted power and shear, while still ensuring the impeller never floods.
- If your primary focus is a shear-sensitive intermediate system: Start with Scale 3–5 as a baseline and explore alternative impeller types (e.g., axial flow up-pumping) that can deliver moderate dispersion at lower shear, then measure kLa to confirm no mass transfer limitation appears.
- If your primary focus is a multi-purpose research pilot plant: Invest in geometrically similar vessels and a variable-speed drive that can sweep from Scale 2 to Scale 10. Map the power curve and kLa for each scale under the actual chemistry, giving you a complete operational envelope for future scale-up decisions.
Determining the agitation scale is the act of translating a chemical demand—fast or slow, film or bulk—into a hydrodynamic reality that a pilot plant can reproduce and a full-scale facility can inherit.
Summary Table:
| Agitation Scale | Reaction Kinetics (Hatta No.) | Dispersion Regime | Recommended Application |
|---|---|---|---|
| Scale 0 | N/A | Flooded (Failure) | Avoid entirely; mass transfer collapses |
| Scale 1–2 | Slow (√M < 0.3) | Coarse Dispersion | Bulk phase reactions; ideal for low shear |
| Scale 3–5 | Moderate (√M ≈ 1) | Moderate Dispersion | Balanced film/bulk reactions |
| Scale 6–10 | Fast (√M > 3) | Rapid Mass Transfer | Mass-transfer-limited reactions (e.g., hydrogenation) |
Optimize Your Process Scale-Up with LABPARK
Are you looking to equip your laboratory with flexible, high-performance systems? LABPARK provides premium Educational and Vocational Unit Operations Pilot Plants in chemical engineering, bioprocess & biotech, and environmental & water treatment.
Designed specifically for universities, research institutes, and enterprises, our pilot plants help you accurately model agitation scales, mass transfer rates ($k_La$), and scale-up parameters.
Ready to elevate your research and training capabilities? Contact LABPARK today to find the ideal pilot plant solution for your lab!
Related Products
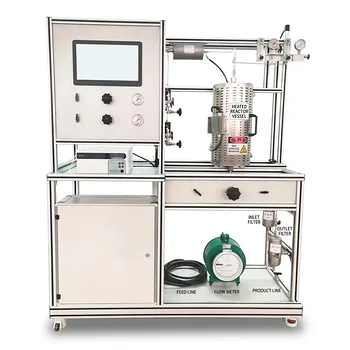
- Fixed Bed Gas Solid Catalytic Reaction Educational Pilot Plant
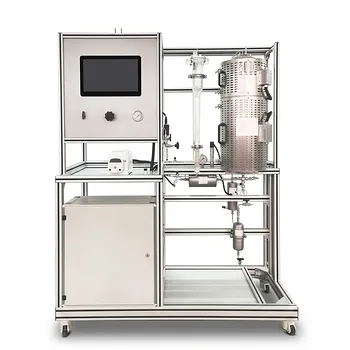
- Fluidized Bed Gas Solid Catalytic Reaction Educational Pilot Plant
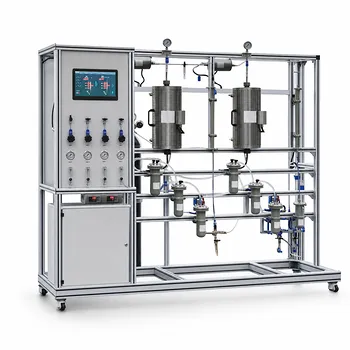
- Fixed-Bed Chemical Reaction and Gas Dust Tar Removal Unit Operations Pilot Plant
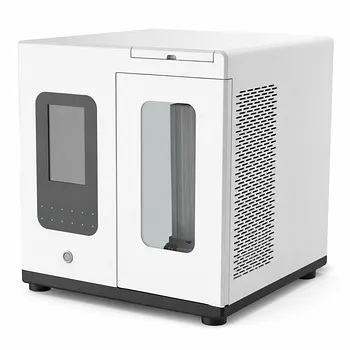
- Micro-Scale Gas-Solid Catalytic Reaction Educational Pilot Plant
- Two Phase Flow Pattern Velocity Resistance Measurement Educational Pilot Plant
People Also Ask
- How do reactor pilot plants safely study gas-solid reactions? Master kinetics with thermal & flow control.
- How does the Mears criterion evaluate transport resistance? Key Guide to Intrinsic Kinetics
- Why is a multibed configuration necessary for exothermic reactions? Optimize your pilot plant trajectory.
- Fluidized vs. Fixed Bed Reactors: Comparing Heat & Complexity in Pilot Plants
- What are the differences between pseudohomogeneous and heterogeneous models in pilot plants?