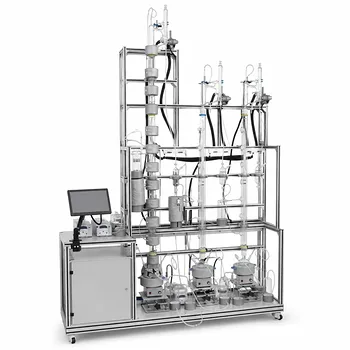
When you pressurize a vessel, you're storing potential energy. In chemical engineering pilot plants, the choice between hydrostatic and pneumatic testing is a decision about containing that energy. A hydrostatic test is overwhelmingly preferred because water is nearly incompressible, storing a fraction of the energy that air does, making a catastrophic rupture a flooding event rather than an explosion. The test pressure is calculated by taking 1.3 times the design pressure, then correcting for temperature-dependent material strengths and the vessel’s remaining wall thickness after corrosion.
The core reason for preferring hydrostatic over pneumatic testing is safety: the stored energy in compressed liquid is drastically lower, eliminating the risk of violent, shrapnel-producing failures. The test pressure is determined by the formula P_test = 1.3 × P_d × (S_a / S_n) × [ t / (t – c) ], which ensures the vessel can withstand the required margin above its design pressure while accounting for material strength changes and any metal loss from corrosion.
The Physics of Safety: Why Hydrostatic Wins
The Stored Energy Difference
Compressed gases, like air or nitrogen, act as a spring. The energy they store scales with pressure and volume, and during a failure, that energy is released almost instantaneously as a supersonic expansion. A small pilot-scale reactor tested pneumatically can launch fragments at bullet-like speeds. Liquids, on the other hand, change volume very little under pressure, storing orders of magnitude less energy. A hydrostatic test relies on water, which expands only about 0.5% in volume at 1,000 bar, so a failure results in a jet of liquid that quickly dissipates, not a devastating explosion.
The Failure Mode Is a Leak, Not a Detonation
In a pneumatic test, a crack in a weld or a weak gasket can become a massive rupture in milliseconds because the gas, already highly compressed, continues to expand behind the expanding crack front. With hydrostatic testing, the liquid drops the pressure immediately as the crack opens, limiting the damage. The failure mode shifts from a detonation to a slow leak or a manageable pressure drop, drastically reducing the risk to personnel in a confined pilot-plant bay.
Cracking the Code: How Test Pressure Is Calculated
The Foundation – 1.3 Times Design Pressure
Pressure vessel codes, notably ASME Section VIII Division 1 UG-99, set the baseline hydrostatic test pressure at 1.3 × the design pressure (P_d). This multiplier ensures that the vessel is stressed to a level safely above its maximum allowable working pressure, proving it can handle unexpected pressure excursions without leaving the elastic range of the material. The factor 1.3 is a consensus margin, not an arbitrary number; it verifies that the weakest joints and thickest sections can withstand a modest overload.
The Temperature-Stress Adjustment (S_a / S_n)
Materials lose strength as temperature rises. The allowable stress at the test temperature (S_a, usually at ambient conditions) is often higher than the allowable stress at the design temperature (S_n, which could be elevated). By multiplying the test pressure by the ratio (S_a / S_n), you ensure that the membrane stress in the vessel during the cold hydrotest does not exceed the material’s yield strength at room temperature. For example, if a 316L stainless steel reactor is designed for 300°C, its Sn is lower than Sa at 20°C, so the test pressure will be raised proportionally—creating an equivalent stress condition.
The Real-World Wall Factor – [ t / (t – c) ]
Pilot-plant reactors often have a corrosion allowance built into their wall thickness. The vessel may be fabricated thicker than strictly required for the design pressure, with the extra metal (c) intended to corrode away over years. The factor [ t / (t – c) ] adjusts the test pressure so that the remaining thin section is not overstressed. If you hydrotest a veteran vessel that has already lost some wall to corrosion, the formula uses the original thickness (t) and the corrosion allowance (c) to calculate a lower test pressure—protecting the now-thinner metal from yielding. This is critical for safe re-rating or periodic re-testing.
Putting It All Together
PT = 1.3 × P_d × (S_a / S_n) × [ t / (t – c) ]
- P_d: The design pressure stamped on the vessel nameplate.
- S_a / S_n: The allowable tensile stress values from the material specification at test and design temperatures.
- t: The specified wall thickness, excluding any extra manufacturing tolerance.
- c: The total corrosion allowance specified in the design.
Navigating the Trade-offs and Limitations
When Pneumatic Testing Becomes an Unavoidable Choice
Some pilot-plant systems simply cannot be wetted. Catalysts that react violently with water, processes requiring ultra-dry solvents, or vacuum-insulated cryogenic equipment may make hydrostatic testing impossible. In these rare cases, a pneumatic test is used, but only after a formal, rigorous hazard analysis. The test must be performed with inert gas (usually nitrogen), with pressure increased in slow steps (e.g., 10% increments), monitored remotely, and conducted behind blast-proof barricades. Even then, the test pressure is often reduced to 1.1 × design pressure per code guidance, acknowledging the immense risk.
The Hidden Risks of Hydrostatic Testing
While far safer, hydrostatic testing isn’t without downsides. Filling a vessel with water can introduce microbial contamination into process lines, cause crevice corrosion in stagnant areas, or leave behind moisture that is difficult to remove from small-diameter tubing. In pilot plants with sensitive analytical equipment downstream, the cleaning and drying cycle after a hydrotest can be a logistical headache. The weight of water may also require temporary structural supports; a tall packed column filled with water can easily exceed the floor loading capacity of a research laboratory.
Common Pitfalls to Avoid
- Ignoring the stress ratio: Using a 1.3 factor alone when the material at test temperature is much stronger than at the design temperature can dangerously under-test the vessel.
- Forgetting the corrosion factor: On a vessel already in service, failing to reduce test pressure for metal loss can permanently deform the shell.
- Venting issues: Air pockets trapped in a hydrostatic test defeat the energy-suppression advantage. Proper venting is non-negotiable.
Making the Right Choice for Your Pilot Plant
The decision tree for testing a reactor or pressure vessel in a pilot-plant setting comes down to your primary driver.
- If your primary focus is absolute safety and risk mitigation: Hydrostatic testing is non-negotiable. The physics of liquid compressibility makes it the only inherently safe option, and the standard 1.3 × design pressure formula with temperature correction should be your default calculation.
- If your primary focus is regulatory compliance and a clean audit trail: Document your test pressure using the full formula PT = 1.3 × P_d × (S_a / S_n) × [t / (t – c)], recording each value from the vessel’s U-1A form. This demonstrates due diligence under ASME UG-99.
- If liquid testing is not feasible due to process constraints: Begin with a formal management-of-change review. If pneumatic testing is authorized, reduce the pressure multiplier to 1.1, use inert gas, pressure in small increments, and evacuate all personnel behind a rated exclusion zone. Never shortcut this protocol.
In the controlled chaos of a pilot plant, the order you impose through rigorous hydrostatic testing is what lets you push boundaries safely.
Summary Table:
| Feature | Hydrostatic Testing | Pneumatic Testing |
|---|---|---|
| Medium Used | Water / Liquids | Air / Inert Gas |
| Stored Energy | Very low (incompressible) | High (compressible) |
| Failure Mode | Safe leak / pressure drop | Explosive rupture / shrapnel |
| Standard Multiplier | 1.3 × Design Pressure | 1.1 × Design Pressure |
| Safety Risk | Low (Preferred) | Extremely High (Restricted) |
Ensure maximum safety and compliance in your laboratory operations. LABPARK provides high-quality Educational and Vocational Unit Operations Pilot Plants in chemical engineering, bioprocess & biotech, and environmental & water treatment. Built for universities, research institutes, and enterprises, our systems prioritize process safety and hands-on learning. Contact us today to find the ideal pilot plant solution for your institution!
Related Products
- Multi Functional Catalytic Reaction and Reactor Evaluation Educational Unit Operations Pilot Plant
- Residence Time Distribution and Reactor Flow Characteristics Determination Educational Pilot Plant
- Tubular Reactor Flow Characteristics Determination Educational Unit Operations Pilot Plant
- 100L Continuous Loop Hydrogenation Educational Unit Operations Pilot Plant
- Multi-Stage Stirred Tanks in Series Residence Time Distribution and Mixing Performance Determination Educational Pilot Plant
People Also Ask
- What reaction engineering principles are shown in a catalytic reactor pilot plant? SO2 Oxidation Guide
- Why is FTIR integration in catalytic pilot plants important? Real-Time Student Insights
- How to analyze active metal distribution & identify catalyst poisoning in pilot plants? Expert Diagnostic Guide
- How do temperature limits and WHSV influence catalytic reactor optimization? Scale-Up Guide
- What operational insights do catalyst pellet concentration profiles provide? Optimize Reactor Yield