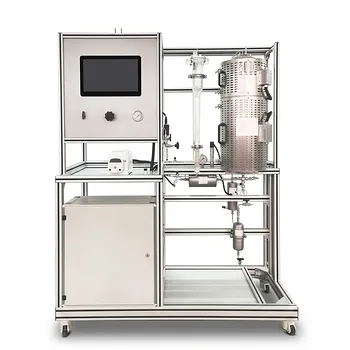
Pressure equalization, system tightness, and integrated environmental monitoring form the non-negotiable design core.
Any educational gas-volume measurement setup must allow students to directly manipulate the pressure reference—via a leveling tube or adjustable column—so they can ensure the trapped gas is at atmospheric pressure before taking a reading. The apparatus must also be built around high-integrity seals, clearly graduated measuring tubes, and an embedded temperature sensor. These features give learners a controlled, transparent window into the Ideal Gas Law and its real-world corrections.
The most effective teaching rigs turn gas law experiments from a black box into a visible, adjustable system. A design that lets students physically equalize pressure, confirm zero leakage, and track temperature transforms abstract equations into tangible cause-and-effect relationships—while baking in safety from the assembly stage.
Mastering Pressure Equalization
The Leveling Tube Principle
A movable leveling tube—connected to the gas burette by flexible tubing—is the cornerstone of pressure control.
By raising or lowering the tube, students bring the liquid meniscus in the burette precisely level with the reference liquid.
This action ensures the gas inside the burette is at the same pressure as the surrounding atmosphere.
Without this physical adjustment, any height difference creates a hydrostatic pressure offset that corrupts the volume reading.
Ensuring Atmospheric Pressure Reference
The setup must allow the liquid in the leveling tube and the burette to be visually aligned at eye level.
This design forces students to account for the variable of external pressure and eliminates the need to assume it.
A clear scale behind both tubes and a low-parallax reading position make the equalization step intuitive.
Every subsequent gas law calculation—from Boyle’s Law to molar mass determination—hinges on this single, repeatable reference point.
Guaranteeing Accurate Volume and Leak-Proof Operation
Leak Prevention as the Foundation
High gas-tightness is the prerequisite for any meaningful measurement.
Leakage cannot be corrected mathematically; it simply produces a permanently wrong volume that wastes class time.
Design must incorporate ground-glass joints, PTFE sleeves, or compression fittings that are easy for students to inspect.
A simple “no-bubble” test—submerging pressurized sections—should be built into the procedure and the apparatus.
Precision in Volume Reading
Clear graduation lines on the measuring tube turn the leak-tight system into a reliable instrument.
The scale must be etched or printed with high contrast against the liquid, with subdivisions that match the experiment’s required precision.
For typical undergraduate labs, 0.1 mL markings on a 50 mL burette give sufficient resolution without overwhelming students.
Combined with a white backing strip to amplify the meniscus, this design minimizes reading errors and lets students focus on the underlying gas law.
Embedding Temperature and Vapor Pressure Corrections
Integrated Temperature Monitoring
An integrated thermometer—placed directly in the gas space or in an adjacent water jacket—is non-negotiable.
The gas temperature must be known precisely, not just the room temperature, because gas volume is linearly proportional to absolute temperature.
Designs that use a surrounding water jacket provide thermal buffering and let students confirm that the gas has reached equilibrium.
When students see the thermometer reading stabilize alongside the volume, they internalise the temperature-volume link in Charles’s Law.
Accounting for Saturated Vapor
Any liquid used in the burette (often water or mercury) contributes a saturated vapor pressure that displaces part of the measured volume.
A well-designed experiment includes a data table or on-board pressure gauge so students can subtract this partial pressure before applying PV=nRT.
Without this correction, calculated molar masses or reaction yields are systematically skewed.
A transparent design—with the vapor pressure correction printed directly on the apparatus or referenced in the manual—teaches the critical skill of isolating the true dry gas variable.
Designing Inherent Safety and Logical Workflow
Fume Hood Integration and Assembly Logic
Educational setups should be inherently tied to a fume hood for reactions releasing flammable or toxic gases.
The physical footprint must fit inside standard hoods, and the assembly sequence should follow a bottom-to-top, left-to-right order.
This design philosophy prevents students from leaning over reactive zones or trapping pressure pockets.
A fixed location for the reaction flask and a clear, labelled flow path turn safety into a muscle memory rather than a checklist.
Hazard-Specific Protections
For experiments involving hydrogen or other explosive gas mixtures, the apparatus must incorporate anti-backdraft features.
Heating must always be stopped before the reducing gas flow is cut off, and the design can include a built-in excess-flow valve or check-valve to prevent air ingress.
Pressure-relief mechanisms—like a lightly sealed safety bell—should be standard when exothermic gas generation is possible.
These safeguards let instructors focus on the gas law concepts, confident that the hardware manages the process hazards.
Understanding the Trade-offs in Educational Designs
Complexity vs. Accessibility
A fully instrumented rig with digital pressure sensors and automated level equalization yields highly precise data but can obscure the physical principles.
A manual leveling tube and simple thermometer, while slightly less precise, force students to think about every correction.
The best educational design finds a middle ground: manual for the conceptual steps, digital only where it saves time without hiding physics.
Cost and Maintenance
High-gas-tightness glassware and precision-bore burettes are more expensive and fragile.
However, using cheap, leak-prone plastic components guarantees wasted lab sessions and teaches poor technique.
Investing in durable, well-graduated glass components pays pedagogical dividends, as long as spares and calibration protocols are readily available.
Single-Purpose vs. Multi-Experiment Versatility
A rigid setup optimised solely for gas-volume measurement delivers the cleanest data.
Yet budget constraints often demand a system that can also demonstrate distillation, absorption, or flow measurement.
Designing modular hardware—where the gas burette and leveling tube can be isolated—preserves teaching integrity without locking the lab into a single experiment.
Making the Right Choice for Your Teaching Goals
Your design priorities should align with what you want students to take away from the experiment.
- If your primary focus is demonstrating the Ideal Gas Law directly: A manual leveling tube system with a clear mercury or water manometer and an embedded thermometer is indispensable. Students must physically equalize pressure to understand that volume is measured at atmospheric pressure.
- If your primary focus is measuring molar mass or reaction stoichiometry: You need a system that makes vapor pressure correction effortless—a water-jacketed burette with an integrated saturation table sticker and a high-accuracy thermometer so the correction becomes a taught step, not a guess.
- If your primary focus is teaching safe laboratory practice in chemical engineering: The rig must be designed around fume hood integration, bottom-to-top assembly, and anti-backdraft hardware. The gas measurement itself becomes the vehicle for instilling a systematic safety mindset.
Build the apparatus so that each correction—pressure, temperature, vapor—is a visible, student-operated step, and you will transform a simple volume measurement into an enduring lesson in thermodynamic reality.
Summary Table:
| Design Principle | Key Feature | Pedagogical Value |
|---|---|---|
| Pressure Equalization | Movable leveling tube & visual reference | Prevents hydrostatic pressure offset errors. |
| Leak Prevention | High-tightness joints & clear 0.1 mL graduations | Eliminates measurement errors; teaches precision. |
| Temp & Vapor Correction | Integrated thermometer & water jacket | Teaches Charles's Law & vapor pressure adjustments. |
| Safety & Workflow | Fume hood integration & anti-backdraft valves | Instills safe operating habits during gas reactions. |
Elevate Your Lab with LABPARK Pilot Plants
Empower your students and researchers with hands-on, high-precision training equipment. LABPARK provides state-of-the-art Educational and Vocational Unit Operations Pilot Plants in chemical engineering, bioprocess & biotech, and environmental & water treatment for universities, research institutes, and enterprises.
Our systems are engineered to ensure strict safety, industrial durability, and clear pedagogical value. Contact LABPARK today to discuss your laboratory requirements and get a tailored solution.
Related Products
- Two Phase Flow Pattern Velocity Resistance Measurement Educational Pilot Plant
- Gas Phase Mixing and Residence Time Distribution Determination Educational Unit Operations Pilot Plant
- Bench Scale Dual Column Gas Separation and Capture Educational Pilot Plant
- Throttling Effect Determination Educational Unit Operations Pilot Plant
- Gas-Solid Heterogeneous Separation Demonstration Educational Unit Operations Pilot Plant
People Also Ask
- How to update chemometric calibration models in pilot plants? Best practices for process engineers.
- Why Correct Sig Figs & Rounding Matter in Educational Pilot Plants: Ensure Data Accuracy
- How does nuclear yield inefficiency translate to chemical engineering education? Optimize kinetics with pilot plants.
- How can educational pilot plants be used to teach process safety and risk assessment in chemical engineering curricula?
- How to identify two-phase gas-liquid flow patterns? Master fluid dynamics with pilot plants