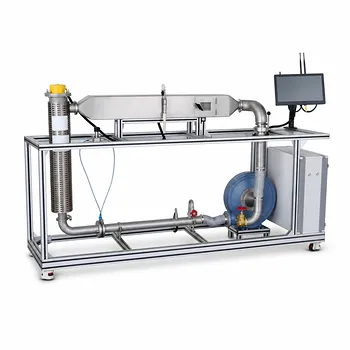
The number of tube passes—and how they are arranged—can reduce the LMTD correction factor to a trivial 1.0 or force you to pull out the empirical charts. In a pilot-scale heat exchanger experiment, if your tube bundle uses an over-and-under configuration with three or more tube passes, the DTM correction factor ($F_t$) is equal to 1.0 and no correction is needed. However, if the pilot unit operates with only one or two passes or employs a side-by-side pass layout, $F_t$ drops below unity, and you must apply a correction factor to accurately represent the driving force for heat transfer.
Core Takeaway: An over-and-under tube-pass layout with three or more passes mimics true counter-current flow, making $F_t = 1$. All other practical pass configurations create mixed flow that degrades the effective temperature difference, requiring an $F_t$ factor obtained from standard correction curves to avoid oversizing or under‑predicting your heat exchanger’s performance.
Why the LMTD Correction Factor Matters in a Pilot Experiment
The log mean temperature difference (LMTD) is calculated assuming pure counter‑current flow, which gives the highest possible driving force for heat transfer. In real multi‑pass exchangers, the flow pattern deviates from this ideal, so the actual mean temperature difference is smaller.
Experiments designed around pilot‑scale units deliberately introduce these deviations. Understanding how the number of tube passes changes $F_t$ teaches you exactly when you can skip the correction and when you must compensate for a weaker temperature gradient.
Pure Counter‑Current Flow Sets the Benchmark
When the two fluid streams flow in opposite directions along the entire heat transfer surface, the LMTD directly represents the effective driving force. In such an ideal case, $F_t = 1$, and the design equation becomes $Q = U_d \cdot A \cdot \text{LMTD}$.
Any departure from that pure counter‑current geometry mixes co‑current or cross‑flow elements, making the exchanger less thermodynamically efficient. The $F_t$ factor quantifies that efficiency loss.
How Tube Pass Number and Arrangement Determine $F_t$
The configuration of the tube bundle—specifically how many times the tube‑side fluid reverses direction and whether those reversals are stacked vertically (over‑and‑under) or placed side‑by‑side—directly controls whether the exchanger behaves like a true counter‑current device.
Over‑and‑Under Passes with 3+ Tubes: Counter‑Current Mimicry
In an over‑and‑under tube‑pass arrangement, the tube‑side fluid snakes back and forth through the bundle in a vertical stack. When you build at least three such passes, the shell‑side fluid can be effectively guided in counter‑flow to this serpentine path.
The result is a near‑perfect counter‑current temperature profile across the entire exchanger. Because the flow no longer contains significant co‑current or cross‑flow steps, the correction factor becomes $F_t = 1.0$. Students and operators can directly use the theoretical LMTD in their heat balance without any adjustment.
Single/Double Passes and Side‑by‑Side Layouts: Inevitable Mixing
A tube bundle with only one or two passes cannot physically maintain a pure counter‑current relationship with the shell‑side fluid. Some portions of the flow inevitably run co‑currently, while others experience cross‑flow.
Similarly, a side‑by‑side pass configuration (where tube returns are arranged horizontally next to each other) introduces strong cross‑flow components. In both cases, the true mean temperature difference is lower than the counter‑current LMTD, so $F_t$ falls below 1.0.
For these configurations you must determine $F_t$ from empirical correction charts (such as Kern’s charts) as a function of the temperature parameters $P$ and $R$, then compute the corrected LMTD: $\Delta T_m = F_t \times \text{LMTD}$.
Understanding the Trade-offs: More Passes Improve $F_t$ but Raise Pressure Drop
While adding tube passes can push $F_t$ toward unity, it also creates a secondary effect that directly impacts your experiment’s operating cost and feasibility.
Increasing the number of tube passes reduces the cross‑sectional flow area per pass, which raises the tube‑side fluid velocity. This higher velocity improves the Reynolds number and can significantly boost the tube‑side heat transfer coefficient ($h_i$).
However, pressure drop is proportional to the square of the velocity and is also multiplied by the number of passes. Doubling the pass count can easily quadruple the tube‑side pressure drop, demanding a far more powerful pump. In a pilot plant, this trade‑off between a perfect $F_t$ and manageable pumping costs is often the central lesson of the experiment.
Common Pitfalls to Avoid
- Assuming all multi‑pass units have $F_t < 1$: Over‑and‑under layouts with three or more passes are a proven exception that yields $F_t = 1.0$. Failing to recognize this leads to an unnecessary (and incorrect) correction.
- Applying $F_t = 1$ to any exchanger with more than two passes: Side‑by‑side arrangements and single‑shell‑pass designs still create mixed flow. Always verify the tube‑pass arrangement, not just the pass count.
- Ignoring the pressure drop penalty: Selecting a high pass count solely to achieve $F_t = 1$ can make the experiment impractical due to excessive pumping energy. The corrected LMTD equation is only part of the full system design.
- Operating with an $F_t$ below 0.8: Even when a correction is needed, most pilot‑scale guides recommend keeping $F_t$ above 0.8 to avoid severe thermal crossover; a very low $F_t$ signals that the chosen configuration struggles to transfer heat effectively at the target temperatures.
Making the Right Choice for Your Pilot‑Scale Experiment
Your choice of tube‑pass configuration should align with the specific learning or performance goal of the experiment.
- If your primary focus is eliminating the $F_t$ correction: Use an over‑and‑under arrangement with three or more tube passes so that $F_t = 1.0$ and the theoretical LMTD can be applied directly.
- If your primary focus is teaching the impact of flow geometry on $F_t$: Configure the pilot unit with one or two passes (or a side‑by‑side layout) and have students determine $F_t$ from empirical charts to see how much the driving force degrades.
- If your primary focus is minimizing pumping costs and system complexity: Stick with 1–2 tube passes, accept that $F_t < 1$, and use the corrected LMTD in your heat balance. The lower tube‑side velocity will keep pressure drop manageable.
- If your primary focus is maximizing the tube‑side heat transfer coefficient: Increase the number of passes to raise tube‑side velocity, but treat the associated pressure drop as a deliberate experimental variable rather than an undesirable side effect.
The number of tube passes shapes not just your correction factor, but the entire operational envelope of your pilot plant—choose it deliberately to match the purpose of your experiment.
Summary Table:
| Pass Configuration | Number of Passes | Ft Factor | Pressure Drop | Flow Characteristics |
|---|---|---|---|---|
| Over-and-Under | 3 or more | $F_t = 1.0$ | High | Mimics true counter-current flow |
| Single / Double | 1 or 2 | $F_t < 1.0$ | Low to Medium | Mixed (co-current / cross-flow) |
| Side-by-Side | Any | $F_t < 1.0$ | Variable | Strong cross-flow elements |
Optimize Your Unit Operations Lab with LABPARK
Configuring pilot-scale heat exchangers requires balancing thermodynamic efficiency with physical constraints. LABPARK provides state-of-the-art Educational and Vocational Unit Operations Pilot Plants in chemical engineering, bioprocess & biotech, and environmental & water treatment for universities, research institutes, and enterprises.
Whether you need to demonstrate complex heat transfer principles or conduct advanced research, our pilot plants are engineered to deliver precise control, realistic experimental data, and robust durability.
Ready to upgrade your laboratory setup? Contact us today to discuss your custom pilot plant requirements with our specialists!
Related Products
- Shell and Tube Heat Exchanger Heat Transfer Coefficient Determination Educational Pilot Plant
- Three-Tube Heat Transfer Educational Pilot Plant for Unit Operations Training
- Comprehensive Multi-Modal Heat Transfer Unit Operations Pilot Plant for Engineering Training
- Dual Mode Heat Transfer Pilot Plant for Unit Operations Training
- Comprehensive Heat Transfer Coefficient Determination Educational Unit Operations Pilot Plant
People Also Ask
- Why Apply LMTD Correction in Shell-and-Tube Pilot Plants & How to Determine It
- How is the fouling factor (Rd) evaluated? Key Pilot Plant Insights for Students
- How is fouling factor demonstrated using shell and tube pilot plants? Practical Lab Guide
- Why is simulating and calculating fouling factors crucial when operating educational heat exchanger pilot plants?
- Why Estimate Tube Wall Temp in Heat Exchangers? Master Pilot Plant Thermal Resistance