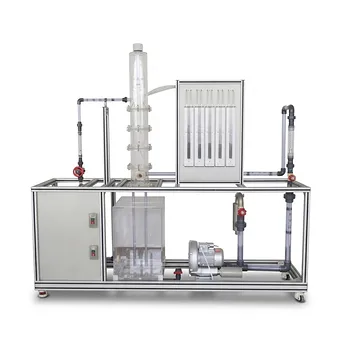
The recommended methodology for verifying the logarithmic velocity distribution in an open-channel demonstration unit centers on taking precise point‑velocity readings with a vertically traversing probe, then comparing the measured profile to the Prandtl logarithmic law. This involves selecting the right sensor, measuring at specifically defined depths to capture the mean vertical velocity, and plotting a smooth velocity profile that reveals the filament of maximum velocity. When executed correctly, the experiment clearly demonstrates the boundary‑layer growth and shear‑stress characteristics that underpin uniform open‑channel flow theory.
The core principle is a standardized point‑gauging procedure: mount a Pitot‑static tube or miniature current meter on a vertical traversing mechanism, record velocities at several depths (most critically at 0.6D or the arithmetic mean of 0.2D and 0.8D of the flow depth D), and then compare the resulting profile against the logarithmic velocity distribution law to confirm its validity in a laboratory flume.
Why the Logarithmic Law Matters in a Demonstration Unit
Open‑channel flow demonstrations are designed to make abstract hydraulic principles tangible. The logarithmic velocity distribution is not just a theoretical curve—it emerges from the balance of turbulent shear and wall friction.
The Physical Story Behind the Profile
Near the channel bed, intense friction forces the velocity to zero (the no‑slip condition). As you move upward, turbulence transports momentum more efficiently, causing the velocity to increase rapidly and then gradually flatten out near the free surface. This shape follows a logarithmic law—velocity is proportional to the natural log of the distance from the wall—and it directly reveals the size of the turbulent boundary layer.
Why Verification Is Essential
Plotting the measured points against the Prandtl equation lets students see whether the flow is truly “uniform” and fully developed. Any significant deviation signals a problem: the flume slope might be incorrect, the flow depth too shallow, or the measurement technique flawed. Verification therefore functions as both a theoretical check and a hands‑on lesson in experimental error.
The Recommended Measurement Setup and Procedure
Choosing the Right Velocity Sensor
The reference describes two workable options:
- Pitot‑static tube: accurate and simple, but it must be carefully aligned with the flow and free of air bubbles. It is the classic choice for educational flumes.
- Miniature current velocity probe (e.g., propeller meter): easier to use at multiple points without manometer adjustments, but it has a larger sensing volume and can slightly disturb the flow.
Both are mounted on a vertical traversing mechanism with a readable scale, allowing precise positioning at known depths below the water surface.
Defining the Measurement Grid
You are not trying to measure every millimeter. Instead, you capture the profile efficiently by focusing on a few statistically meaningful depths.
- Primary depth for mean velocity: take a single reading at 0.6 times the total depth (D) measured from the free surface. In many uniform flows, this approximates the depth‑averaged velocity.
- Two‑point method: alternately, measure at 0.2D and 0.8D and average them. This better accounts for the vertical velocity gradient and is often more robust when the profile is not perfectly logarithmic.
- Full profile mapping: to fully verify the logarithmic law, take at least 5–8 readings from near the bed to just below the surface (e.g., 0.1D, 0.2D, 0.4D, 0.6D, 0.8D, 0.9D). The near‑bed region is critical for capturing the rapid rise.
Step‑by‑Step Procedural Guide
- Establish a stable, uniform flow. The flume should run long enough for the flow depth and surface slope to be steady.
- Zero the traversing mechanism at the channel bed and record the total depth D.
- For each depth increment, wait for the velocity reading to stabilize (10‑30 s), then record the average value.
- Plot velocity (u) against height (y) from the bed. Convert depths to distance-from‑bed coordinates: y = D − measured depth.
- Fit the logarithmic law: express y as the logarithmic term ln(y/ys) where ys is a small roughness length parameter; find the best‑fit line on a semi‑log plot.
- Locate the filament of maximum velocity—the point where the velocity starts to decline very near the surface due to air‑water interaction or secondary currents.
Verifying the Logarithmic Law
Comparing Experimental Data with Prandtl’s Equation
The Prandtl logarithmic velocity distribution for a rough bed is often written as:
u(y) = (u / κ) * ln(y / y₀)*
where u* is the shear velocity, κ ≈ 0.4 is the von Kármán constant, and y₀ is the Nikuradse equivalent sand roughness.
From your measurements, calculate u* using the flume slope and hydraulic radius (u* = √(g R S₀)), then plot u vs. ln(y). A straight line with slope u*/κ confirms logarithmic behavior. If the line bends near the bed, the flow is in the viscous sublayer; if it bends near the surface, the wake effect or secondary currents might be significant.
Locating the Filament of Mean Velocity
The reference mentions this filament specifically. It is the depth where the measured velocity equals the cross‑sectional average. In a vertical profile, it typically lies around 0.4D for a rough turbulent flow. Finding it experimentally (by averaging the 0.2D and 0.8D values or interpolating) gives students a powerful check against the 0.6D rule of thumb.
Understanding the Trade‑offs and Common Pitfalls
Accuracy Limitations of Point Measurements
- Pitot tube drift: tiny changes in alignment with the streamlines can produce errors, especially in flow with a non‑horizontal mean direction.
- Probe blockage and interference: a miniature current probe has a finite size; measuring very close to the bed (< 0.1D) often yields readings that are distorted by the probe’s own wake.
- Time averaging: turbulence causes fluctuations. Too short an averaging window gives a noisy mean; too long can waste lab time if the flow isn’t perfectly steady.
When the Logarithmic Law Breaks Down
- Developing flow: if the boundary layer hasn’t reached the surface, the log layer does not extend to the full depth.
- Highly supercritical or transient flows: the log law assumption of local equilibrium between turbulence production and dissipation may fail.
- Channel aspect ratio effects: in very narrow flumes, side‑wall friction can contaminate the center‑line profile, making it appear non‑logarithmic even when the flow is uniform.
Balancing these limitations is part of the demonstration’s educational value. The verification is not about a perfect mathematical match; it’s about recognizing when and why discrepancies occur.
Making the Right Choice for Your Goal
The same basic methodology adapts to different instructional or research priorities.
- If your primary focus is a clear classroom demonstration: Use the simple Pitot‑static tube and the 0.6D rule. Emphasize the visual plot and the concept of the filament of maximum velocity. This keeps the procedure fast and intuitive.
- If your primary focus is a rigorous lab experiment or research: Deploy a miniature current probe with a high‑resolution traversing system, take at least 8 points per vertical, and compute the shear velocity independently from the energy gradient. Then perform a least‑squares fit to the logarithmic law and quantify the uncertainty.
- If your primary focus is teaching experimental error and data analysis: Deliberately drive the flume off‑design (e.g., steep slope, shallow depth) and have students diagnose why the log law no longer holds, exploring concepts like the law of the wall, wake region, and boundary‑layer development.
A demonstrably sound methodology transforms an open‑channel flume into a powerful tool for revealing how turbulence organizes itself near a solid boundary.
Summary Table:
| Method | Measurement Depths | Best Application |
|---|---|---|
| Single-Point | 0.6D from surface | Quick estimation of mean velocity |
| Two-Point | 0.2D and 0.8D (averaged) | Robust mean velocity calculation |
| Full Profile | 5–8 points (0.1D to 0.9D) | Complete logarithmic law verification |
Elevate Your Engineering Lab with LABPARK
Are you looking to equip your laboratory with precision fluid mechanics and process engineering systems? LABPARK provides high-quality Educational and Vocational Unit Operations Pilot Plants in chemical engineering, bioprocess & biotech, and environmental & water treatment.
Tailored for universities, research institutes, and enterprises, our solutions ensure hands-on, reliable, and accurate experimental learning.
Contact us today to discover how we can support your academic and research goals!
Related Products
- Bernoulli Equation Demonstration Unit Operations Pilot Plant
- Orifice and Venturi Flowmeter Calibration Educational Pilot Plant for Fluid Mechanics Laboratory
- Fluid Reynolds Number Demonstration Educational Unit Operations Pilot Plant
- Comprehensive Fluid Mechanics Educational Unit Operations Pilot Plant
- Fluid Friction Resistance Determination Educational Unit Operations Pilot Plant
People Also Ask
- How does nozzle geometry affect energy efficiency and jet performance in fluid mechanics laboratory demonstration units?
- How is the Bernoulli equation applied in fluid mechanics training plants? Visualize energy conservation rules.
- How to demonstrate rapid vs slow valve closure? Clear water hammer transient experiments for engineering labs.
- How does friction factor differ in laminar vs turbulent flow? Lab Experiment Guide
- How do pilot plants teach U-tube manometers? Master Differential Pressure Calculations