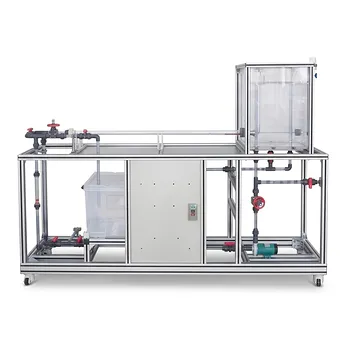
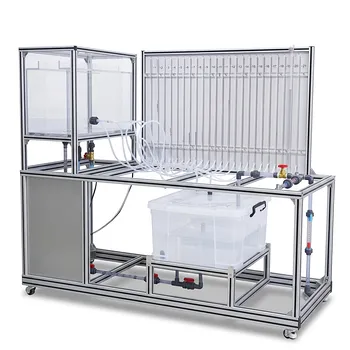
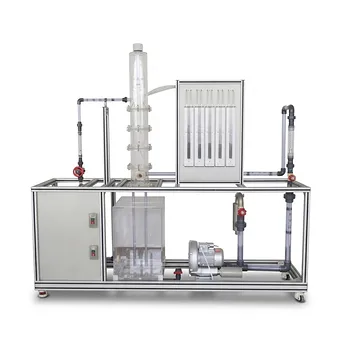
Are you trying to move beyond textbook diagrams and physically demonstrate how a V-notch weir transitions from free flow to submerged operation? In an academic fluid mechanics laboratory, a flume or flow channel equipped with a sharp-crested V-notch weir lets students directly manipulate downstream water levels, measure the resulting changes in both upstream and downstream heads, and observe the distinct nappe forms. By comparing measured discharge values with the theoretical free-flow equation and the empirical Villemonte correction, the apparatus transforms abstract hydraulic principles into a quantifiable, visual experiment.
The core insight is that the laboratory flume becomes a living calculator: it reveals that while free-flow discharge depends only on the upstream head, submerged flow forces you to account for the tailwater’s backwater effect through a submergence ratio S. This hands-on comparison not only validates the correction formula but also makes the dramatic reduction in effective head loss physically visible.
Setting Up the Demonstration in a Laboratory Flume
A standard teaching flume provides the controlled environment needed to isolate the variables governing weir hydraulics. The V-notch weir plate is installed across the channel, and a downstream gate or adjustable weir allows the operator to set any desired tailwater level.
Essential Instrumentation and Measurements
You will rely on point gauges or manometers to measure two critical heads: H₁, the upstream head above the notch apex, and H₂, the downstream head above the same apex.
A volumetric tank or an in-line flowmeter gives you the actual volumetric flow rate Q. These instruments let you record Q, H₁, and H₂ simultaneously for each test run.
Creating Free-Flow Conditions
Start by lowering the downstream gate completely. The water issuing from the V-notch will spring clear and form a fully aerated, free-falling nappe.
Under these conditions, the tailwater sits well below the notch crest, and the discharge becomes a function of only the upstream head and the weir geometry. This is your baseline.
Inducing Submergence and Observing Nappe Transition
Now raise the downstream gate incrementally. As the tailwater climbs above the weir crest, the weir becomes submerged, and you will observe a clear visual evolution.
At a low submergence ratio (S = H₂/H₁), the nappe still oscillates but starts to plunge slightly into the tailwater—this is the plunging nappe. At a higher submergence ratio, the downstream water physically supports the nappe from below, creating a surface nappe that glides along the free surface. This visual cue immediately tells students that the discharge mechanism has fundamentally changed.
From Observation to Calculation: Quantifying the Difference
The lab’s true power is in transforming these visual transitions into numerical comparisons. You can now use the measured data to test two distinct theoretical models.
The Free-Flow Equation as a Baseline
For the free-flow runs, you first compute the theoretical discharge using the standard V-notch formula:
Q₁ = C_d × (8/15) × √(2g) × tan(θ/2) × H₁^(5/2)
Here C_d is the discharge coefficient (typically close to 0.58–0.62 for a sharp-crested weir), g is gravitational acceleration, and θ is the total notch angle. The exponent 5/2 is the weir exponent n for a triangular notch. Compare this calculated Q₁ with your measured free-flow discharge to establish the weir’s baseline accuracy.
Applying the Villemonte Correction for Submerged Flow
When the weir is submerged, the free-flow equation overpredicts the discharge. The laboratory’s key demonstration is to apply the Villemonte equation to the measured Q₁, H₁, and H₂:
Q_net = Q₁ × (1 - Sⁿ)^(0.385)
Where S is the submergence ratio H₂/H₁, and n is the weir exponent (5/2 for a V-notch). By entering your measured H₁ and H₂ into this formula, you can calculate the corrected net flow and directly compare it with the volumetric discharge you are measuring.
Understanding the Submergence Ratio (S) and Exponent
The ratio S encapsulates the entire backwater effect. As S approaches 1 (tailwater nearly matching the upstream head), the term (1 - Sⁿ)^(0.385) collapses toward zero, correctly modeling the dramatic discharge reduction.
The lab lets you demonstrate that the correction is not linear—a small submergence ratio causes a relatively minor reduction, but once S exceeds about 0.7–0.8, the flow becomes exquisitely sensitive to tailwater fluctuations. This directly shows why accurate downstream head measurement is critical in submerged weir applications.
Understanding the Trade-offs and Limitations
No demonstration is without its constraints. Recognizing these limitations is essential for developing rigorous experimental habits.
The Villemonte equation is empirical, derived from a broad set of experimental data, and assumes a sharp-crested weir with a fully ventilated free-flow nappe. If your weir plate is dull, nappe aeration is poor, or the approach channel is too short, the baseline Q₁ will be unreliable, corrupting the submerged comparison.
Accurate head measurement right at the weir becomes increasingly difficult under surface nappe conditions, where the water surface near the weir plate can be wavy and ill-defined. Finally, the experiment works best for submergence ratios up to about 0.95; near the point of complete submergence, measurement uncertainty explodes and the empirical correction becomes less precise. Acknowledging this teaches students about the practical limits of hydraulic formulas.
Making the Right Choice for Your Demonstration Goals
Your experimental focus will determine which aspect of the lab to emphasize.
- If your primary focus is teaching the fundamental principle of a weir as a control section: Let students spend most of their time on free-flow trials, meticulously verifying the H^(5/2) relationship and the constancy of C_d across a range of heads.
- If your primary focus is dynamic hydraulics and backwater effects: Design a stepwise procedure where students raise the tailwater in small increments, sketch the nappe transition from plunging to surface forms, and plot the measured discharge reduction against the submergence ratio.
- If your primary focus is validating empirical correction methods: Have students compute Q_net from the Villemonte equation and plot it against the measured submerged flow, calculating the percentage error. This directly confronts them with the accuracy and limits of the formula.
By transforming the weir from a fixed formula into a responsive physical system, the laboratory flume equips students not just with equations, but with an intuitive, visual understanding of how a rising tailwater steals away a weir’s discharge capacity.
Summary Table:
| Feature | Free-Flow V-Notch Weir | Submerged V-Notch Weir |
|---|---|---|
| Tailwater Level ($H_2$) | Below the notch crest ($H_2 \approx 0$) | Above the notch crest ($H_2 > 0$) |
| Nappe Form | Fully aerated, free-falling | Plunging or surface nappe |
| Flow Determinants | Upstream head ($H_1$) only | Upstream ($H_1$) and downstream ($H_2$) heads |
| Discharge Equation | Standard V-Notch Formula | Villemonte Correction Equation |
Upgrade Your Fluid Mechanics Labs with LABPARK
Looking to bring textbook hydraulic principles to life? LABPARK provides high-quality Educational and Vocational Unit Operations Pilot Plants in chemical engineering, bioprocess & biotech, and environmental & water treatment. Tailored for universities, research institutes, and enterprises, our laboratory flumes and flow channels make demonstrating complex weir flow characteristics and discharge calculations simple and precise.
Ready to enhance your teaching and research capabilities? Contact LABPARK today to explore our customizable pilot plant solutions!
Related Products
- Fluid Reynolds Number Demonstration Educational Unit Operations Pilot Plant
- Orifice and Venturi Flowmeter Calibration Educational Pilot Plant for Fluid Mechanics Laboratory
- Bernoulli Equation Demonstration Unit Operations Pilot Plant
- Fluid Friction Resistance Determination Educational Unit Operations Pilot Plant
- Centrifugal Pump Performance and Orifice Flowmeter Calibration Educational Pilot Plant
People Also Ask
- Why is matching Reynolds & Froude numbers impossible in flumes? Solving the scaling conflict.
- How is dye displacement used to monitor carcinogens in water treatment pilot plants?
- What is the role of mock-ups or cold flow models in chemical engineering process scale-up and pilot plant design?
- What is the physical significance of the vena contracta? Master Fluid Flow Calibration
- How to Integrate FIIA in Bioprocess Pilot Plants? Real-Time Antibody Monitoring