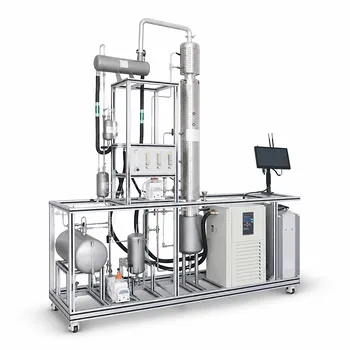
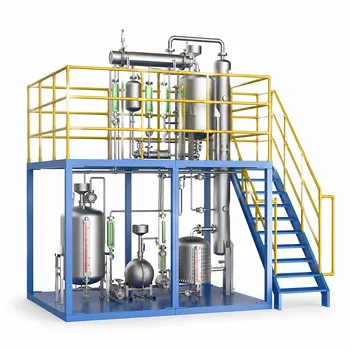
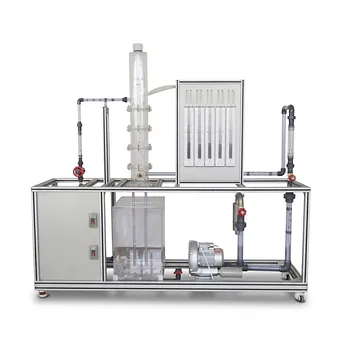
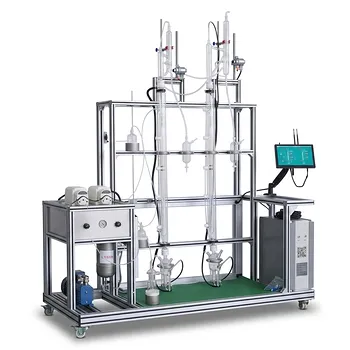
Choosing the right hole diameter and pitch for a sieve tray in an educational pilot column is both a precise engineering decision and a pedagogical one. The key considerations revolve around preventing clogging, creating a clear window to observe weeping and flooding, and maintaining a hole area ratio that produces repeatable, teachable hydraulic behavior. For clean, non-fouling mixtures typical in teaching labs, a 5 mm hole diameter combined with a pitch 2.5 to 4 times that diameter (arranged in an equilateral triangular pattern) is the standard starting point that balances demonstration quality with operational simplicity.
In educational distillation columns, hole diameter and pitch aren’t just mechanical details—they are the variables that bring tray hydraulics to life. A 5 mm hole with a pitch of roughly 3 to 4 times its diameter gives students a unmistakable view of weeping, flooding, and efficiency transitions, while the simple triangular layout lets them directly compute hole area ratios and connect geometry to column performance.
Why Hole Diameter Is Your First Critical Decision
The diameter of each perforation sets the lower and upper operating limits of the tray. It determines how easily the tray weeps at low vapor rates and when it begins to flood. For a teaching column, this must be chosen so that these phenomena occur safely inside the column’s normal operating range.
Selecting the Right Size for Clean vs. Fouling Systems
Sieve tray holes typically range from 2.5 mm to 19 mm. In pilot-scale columns handling non-fouling, clean fluids—the overwhelming majority of educational setups—a 5 mm hole is the most common and practical choice.
If you ever run mixtures with suspended solids or polymerization tendencies, you would step up to larger holes to prevent clogging. In the student lab, however, 5 mm strikes the ideal balance: it’s small enough to generate a meaningful pressure drop and distinct weeping point, yet large enough to be easily fabricated and inspected.
Tuning the Weeping and Flooding Window
A larger hole diameter (above 5 mm) delays weeping because the liquid must overcome a higher surface-tension barrier to drain through the larger opening. For education, this can be a double-edged sword.
Larger holes make weeping harder to demonstrate at low vapor rates, which can hide a fundamental hydraulic limit. On the other hand, smaller holes (closer to 2.5 mm) weep more easily at low vapor loads, giving students a dramatic, early demonstration of liquid leaking from the tray—often a desired teachable moment.
The commonly chosen 5 mm diameter ensures weeping occurs at roughly 50–60% of the design vapor load, making it observable without dominating the experiment.
The Often-Overlooked Punch Direction
If the tray is fabricated by punching rather than drilling, the orientation of the punch matters.
Punching leaves a rough burr on the exit side. To prevent that burr from disturbing the vapor flow and adding unwanted pressure drop, the tray must be installed so the punch direction faces upward—meaning the smooth side is on the bottom (vapor entry side).
For a reliable, repeatable educational demonstration, this small detail keeps pressure drop measurements consistent and lets students focus on hydraulic theory rather than unexplained variability.
How Hole Pitch Determines the Tray’s Hydraulic Signature
The center-to-center distance between holes—the hole pitch—dictates how many holes fit in the active area and therefore the total open area for vapor to pass through. Get the pitch wrong, and the tray will either flood instantly or weep excessively, confusing the very principles you aim to teach.
The Relationship Between Pitch and Hole Area
Pitch (( l_p )) must never be less than 2 times the hole diameter (( d_h ) ), otherwise the tray deck becomes structurally weak and holes merge.
A typical working range is ( l_p = 2.5 ) to ( 4.0 , d_h ). Within this span, you control the hole area ratio (( A_h/A_p ) ), the fraction of the active bubbling area that is open holes.
For an equilateral triangular arrangement, this ratio is given by the formula:
[
\frac{A_h}{A_p} = 0.9\left(\frac{d_h}{l_p}\right)^2
]
This single number is the master switch for tray hydraulics: it sets the vapor velocity through the holes and thus the weeping point, entrainment, and tray pressure drop.
Achieving an Educational “Sweet Spot” with Triangular Pitch
A triangular pitch (60° pattern) is universally recommended because it packs the most holes into a given area while maintaining uniform spacing.
Using the formula, a 5 mm hole with a pitch of 3.8 times the diameter (19 mm)—often cited as the practical optimum—produces a hole area ratio of about 6.2%, which lands squarely in the 5–15% band used in industry and yields a stable, easily characterized tray.
With this ratio, students can clearly see the transition from bubbling to weeping, measure a moderate pressure drop, and later calculate tray efficiency without being derailed by extreme hydraulics.
What Happens When Pitch Is Too Tight or Too Loose
- Pitch too small (high hole area ratio): The vapor velocity drops, causing early and severe weeping. The tray may never reach its proper froth regime, and the lesson on flooding gets replaced by a single, persistent weep.
- Pitch too large (low hole area ratio): The vapor jets reach dangerously high velocities. This can cause massive entrainment, premature jet flooding, and a pressure drop so large it masks the subtle efficiency drop from weeping. Students would then struggle to disentangle the two effects.
By staying within the 2.5–4.0 ( d_h ) range, you ensure the tray operates in a region where weeping and flooding boundaries are distinct and teachable.
Understanding the Trade‑offs in an Academic Setting
Every design choice in an educational pilot plant involves a trade‑off between demonstration clarity, operational robustness, and maintenance ease.
- Weeping visibility vs. operational stability: Smaller holes (e.g., 2.5 mm) make weeping onset dramatic and easy to observe, but they also make the tray less forgiving of small flow variations, potentially derailing a class session. The 5 mm standard provides a buffer while still showing the phenomenon.
- Pressure drop measurement sensitivity: A low hole area ratio (wide pitch) amplifies pressure drop, making measurements more pronounced for student data acquisition. However, it may push the flooding point lower and reduce the turndown ratio, limiting the range over which experiments can be run.
- Fabrication complexity: While interchangeable trays with different hole geometries are educationally powerful, they require careful alignment and sealing of tray decks. An overly aggressive pitch change between trays can lead to mechanical leaks that nullify comparative results. It’s better to vary pitch in deliberate steps (e.g., 3.8, 3.0, and 2.5 ( d_h )) and keep the tray deck design identical.
- Clogging in student‑run experiments: Even “clean” systems can introduce surprises. If a student inadvertently allows solids into the column, a 5 mm hole will tolerate it far better than a 2.5 mm one, reducing unplanned downtime while still teaching the lesson on fouling sensitivity.
Making Informed Choices for Your Educational Pilot Plant
Once you understand the fundamentals, the final selection should be linked directly to your teaching objectives. Use the recommendations below to match tray geometry with learning outcomes.
- If your primary focus is demonstrating weeping and flooding as vivid, distinct phenomena: start with a set of three trays—5 mm holes, triangular pitch, with hole area ratios of about 6% (pitch 3.8 ( d_h )), 9% (pitch 3.15 ( d_h )), and 14% (pitch 2.5 ( d_h )). Students can systematically see how increased open area shifts the weeping limit.
- If your primary focus is stable operation and reproducible mass transfer experiments (e.g., efficiency calculations): choose a single tray configuration of 5 mm holes and a pitch of 19 mm (3.8 ( d_h )). This provides a calm, predictable bubbling regime and pressure drop that won’t overwhelm student data loggers.
- If your primary focus is comparing different tray types or modeling industrial conditions: combine the standard 5 mm tray with a second tray that has larger holes (8 mm) and an adjusted pitch to keep the same hole area ratio. This isolates the effect of hole diameter alone and teaches scale‑up principles.
- If your primary focus is keeping maintenance minimal while still teaching basic hydraulics: stick with the 5 mm, 19 mm pitch tray and install it with the smooth punch side facing downward. The straightforward configuration reduces error sources and lets you focus on the fundamental pressure-flow curves.
In every case, remember that these tray dimensions transform an abstract textbook concept into a live, observable event. The right hole diameter and pitch don’t just make the column work—they make the science visible.
Summary Table:
| Parameter | Recommended Value / Range | Key Impact on Hydraulics & Learning |
|---|---|---|
| Hole Diameter ($d_h$) | 5 mm (standard) | Balances weeping visibility (onset at 50-60% load) with easy cleaning and fabrication. |
| Hole Pitch ($l_p$) | 2.5 to 4.0 $\times$ $d_h$ | Determines active bubbling area; spacing below 2 $\times$ $d_h$ structurally weakens the tray. |
| Hole Area Ratio ($A_h/A_p$) | 5% to 15% (~6.2% is optimal) | Sets vapor velocity. High ratios cause early weeping; low ratios cause high pressure drop & jet flooding. |
| Punch Direction | Upward (smooth side down) | Minimizes vapor flow disturbance and keeps experimental pressure drop measurements consistent. |
Bring Chemical Engineering Principles to Life with LABPARK
Configuring the perfect educational distillation column requires balancing precise engineering with hands-on learning. LABPARK provides state-of-the-art Educational and Vocational Unit Operations Pilot Plants in chemical engineering, bioprocess & biotech, and environmental & water treatment.
We help universities, research institutes, and enterprises design pilot plants that offer clear visual insights into hydraulic behaviors like weeping and flooding, combined with robust, industry-grade reliability.
Ready to elevate your engineering lab? Contact LABPARK today to discuss your custom pilot plant requirements!
Related Products
- Continuous Sieve-Plate Distillation Pilot Plant for Unit Operations Laboratory Education
- Dual-Mode Rectification Pilot Plant for Practical Training Unit Operations
- Plate Column Hydrodynamics Tray Demonstration Educational Pilot Plant
- Multi-Functional Special Distillation Educational Pilot Plant
- Continuous Batch Extractive Distillation Educational Pilot Plant
People Also Ask
- How do distillation pilot plants validate VLE data? Achieve reliable solvent separation scale-up.
- Why is condensate subcooling critical in pilot plants? Expert Design & Control Guide
- Why is the column performance diagram critical? Optimize distillation pilot plant safety & efficiency.
- How does thermodynamic model selection affect pressure-sensitive azeotropic distillation pilot plants? Design with validated VLE
- What are the primary reflux ratio control strategies? Master Distillation Unit Operations