Mastering friction factor measurement transforms textbook theory into tangible engineering skill. Chemical engineering students can experimentally determine the friction factor ( f ) and head loss ( h_L ) in a unit operations pilot plant by measuring the pressure drop across a horizontal, straight test pipe at known flow rates, then applying the Darcy–Weisbach equation. Paired with flow measurement (venturi, orifice, or rotameter) and fluid property data, this direct approach provides experimental ( f ) values that can be plotted against the Reynolds number to validate the Moody diagram and empirical correlations like Colebrook–White.
The core technique is straightforward: measure steady-state pressure drop (( \Delta P )) and volumetric flow rate (( Q )) on a horizontal test section, compute the head loss ( h_f = \Delta P/(\rho g) ), then solve the Darcy–Weisbach equation ( h_f = f,\dfrac{L}{D},\dfrac{v^2}{2g} ) for ( f ). By varying flow rate, students map the entire Moody chart and see how the friction factor transitions from laminar (( f = 64/Re )) to turbulent, roughness-dependent behavior. This hands-on verification bypasses trial‑and‑error iterations and builds deep intuition for industrial piping design.
Step‑by‑Step Experimental Execution
Setting Up the Test Section
Select a horizontal straight pipe of known internal diameter ( D ) and length ( L ). The length between the pressure taps must be long enough to guarantee fully developed flow—typically ( L/D > 20 ) to eliminate entrance effects. Choose a pipe material with a documented absolute roughness ( \varepsilon ) (e.g., drawn tubing, commercial steel) so experimental results can be directly compared with the Colebrook–White or Chen equations.
Measuring Pressure Drop
Install pressure taps at two points along the test section and connect them to a liquid-column manometer or a differential pressure transmitter. For laminar flow, where pressure drops are small, an inclined manometer or a high‑precision electronic transducer is essential. Ensure the system reaches steady state before recording ( \Delta P ). Because the test pipe is horizontal, the mechanical energy loss converts directly to ( h_f = \dfrac{P_1 - P_2}{\rho g} ), with no elevation change to correct for.
Determining Flow Rate and Fluid Velocity
Measure the volumetric flow rate ( Q ) using a venturi meter, orifice plate, or rotameter. If the pilot plant is equipped with a positive‑displacement meter or a magnetic flowmeter, those can also be used—just verify calibration. Fluid velocity is then ( v = \dfrac{4Q}{\pi D^2} ). Record the fluid temperature so you can look up density ( \rho ) and dynamic viscosity ( \mu ) from reliable tables; these are critical for the Reynolds number calculation.
Covering All Flow Regimes
Adjust a control valve downstream of the test section to vary the flow rate from very low (laminar) to very high (fully turbulent). Collect at least 8‑12 data points that span ( Re ) from below 2000 to above 10 000. This lets you observe the laminar line (( f = 64/Re )), the unstable transition region, and the gradual approach to the fully rough zone where ( f ) depends only on relative roughness ( \varepsilon/D ).
Transforming Raw Data into Friction Factor
Reynolds Number Calculation
For each flow rate, compute the Reynolds number:
( Re = \dfrac{\rho v D}{\mu} ).
Classify the regime: laminar (( Re \le 2000 )), transition (( 2000 < Re < 4000 )), or turbulent (( Re \ge 4000 )). In the fully turbulent zone, the friction factor becomes independent of ( Re ), confirming that the Moody chart’s right‑hand plateau has been reached.
Computing Head Loss and ( f ) from Darcy–Weisbach
Because the test section is horizontal, the head loss equals the pressure drop expressed as a fluid column:
( h_f = \dfrac{\Delta P}{\rho g} ).
Insert this into the Darcy–Weisbach equation and solve for the Darcy friction factor ( f ):
( f = \dfrac{2 D g , h_f}{L , v^{2}} ).
Plotting Experimental Points on the Moody Diagram
On a log‑log graph, plot the experimental ( f ) versus ( Re ). Overlay the theoretical Moody chart curves for the known relative roughness. Students can immediately see:
- In the laminar region, data should follow ( f = 64/Re ) and be independent of roughness.
- In the turbulent region, data gradually departs from the smooth‑pipe line, illustrating how roughness begins to influence ( f ).
- In the fully rough region, the curve flattens, showing that ( f ) no longer depends on ( Re ).
This visual validation replaces iterative solving (guess ( f ), compute ( v ), update ( Re )) and highlights why the Colebrook–White equation requires trial‑and‑error when direct measurement isn’t available.
Understanding the Trade‑offs
Ensuring Fully Developed Flow
If the pressure taps are too close to the pipe entrance or to a disturbance (elbow, valve), the velocity profile is not fully developed, and the measured pressure drop will overestimate the true friction loss. Use a straight entrance length of at least ( 10D )—and preferably ( 30D )—in laminar flow to avoid erroneous data.
Instrumentation Accuracy and Calibration
Manometers must be free of air bubbles; differential transmitters need zero‑point checks. Small errors in ( \Delta P ) magnify in ( f ) because velocity appears squared. A rotameter or orifice plate must be calibrated for the actual fluid, or the discharge coefficient must be known. Even a 2 °C temperature error shifts density and viscosity enough to misplace points on the Moody chart.
Laminar Flow Sensitivity
Laminar pressure drops are often less than a few centimetres of water column. Without a sensitive inclined manometer or a high‑resolution transducer, the data scatter can be so large that students cannot reliably confirm ( f = 64/Re ). If the pilot plant cannot maintain stable low flow, consider using a high‑viscosity fluid to raise the pressure drop into a measurable range.
Pipe Roughness Knowledge
The experimental ( f ) in the turbulent region can be used to back‑calculate the relative roughness ( \varepsilon/D ) by solving the Colebrook equation implicitly. However, if the pipe’s roughness is unknown, it becomes a fitting parameter, and the educational link to physical surface texture is weakened. Always document the pipe material and, if possible, measure or look up its absolute roughness.
Applying the Complete Energy Picture
Beyond the Straight Pipe: Minor Losses and System Head
The same pilot plant can measure total system head loss including elbows, tees, and valves. By placing pressure taps across individual fittings, students can compute the minor loss coefficient ( K ) via ( h_m = K \dfrac{v^2}{2g} ). This connects the Darcy friction factor to real‑world system curves that include both distributed and local losses.
Validating the Energy Equation
With a pump and a vertical section, the mechanical energy balance becomes
( H_1 = H_2 + h_f + h_m ), and the pump head ( h_{pump} = H_2 – H_1 + \sum h_L ).
By measuring suction and discharge pressures, flow rate, and elevation change, students experimentally verify that the total head drops by exactly the amount predicted from their measured ( f ) and minor loss coefficients. This bridges lab‑scale data to the design of industrial heat exchangers, reactors, and transfer lines.
Making the Right Choice for Your Learning Goal
Apply these strategies to get the most from your pilot‑plant experiment.
- If your primary focus is fluid mechanics fundamentals: Run flow rates that span laminar, transition, and turbulent regimes; plot all points on a Moody chart and observe how the friction factor becomes independent of viscosity in the fully rough zone.
- If your primary focus is validating empirical equations: Compute ( f ) from your pressure‑drop data and compare it side‑by‑side with the Blasius, Colebrook‑White, or Chen predictions, quantifying the deviation in each regime.
- If your primary focus is piping system design: Use the experimental ( f ) to extract a reliable roughness value for your test pipe, then apply the Colebrook equation iteratively in a spreadsheet to design future pipelines with confidence.
- If your primary focus is pump and system interaction: Overlay the system curve (static head plus ( h_f )) with measured pump performance curves to find operating points, efficiency, and the power lost to friction.
A well‑executed pressure‑drop experiment does more than yield numbers—it imparts the engineering intuition that connects a simple manometer reading to the millions of dollars lost annually to pipe friction in process plants.
Summary Table:
| Experimental Step | Key Equation / Parameter | Objective & Purpose |
|---|---|---|
| 1. System Setup | Horizontal straight pipe ($L/D > 20$) | Ensures fully developed flow and eliminates entrance effects. |
| 2. Pressure Measurement | $h_f = \Delta P / (\rho g)$ | Measures mechanical energy loss across the test section. |
| 3. Velocity Calculation | $v = 4Q / (\pi D^2)$ | Converts volumetric flow rate ($Q$) to mean velocity ($v$). |
| 4. Reynolds Number | $Re = \rho v D / \mu$ | Classifies flow regime (laminar, transition, or turbulent). |
| 5. Friction Factor ($f$) | $f = 2Dgh_f / (Lv^2)$ | Solves the Darcy-Weisbach equation to plot on the Moody Diagram. |
Upgrade Your Chemical Engineering Lab with LABPARK
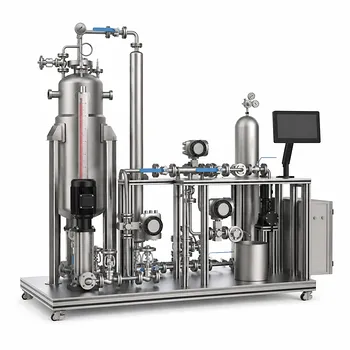
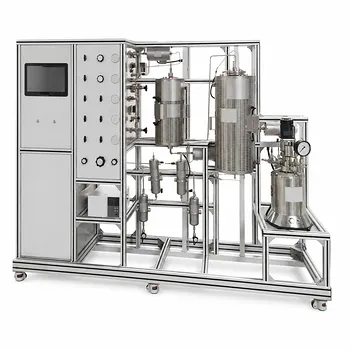
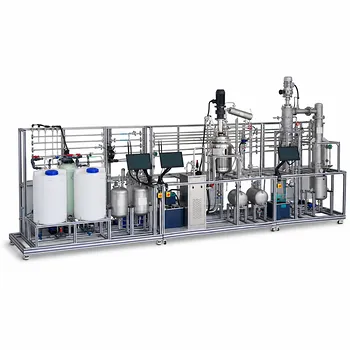
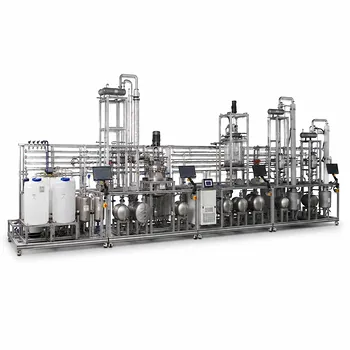
Bridging textbook theory and practical engineering requires robust, reliable laboratory equipment. LABPARK provides high-quality Educational and Vocational Unit Operations Pilot Plants in chemical engineering, bioprocess & biotech, and environmental & water treatment designed specifically for universities, research institutes, and enterprises.
Equip your students with the physical tools they need to master fluid mechanics, heat transfer, and separation processes. Contact LABPARK today to discover our customizable pilot plant solutions and elevate your educational curricula!
Related Products
- General Purpose Cosmetics Production Unit Operations Training Pilot Plant
- Multi Pump Fluid Transport Process Piping Unit Operations Training Pilot Plant
- Multi-Functional Drying Educational Unit Operations Pilot Plant
- Fixed-Bed Chemical Reaction and Gas Dust Tar Removal Unit Operations Pilot Plant
- 100L Continuous Loop Hydrogenation Educational Unit Operations Pilot Plant
People Also Ask
- How can unit operations pilot plants demonstrate simultaneous removal of light and heavy impurities? Configure a modular setup
- How do steady-state and dynamic simulations complement pilot plants? Validate scale-up and controllability
- Why Does a Pilot Plant Solver Return a Singular Matrix Error, and How Can You Resolve It?
- How do deviations in estimating latent heat impact pilot plant thermal systems? Avoid hardware mis-sizing.
- Why is the chemical plant startup schedule crucial? De-risk scale-up with pilot plants.