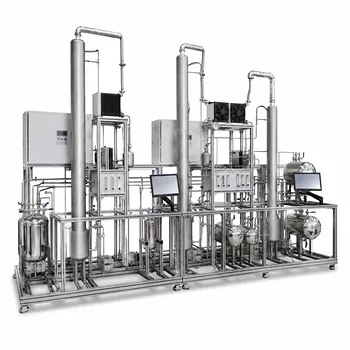
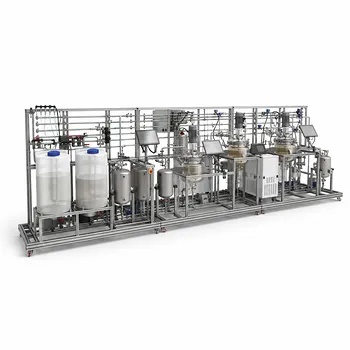
Sterility is the cornerstone of feed preparation in bioprocess pilot plants. The key requirement is to render all growth media and nutrient feeds completely free of viable microorganisms before they enter the bioreactor. This is typically implemented through validated thermal sterilization—heating the feed to a precise high temperature, holding it for a sufficient time to achieve a log-6 reduction in microbial load, and then rapidly cooling it to the required operating temperature before aseptic transfer into the vessel.
Preventing contamination is not just a single sterilization step. It is a system-level discipline that combines precise thermal design, corrosion-resistant materials, hygienic surface finishes, and robust aseptic handling protocols. Without this integrated approach, even a perfectly sterilized feed can become re-contaminated during transfer, cooling, or prolonged cultivation, ruining expensive cell cultures and invalidating entire batches.
The Core Principle: Sterilizing the Feed Without Compromising the Culture
The explicit question of how to prevent contamination is answered by a chain of interconnected requirements. The deep need, however, is to understand how to implement these requirements in a way that is repeatable, cost-effective, and gentle on sensitive biological systems. These systems are fragile—proteins denature above 50°C, shear forces kill cells, and even trace metal ions can poison a culture. Your feed preparation strategy must therefore satisfy two conflicting demands: kill every unwanted microbe, but leave the nutrients and the bioreactor environment perfectly safe for the living cells you intend to grow.
Understanding the Thermal Kill Step
The foundation of feed sterilization remains heat. Just as the primary reference states, heating the feed solution to a high temperature for a specified holding time kills all viable microorganisms. In pilot-plant practice, this is typically done in a continuous sterilizer or as an in-place batch sterilization of the media in the vessel itself.
The target is often a sterilization equivalent to 121°C for 15–20 minutes, but continuous systems can operate at higher temperatures (e.g., 140°C) for a much shorter time—seconds—because the thermal death kinetics are exponential. The advantage of high-temperature, short-time (HTST) sterilization is that it destroys spores rapidly while minimizing heat damage to heat-labile media components like vitamins and amino acids.
Cooling to Protect the Biologics
After the hold tube, the sterile feed is still far too hot to enter a bioreactor that typically operates between 20°C and 50°C. Direct injection of hot media would instantly kill the inoculum. So the system must include a cooling heat exchanger—usually a plate-and-frame or shell-and-tube design—that brings the feed down to the target temperature (say, 37°C) using chilled water.
This cooling step must be sterile. Any leak in the heat exchanger could introduce unsterile cooling water into the media stream. That’s why double-tube sheet designs or positive pressure differentials (keeping the sterile side at a higher pressure than the coolant) are common.
Aseptic Transfer: The Final Barrier
Even after thermal sterilization and cooling, the feed must travel through pipes and fittings to reach the bioreactor. The primary reference emphasizes that these heat exchange and sterilization steps must be integrated to demonstrate robust contamination control and sterile transfer techniques. In a pilot plant, that means all downstream piping, valves, and connections must be pre-sterilized and held under positive pressure with sterile air or steam.
Any dead legs, threaded connections, or rough surfaces in the transfer line become a refuge for microbes. This is why material selection, surface finish, and gasket compatibility become non-negotiable parts of feed preparation—they are not separate topics but integral parts of the sterile barrier.
Designing the Feed System for Sterility and Biocompatibility
The physical components that touch the feed are just as critical as the sterilization process itself. If the materials corrode, leach inhibitors, or harbor biofilms, contamination is inevitable even with a perfect thermal cycle.
The Material Foundation: Why 316L Stainless Steel is Mandatory
The supplementary references rightly stress that for fermentation unit operations, 316L stainless steel is highly recommended. Its low carbon content prevents intergranular corrosion after welding, and its molybdenum content provides resistance to the chlorides often present in media (from salts or pH adjustments). Standard 304 stainless steel may be acceptable for non-critical food applications, but in a bioprocess pilot plant where even trace corrosion can inhibit microbial growth, 316L is the baseline.
Copper, brass, and bronze must be strictly avoided. These metals release ions that are potent fermentation inhibitors. Even a small brass fitting in a feed line can doom a batch.
Surface Finish: The Microscopic Battlefield
Material choice alone is not enough. The internal surfaces of all feed vessels, piping, and heat exchangers must be mechanically polished—sandblasting followed by finer polishing—and ideally electropolished. Electropolishing removes surface material at the microscopic level, creating a chromium-enriched, ultra-smooth finish with a roughness (Ra) typically below 0.5 µm.
This matters for two reasons: it eliminates crevices where bacteria can lodge and form biofilms, and it prevents feedstock adhesion that would shelter microbes from the next cleaning-in-place (CIP) cycle. A polished surface also drains completely, minimizing the stagnant puddles where contaminants can grow.
Seals and Polymers That Won’t Leach Toxins
The system is only as sterile as its weakest seal. O-rings, gaskets, and diaphragm materials must withstand high temperatures (during steam sterilization of the transfer line) without degrading or releasing plasticizers into the media. The supplement specifies stable polymers: EPDM for general service, PTFE for aggressive chemicals, and fluorocarbon rubbers (FKM) for specific process conditions.
These seals are often overlooked, but a swollen or cracked O-ring after a steam cycle can introduce a contamination pathway directly into the sterile stream. In a pilot plant used for training, demonstrating proper seal selection and maintenance is a core part of contamination prevention.
Beyond the Initial Sterilization: Maintaining Integrity Over Long Runs
The deep need extends to the operational phase. A batch fermentation can run for over 140 hours. In that time, the sterile feed lines that were pristine at the start can become a risk if not actively protected.
Protecting Sampling and Dosing Lines
Automated monitoring systems, like flow injection analyzers for pH or nutrient concentration, draw samples continuously. The tubing from the autosampler to the analyzer is a potential route for microbial back-growth into the reactor. The supplementary references note that this tubing must be washed with a cleaning agent—such as a 3% mucasol solution—after each sample. A programmed washing cycle between measurements is not just good practice; it is an essential barrier.
Similarly, tubing used for acid or alkali dosing to control pH must be kept sterile. Pulsation dampeners and check valves in these lines can trap media and create dead zones. A well-designed system integrates steam-in-place (SIP) connections for these lines or uses single-use aseptic connector technologies for smaller pilot setups.
Integrated Control Loops That Support Sterility
Precision control over temperature, dissolved oxygen, and pH is critical for cell health, but it also feeds directly into feed preparation and sterility. For example, the temperature control loop using a cooling water jacket must prevent overcooling that could cause condensation inside sterile vent filters, blocking them and creating back-pressure. The dissolved oxygen loop sparges sterile air, so the air filter integrity test must be part of the feed preparation quality assurance.
The control system—often a PLC—must log all sterilization cycle data (temperature, time, pressure) to prove that a validated kill step occurred. This data traceability is a key requirement for pilot plants that are modeling scale-up to production.
Understanding the Trade-offs and Common Pitfalls
No sterilization method is perfect. A trusted advisor must be clear-eyed about the downsides.
The Thermal Degradation Balance
HTST sterilization minimizes nutrient damage, but some heat-labile components—like certain vitamins or growth factors—may still degrade. One common pitfall is over-sterilizing, which can create Maillard reaction products that inhibit cell growth. For extremely sensitive media, the trade-off might be to filter-sterilize those components separately through a 0.2 µm filter and add them after the thermal cycle, introducing additional complexity and aseptic handling steps.
Material Cost vs. Contamination Risk
A full 316L electropolished system with orbital welding and sanitary fittings is expensive. For a pilot plant on a constrained budget, making a conscious decision—say, using 316L for the critical feed path downstream of the sterilizer and 304 for upstream holding tanks—can be acceptable if risk is properly managed. But the moment cost-cutting introduces a brass fitting or a rough weld, the entire contamination battle is lost.
Cleaning and Reagent Consumption
Long-term cultivation with automated cleaning of sampling lines drives up reagent consumption and waste disposal costs. Reusing immobilized enzyme cartridges (like Protein G affinity columns) through controlled elution minimizes costs but requires meticulous sterility protocols. If the elution buffer isn’t sterile, the entire purification step becomes a contamination vector.
Making the Right Choice for Your Pilot Plant Goals
Every pilot plant has a unique focus. Your feed preparation strategy should align with what you’re trying to learn and demonstrate.
- If your primary focus is demonstrating scalable GMP-like operations: Select an all-316L, electropolished system with full CIP and SIP capabilities. Log every sterilization cycle and validate the holding time at temperature. Integrate automated washing cycles for all sampling loops.
- If your primary focus is flexible research with varied media and microorganisms: Invest in a modular system with sanitary clamp connections that allow quick reconfiguration. Prioritize single-use sterile connectors and filter-sterilized additive ports for heat-sensitive components, accepting the higher consumable cost for greater flexibility.
- If your primary focus is training students on contamination control principles: Emphasize the “why” behind material choice and surface finish. Include visible examples of failed seals, corroded fittings, and rough welds. Design experiments where students must diagnose a contamination event based on data logs and component inspection.
Ultimately, preventing bioreactor contamination through feed preparation is a systems engineering discipline. It’s about creating an unbroken sterile boundary from the media make-up tank to the bioreactor nozzle, using the right materials, validated thermal steps, and real-time protective measures that never sleep. Master that, and your pilot plant becomes a reliable engine for discovery rather than a source of costly frustration.
Summary Table:
| Key Requirement | Typical Implementation | Technical Target / Standard |
|---|---|---|
| Sterilization | Continuous HTST or batch autoclave | 121°C (15–20 min) or 140°C (seconds) |
| Material Selection | 316L Stainless Steel (avoid copper/brass) | High corrosion & chloride resistance |
| Surface Finish | Mechanical polishing & electropolishing | Ra < 0.5 µm to eliminate biofilms |
| Seals & Gaskets | High-temperature stable polymers | EPDM, PTFE, or FKM |
| Integrity Control | SIP, CIP, and automated sample line washing | Active prevention over long runs (>140h) |
Optimize Your Bioprocess Training & Research with LABPARK
Preventing contamination requires precision-engineered systems. LABPARK provides state-of-the-art Educational and Vocational Unit Operations Pilot Plants in chemical engineering, bioprocess & biotech, and environmental & water treatment. Designed specifically for universities, research institutes, and enterprises, our pilot plants feature industry-standard 316L stainless steel, high-grade electropolishing, and automated sterilization controls to ensure reliable, contamination-free operations.
Ready to elevate your laboratory's capabilities? Contact our engineering experts today to customize the perfect pilot plant solution for your institution!
Related Products
- Bio-fermentation Ethanol Production Practical Training Unit Operations Pilot Plant
- Natural Product Extraction Unit Operations Training Pilot Plant
- Quantitative Dosing and Liquid Flow Control Educational Unit Operations Pilot Plant
- Fixed-Bed Chemical Reaction and Gas Dust Tar Removal Unit Operations Pilot Plant
- Educational Unit Operations Pilot Plant for Intraparticle Diffusion Effective Factor Measurement
People Also Ask
- Why Use PTFE & Hastelloy in Chemical Pilot Plants? Prevent Corrosion & Ensure Safety
- Why Compare Predicted and Experimental Excess Enthalpy? Key to Accurate Pilot Plant Scale-up
- Why is the chemical plant startup schedule crucial? De-risk scale-up with pilot plants.
- When to transition from PID to adaptive control in pilot plants? Key process indicators.
- Why must batch and fed-batch fermentation pilot plants be designed to accommodate changing rheological conditions?