The definitive answer is to deploy sensor probes in upward-flowing vertical pipeline segments, positioned along a straight section a full 40 to 60 pipe diameters downstream of any turbulence-generating component. This single configuration harnesses gravity to counteract radial velocity differences, creating a self-mixing, stable flow that minimizes sampling bias. When the pipe itself cannot be vertical, a recirculation loop that forces flow upward past the sensor becomes the gold standard for achieving representative data.
The root cause of most process data errors is not the sensor’s precision—it’s the physical location and geometry of the sampling point. An upward vertical flow path, combined with sufficient stabilization length, eliminates the stratification and chaotic flow patterns that introduce Increment Delineation Error (IDE) and ensures the sensor sees a genuinely representative cross-section of the process stream.
Why Conventional Placements Guarantee Bad Data
A sensor probe that taps into a horizontal or downward-flowing line will almost always report a story that is not true. To understand why, you must think in terms of Increment Delineation Error (IDE).
Gravity Segregates the Stream You Think Is Mixed
In horizontal pipes, gravity acts perpendicular to flow. Denser or larger particles settle toward the bottom, while lighter phases concentrate at the top. A sensor fixed at one depth sees only that one, non-representative zone.
Downward vertical flow is even worse. Gravity and axial velocity gradients amplify segregation. The material races past in a chaotic, unmixed state, and radial velocity profiles distort the true composition. An upward vertical column, in contrast, forces gravity to work as a continuous mixing mechanism.
The Boundary Layer Destroys Stability Near Disturbances
Every elbow, pump, valve, or tee introduces a turbulent wake. Immediately downstream, the velocity profile is a distorted, transitional mess. A sensor placed inside this disturbed region measures transients, not the steady-state process. A fully developed, stable velocity profile—where a probe can finally see a consistent, radially balanced flow—requires a specific entry length.
For laminar regimes, that stabilization length ((x_0)) is typically 50 to 100 pipe diameters. Turbulent flows recover faster, but the 40 to 60 diameter rule from the primary reference provides a robust safety margin that covers both regimes.
The Optimal Spatial Configuration
Placing a probe correctly is not a suggestion; it is a hard requirement to decouple the sensor signal from the plumbing’s geometry.
Lock Onto Upward Vertical Flow
Always aim for an upward-flowing vertical pipe segment. The upward movement creates a natural balance: gravity retards faster central flow while accelerating slower near-wall material. The result is a smooth, radially symmetric profile where a single insertion probe can encounter a true cross-sectional average.
This applies to straight piping on the process side. If the main process line runs horizontally, you must either re-route it into a vertical riser or use a dedicated bypass loop.
Respect the 40 to 60 Pipe Diameter Rule
Place the sensor 40 to 60 pipe diameters downstream of the last flow disturbance—a bend, a reducer, a pump discharge, or even a fully-opened globe valve. This distance ensures the flow has become fully developed and the velocity profile is stable.
In high-turbulence lines the length can sometimes be slightly shorter, but pilot plants rarely have the luxury of verified computational fluid dynamics. Treating 40-60 diameters as the minimum avoids wasting months of data.
Shrink the Pipe Immediately Around the Sensor
Using a smaller inner pipe diameter at the sensor location is one of the most effective, underused tools. A narrower pipe reduces the spatial volume that the sensor must integrate. It crushes the support mismatch between the sensor’s optical field of view and the physical sample extracted for calibration.
This step slashes both Increment Delineation Error and Increment Extraction Error (IEE) because the entire stream is forced through a confined, well-mixed region.
The Recirculation Loop: Solving the Reactor Problem
Pilot plant reactors are three-dimensional vessels full of gradients. A sensor stuck in the tank wall will read local dead zones, not the bulk. The solution is to convert that 3D heterogeneity into a 1D representative stream.
Pull from the Bottom, Return to the Top
Create a narrow-diameter vertical bypass loop that draws material from the bottom of the reactor and pumps it back to the top. The PAT sensor and the physical extraction sampler must be colocated in this upward-flowing leg.
Now the sensor sees the same material that the grab sample captures. The small pipe diameter inside the loop minimizes the volume mismatch, enabling reliable multivariate calibrations.
Colocate PAT and Physical Sampling
Representative data is worthless unless the reference samples match what the probe sees. Place the physical sampling valve directly adjacent to the in-line sensor, in the same pipe cross-section, experiencing the identical flow regime. Without this, X and Y data misalign and chemometric models become noise amplifiers.
Understanding the Trade-offs and Pitfalls
No configuration is perfect. Objectively, you must manage several inescapable trade-offs.
In-Situ Probes and Fouling
Remote in‑situ fiber‑optic probes are sometimes the only option for extreme temperature, pressure, or reactor integrity constraints. The downside is severe: no temperature control, and a high risk of fouling that slowly decouples the sensor from the real fluid properties. You trade placement accuracy for maintenance hell.
Extractive Fast-Loops Demand Temperature Discipline
An extractive fast‑loop can deliver precise temperature control (often ±0.1 °C) and allow stream switching to a single analyzer. But it introduces lag time and is unsuitable for multiphase flows where solids settle in the loop. Traditional single-point extraction valves on these loops still fail unless they take a complete cross‑stream cut, not a sip from the wall.
Statistical Software Cannot Fix a Bad Probe Location
Chemometrics and data modeling cannot correct for non‑representative sampling. If the probe’s measurement volume is different from the physical sample’s support, the calibration is untrustworthy. Sampling errors are typically one to two orders of magnitude larger than analytical errors. The only solution is to fix the physical Sampling Unit Operation (SUO) first, then apply statistics.
Making the Right Choice for Your Goal
Adopt each recommendation based on your specific equipment and constraints.
- If your primary focus is a straight, single‑phase liquid pipeline: Install the sensor in an upward‑vertical spool piece exactly 40‑60 diameters downstream of the last elbow and use a reduced pipe diameter at the measurement point.
- If your primary focus is a three‑dimensional reactor or tank: Implement a pumped recirculation loop drawing from the bottom, and colocate both the PAT sensor and physical sampler in the upward narrow‑diameter leg.
- If your primary focus is high‑temperature or high‑pressure streams that cannot be looped: Use an in‑situ probe but pair it with a rigorous, scheduled cleaning protocol and validate its signal regularly with a properly designed extractive sample taken from the same vertical flow zone.
- If your primary focus is student training or pilot‑plant cost reduction: Teach systematic sampling and variographic analysis. Show that a single dataset of 60–100 samples can determine the most cost‑effective number of composite increments to reduce Total Sampling Error without expensive hardware changes.
Get the probe position right, and your data tells the truth. Ignore verticality and distance, and every spectral model you build will be a sophisticated lie.
Summary Table:
| Placement Metric | Recommended Configuration | Purpose / Benefit |
|---|---|---|
| Flow Direction | Upward vertical pipeline | Prevents gravity segregation & ensures radial mixing |
| Distance Downstream | 40 to 60 pipe diameters | Avoids turbulence; ensures fully developed flow |
| Pipe Diameter | Narrower diameter at sensor | Reduces sampling volume mismatch (IDE & IEE) |
| Reactor Setup | Recirculation fast-loop (upward leg) | Converts 3D heterogeneity to 1D representative stream |
Optimize Your Process Data with LABPARK
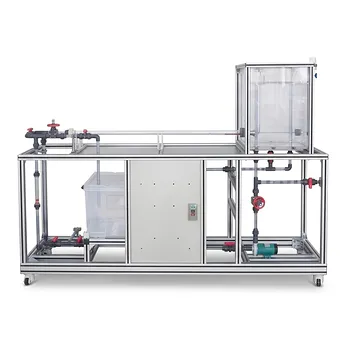
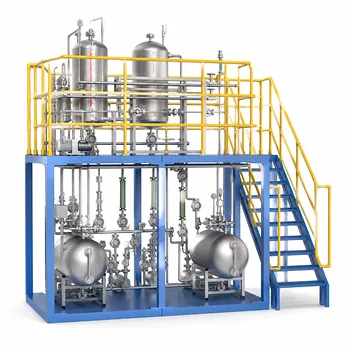
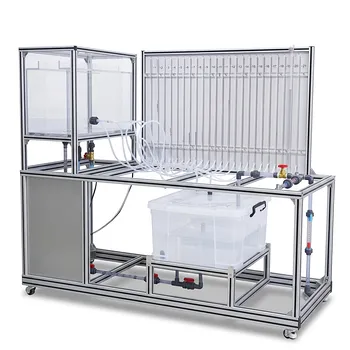
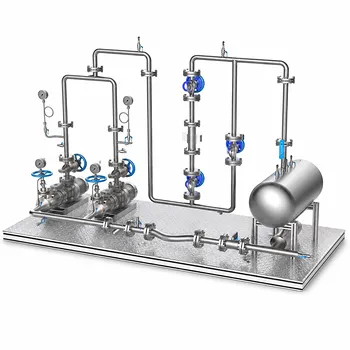
Achieving accurate process data starts with precision-engineered pilot plants. LABPARK provides state-of-the-art Educational and Vocational Unit Operations Pilot Plants in chemical engineering, bioprocess & biotech, and environmental & water treatment. Designed specifically for universities, research institutes, and enterprises, our systems ensure reliable performance and minimize sampling errors to support your research and training goals.
Ready to elevate your laboratory capabilities? Contact LABPARK today to find the perfect pilot plant solution for your needs!
Related Products
- Orifice and Venturi Flowmeter Calibration Educational Pilot Plant for Fluid Mechanics Laboratory
- Fluid Reynolds Number Demonstration Educational Unit Operations Pilot Plant
- Fluid Transport and Piping Dynamics Practical Training Unit Operations Pilot Plant
- Quantitative Dosing and Liquid Flow Control Educational Unit Operations Pilot Plant
- Multi Pump Fluid Transport Process Piping Unit Operations Training Pilot Plant
People Also Ask
- What is the difference between static and stagnation pressure? Master Pilot Plant Flow Measurement
- How do pilot plants demonstrate siphon pressure variations? Visualizing Bernoulli's Energy Balance
- How do fluid mechanics training pilot plants facilitate the visualization and calculation of laminar and turbulent flows?
- How to update chemometric calibration models in pilot plants? Best practices for process engineers.
- Why are the laws of similitude critical in fluid flow pilot plants? Scale Up Safely