Baffle cut and spacing act as the primary "tuning knobs" for the shell-side flow regime. These two parameters directly control fluid velocity and turbulence over the tubes. The baffle cut, ideally set between 20% and 25% of the shell diameter, determines how much fluid is redirected. The spacing, optimally 0.3 to 0.5 times the shell diameter, defines the flow area and therefore the velocity, creating a direct tension between maximizing heat transfer and managing the resulting pressure drop.
The core educational insight lies in managing a fundamental trade-off: tighter spacing and aggressive cuts dramatically increase the heat transfer coefficient, but they also escalate pressure drop, pushing against pump limits and system constraints. Mastering baffle design means balancing thermal performance against the practical energy costs.
The Mechanics of Baffle-Controlled Flow
To analyze a unit operation, you must first understand the fundamental flow patterns. Baffles are not just structural supports; they are flow-directing devices that dictate whether a shell-side fluid efficiently absorbs heat.
From Laminar Drift to Turbulent Cross-Flow
Without baffles, the shell-side fluid would take the path of least resistance, flowing parallel to the tubes. This results in low velocity, minimal turbulence, and a poor heat transfer coefficient.
Baffles fundamentally alter this dynamic by forcing the fluid into a cross-flow pattern. Instead of drifting along the tube axes, the fluid is directed back and forth across the tube bundle. This cross-flow generates high levels of turbulence, disrupting the boundary layer that insulates the tube walls and dramatically increasing the rate of convective heat transfer.
The Role of Baffle Cut: Controlling Velocity and Turbulence
The baffle cut is defined as the percentage of the shell’s diameter that is cut away to create a window for fluid flow. It’s a critical lever for controlling velocity profiles.
Defining the Optimal Window
Typical segmental baffles use a cut height that corresponds to a free area of 20% to 25% of the shell inner diameter. This range, within the broader 15% to 45% design window, represents an engineering sweet spot.
This specific window creates a balanced velocity profile. It generates sufficient cross-flow turbulence to achieve a high heat transfer rate without constricting the flow path so much that pressure drop becomes unmanageable for standard pilot plant pumps.
The Consequences of Deviation
Straying from the ideal range creates clear performance penalties. If the baffle cut is too small, the window area is too restrictive. While velocity might increase locally, the overall flow resistance spikes excessively, leading to very high pressure drops for diminishing thermal gains.
If the baffle cut is too large, the opposite problem occurs. A significant portion of the fluid bypasses the intended cross-flow path entirely, slipping through the oversized window. This bypass flow reduces the main cross-flow velocity over the tubes, causing the heat transfer coefficient to plummet as the effective turbulence decreases.
The Role of Baffle Spacing: Dictating Flow Area and Resistance
Baffle spacing, the distance between adjacent plates, acts as the primary control over the system’s flow area and therefore its resistance. It is normally set between 0.2 and 1.0 times the shell's inner diameter.
The Inverse Relationship with Velocity
There is a direct, inverse relationship between spacing and heat transfer. Reducing the baffle spacing decreases the shell-side flow area ($A_x$), which directly increases fluid velocity ($u_x$).
This higher cross-flow velocity generates more intense turbulence, which in turn increases the shell-side heat transfer coefficient ($h_x$). This makes reducing spacing a powerful tool for boosting the thermal duty of an exchanger, especially when the unit is constrained by a fixed tube length.
Using Spacing to Solve Pressure Drop Problems
However, this relationship comes with a critical cost. Because pressure drop is roughly proportional to the square of velocity, the increased heat transfer from tight spacing brings an exponential increase in shell-side pressure drop ($\Delta p$).
In a pilot plant, a common learning exercise involves hitting this exact constraint. If the calculated pressure drop exceeds an allowable limit, such as 0.8 bar, the direct and effective solution is to increase the baffle spacing. By opening up the flow area, you reduce the velocity and bring the pressure drop back down to acceptable limits, even though this sacrifices some of the peak heat transfer coefficient. This teaches a fundamental lesson in conservative, operable equipment design.
Understanding the Trade-offs in a Teaching Environment
The true value of baffle design in a pilot plant lies not in achieving a single "perfect" number, but in making the design trade-offs explicit and measurable. Trust is built by confronting these limitations head-on.
Spatial Constraints and Equipment Design
Educational pilot plants often face severe spatial and budget limitations, requiring compact equipment. If a heat exchanger’s tube length must be shortened to fit a skid, the lost thermal performance must be recovered elsewhere.
The standard compensation is to increase the number of tube passes and add more tightly spaced baffle plates to drive up velocity. This is an excellent demonstration of design optimization, but it comes with a blunt set of consequences. The resulting unit will have a higher pressure drop, require a greater total heat transfer surface area, be physically heavier, and cost more to manufacture. These are the real-world, multi-variable trade-offs that students must learn to quantify.
The Hidden Threat of Bypass Flow
Thermal calculations often assume perfect cross-flow, but the reality of manufacturing can undermine even the best baffle cut and spacing choices. The clearance gaps between the baffle plate, the shell, and the tube bundle are a critical variable.
If these tolerances are too large, a fraction of the flow will bypass the intended cross-flow path, slipping through these low-resistance gaps. This bypass stream can drastically reduce the experimentally measured effective heat transfer coefficient, yielding data that deviates significantly from the theoretical predictions based on ideal baffle geometry.
Making the Right Choice for Your Experimental Goal
Your selection of baffle cut and spacing should directly support your instructional or research objective. There is no universal optimum, only the right configuration for your specific goal.
- If your primary focus is demonstrating maximum thermal duty: Configure the baffle spacing at the lower end of the optimal range, between 0.2 and 0.3 times the shell diameter, with a tight 20% cut. This will maximize the heat transfer coefficient and provide a clear data set for Nusselt-correlation analysis.
- If your primary focus is managing system constraints like pump capacity: Start your design with spacing at 0.5 times the shell diameter. Measure the pressure drop and, if it's under your pump’s limit, you have a safe and stable operating baseline from which to make incremental adjustments for improvement.
- If your primary focus is observing and quantifying bypass flow effects: Intentionally test a poorly fitted baffle set with excessive tube-hole clearances. Compare its performance directly against the optimized configuration to visually and quantitatively prove the difference between theoretical and actual performance.
- If your primary focus is producing a generalized correlation for an industrial partner: Maintain a standard 25% baffle cut and operate across a range of spacings (e.g., 0.3 to 0.7 times the diameter) to generate a comprehensive curve that maps the full relationship between the Colburn j-factor and the Reynolds number.
The baffle cut and spacing are your most accessible tools for transforming a simple heat exchanger into a powerful, multivariable learning platform that highlights the true, competing forces at the heart of process engineering.
Summary Table:
| Parameter | Optimal Range | Too Low / Tight | Too High / Wide |
|---|---|---|---|
| Baffle Cut | 20% – 25% of shell diameter | Restricts flow, causing excessive pressure drop | Fluid bypasses cross-flow, dropping heat transfer |
| Baffle Spacing | 0.3 – 0.5 of shell diameter | Increases velocity, heat transfer, and pressure drop | Decreases velocity, heat transfer, and pressure drop |
Elevate Engineering Education with LABPARK
Bridge the gap between theory and practice in your labs. LABPARK designs and delivers premium Educational and Vocational Unit Operations Pilot Plants in chemical engineering, bioprocess & biotech, and environmental & water treatment.
Whether you represent a university, research institute, or enterprise, we provide the robust, highly adjustable equipment needed to teach critical engineering trade-offs like heat exchanger optimization.
Contact LABPARK today to find the perfect pilot plant solution for your facility!
Related Products
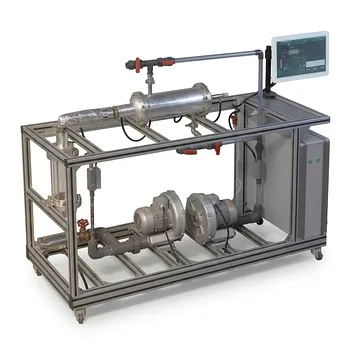
- Shell and Tube Heat Exchanger Heat Transfer Coefficient Determination Educational Pilot Plant
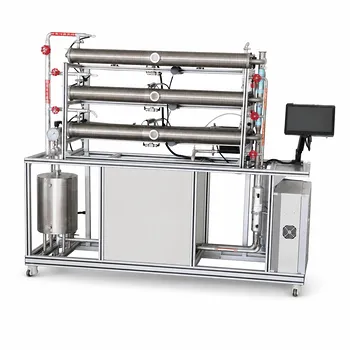
- Three-Tube Heat Transfer Educational Pilot Plant for Unit Operations Training
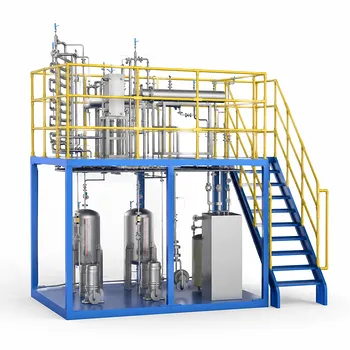
- Comprehensive Multi-Modal Heat Transfer Unit Operations Pilot Plant for Engineering Training
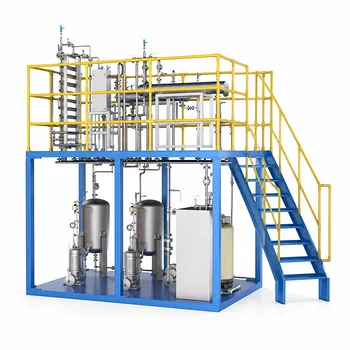
- Dual Mode Heat Transfer Pilot Plant for Unit Operations Training
- Circulating Wind Tunnel Drying and Convective Heat Transfer Coefficient Determination Educational Pilot Plant
People Also Ask
- Why Apply LMTD Correction in Shell-and-Tube Pilot Plants & How to Determine It
- Why adjust baffle spacing in shell-and-tube heat exchanger pilot plants? Master heat transfer & pressure drop.
- How to Estimate Shell-Side Pressure Drop in a Shell-and-Tube Heat Exchanger Pilot Plant: Key Parameters Explained
- How is the fouling factor (Rd) evaluated? Key Pilot Plant Insights for Students
- How is fouling factor demonstrated using shell and tube pilot plants? Practical Lab Guide