The weir height on a sieve tray directly dictates the volume of liquid held on the deck, creating a fundamental trade-off in your pilot plant. A taller weir increases liquid holdup and vapour–liquid contact time, which generally boosts mass transfer efficiency, but it does so at the cost of a higher pressure drop per tray. Under positive-pressure operation, a weir height of 40–50 mm is typical; under vacuum, the need to preserve a low bottom temperature forces you to use drastically shorter weirs of 6–12 mm.
The core rule is simple: higher weir = more separation power but more pressure drop. Your operating pressure determines which side of this balance you must prioritize. In a unit operations pilot plant, mastering this relationship is the key to understanding column hydrodynamics, energy consumption, and flooding limits.
The Fundamentals of Tray Hydraulics and Weir Height
What the Weir Height Actually Controls
The weir sits at the tray’s outlet and sets the depth of the liquid layer through which the rising vapour must bubble. A higher weir holds a deeper, heavier pool. That depth increases the residence time of the liquid, giving the vapour more time to transfer mass into the liquid phase. The result is a more complete approach to equilibrium on each tray. But a deeper liquid also demands more energy from the vapour to overcome the static head, directly raising the tray’s pressure drop.
The Pressure Drop Components on a Sieve Tray
The total tray pressure drop (h_t) (in mm of liquid column) is the sum of three heads:
(h_t = h_d + (h_w + h_{ow}) + h_r)
- (h_d) (dry tray drop): The friction loss as vapour jets through the perforations.
- (h_w + h_{ow}): The static head contributed by the outlet weir height (h_w) plus the liquid crest (h_{ow}) flowing over the weir. This is where weir selection shows up directly.
- (h_r) (residual head): Energy consumed to form bubbles and generate froth.
The final pressure drop in Pascals is (\Delta p_t = 9.81 \times 10^{-3} , h_t , \rho_L). For a given tray, raising (h_w) immediately swells the ((h_w + h_{ow})) term, increasing the total pressure drop and the back-pressure seen by the downcomer liquid.
Efficiency vs. Pressure Drop
Overall plate efficiency (E_T = N_T/N_p) tends to increase with deeper liquid layers—more contact time yields more theoretical stages per actual tray. In pilot-scale education, this is the classic demonstration: you can watch efficiency rise as you increase weir height, but you also watch the manometer or pressure transducer climb. The link is not infinite; beyond a point, the froth becomes too dense and entrainment limits further gains, making the extra pressure drop purely parasitic.
How Operating Pressure Rewrites the Rules
Positive Pressure Operation (Atmospheric and Above)
When the column runs under positive pressure, you have more freedom to absorb a moderate pressure drop. Raw distillation capacity is limited by vapour velocity and flooding, not by the absolute bottom pressure. Therefore, typical weir heights sit comfortably in the 40–90 mm range, with 40–50 mm often recommended for pilot units. This range delivers a robust liquid seal, good mass transfer, and stable hydraulic gradients without pushing pressure drop into problematic territory.
Vacuum Operation
Under vacuum, every millimetre of liquid head translates into a significant fraction of the total column pressure. The overarching goal is to keep the bottom temperature as low as possible to protect heat-sensitive compounds. Pressure drop must be slashed. Weir heights drop to 6–12 mm. You sacrifice some tray efficiency because the liquid layer is so shallow, but the alternative—losing vacuum or overheating the bottoms—would ruin the separation. In a pilot plant, this stark contrast between atmospheric and vacuum weir choices is one of the most powerful lessons in process design trade-offs.
Why Pressure Drop Matters More Under Vacuum
Under vacuum, the total pressure of the system is already low. A few extra mm of liquid head can represent a large percentage increase in the absolute pressure ratio from top to bottom. This directly raises the boiling point in the reboiler, risks thermal degradation, and forces the vacuum system to work harder. That’s why vacuum tray design obsesses over every component of (h_t), especially the controllable ((h_w + h_{ow})).
The Trade‑offs: Efficiency, Flooding, and Operational Stability
More Efficiency, but Greater Entrainment and Flooding Risk
A deeper froth layer from a high weir improves efficiency, but it also generates more spray and droplet carry‑over. As vapour velocity increases, the froth height (H_F) grows, and eventually the entrainment becomes so severe that liquid is carried to the tray above. This is entrainment flooding. The increased liquid head also raises the liquid level in the downcomer (h_b), which must stay below half the sum of tray spacing and weir height to avoid downcomer backup flooding. In a pilot plant, watching a column flood because the weir was too tall for the chosen tray spacing is a memorable lesson in hydraulic limits.
Higher Pressure Drop = Higher Energy Costs
The vapour must be pushed through the column by a blower or by the reboiler’s vapour generation. Every Pascal of pressure drop consumed by a tall weir translates directly into higher energy consumption. In a teaching lab this may be negligible, but in a pilot plant that mirrors a production design, you are demonstrating exactly where the electricity or steam costs will land. Low-weir designs, especially under vacuum, are an energy‑conserving strategy.
Practical Considerations for Your Pilot Plant
Froth Height and Flow Per Weir Length
The froth height on a sieve tray is a function of dry tray pressure drop and the liquid flow rate per unit weir length. Empirical correlations (given for example as polynomials of (\text{gpm}/L_{WI})) let you estimate (H_F). Monitoring froth height during experiments is a direct way to see how your chosen weir height interacts with liquid loading. When froth approaches the tray above, flooding is imminent—data that turns a hydraulic equation into a tangible visual observation on a glass-walled pilot column.
Tray Spacing and Vapour Capacity
Tray spacing sets the maximum allowable vapour capacity parameter (K_{SB}). A wider spacing (e.g., 24 inches) tolerates higher vapour velocities before entrainment flooding than a narrow spacing (e.g., 12 inches). When you select a weir height, you are implicitly committing to a certain froth depth; that froth depth must fit within the existing tray spacing. Matching the weir height to the column geometry is therefore a practical design step that students and pilot-plant engineers must consciously verify.
Making the Right Choice for Your Distillation Pilot Plant
Your weir height selection should flow from your primary objective. Use this guide to align design with purpose.
- If your primary focus is maximizing separation efficiency under atmospheric pressure: Choose a weir height in the 40–50 mm range. It provides a deep enough liquid head to enhance mass transfer without pushing pressure drop near flooding limits in a normal tray spacing.
- If your primary focus is minimizing energy consumption and preserving vacuum: Drop the weir height to 6–12 mm. Accept a modest efficiency penalty to keep pressure drop low, bottom temperatures minimal, and energy costs down.
- If you are exploring the fundamental behaviour of a trayed column in a teaching lab: Vary the weir height systematically. Start with a tall weir and record the efficiency and pressure drop; then switch to a short weir and observe the trade‑off. This single experiment teaches more about hydraulics than any textbook graph.
- If you are scaling pilot data to an industrial design: Remember that the tray spacing and the weir height must be matched to the expected vapour load. Use the froth height correlations and downcomer backup criteria to confirm that your chosen weir height will not bottleneck throughput at scale.
Your weir height is not a passive dimension; it is the hand that balances separation power against pressure drop. Make that choice deliberately for your operating pressure, and you will transform your pilot plant from a confusing maze of data into a clear story of hydraulic and mass‑transfer principles.
Summary Table:
| Operating Pressure | Recommended Weir Height | Mass Transfer Efficiency | Pressure Drop | Primary Design Goal |
|---|---|---|---|---|
| Positive / Atmospheric | 40–50 mm | High | Moderate | Maximize separation efficiency |
| Vacuum | 6–12 mm | Moderate (Reduced) | Very Low | Minimize bottom temperature |
Optimize Your Chemical Engineering Lab with LABPARK
Are you looking to teach column hydrodynamics or scale up your distillation processes?
LABPARK provides state-of-the-art Educational and Vocational Unit Operations Pilot Plants in chemical engineering, bioprocess & biotech, and environmental & water treatment. Designed specifically for universities, research institutes, and enterprises, our pilot plants enable students and researchers to master tray hydraulics, heat transfer, and process control in a safe, hands-on environment.
- Customizable Configurations: Easily adjust weir heights, tray spacing, and operating pressures to demonstrate complex hydraulic balances.
- Industry-Grade Quality: Reliable data logging and clear-walled visual columns designed for real-world educational training and research.
Ready to elevate your engineering curriculum or research capabilities? Contact LABPARK today to discuss your custom pilot plant solution!
Related Products
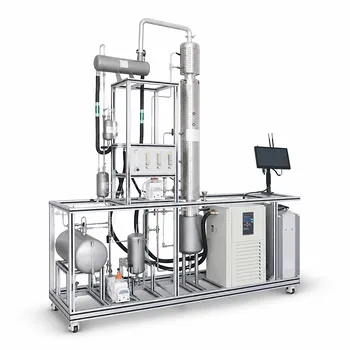
- Continuous Sieve-Plate Distillation Pilot Plant for Unit Operations Laboratory Education
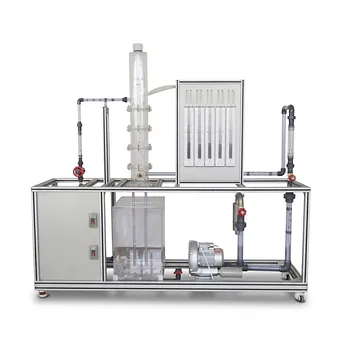
- Plate Column Hydrodynamics Tray Demonstration Educational Pilot Plant
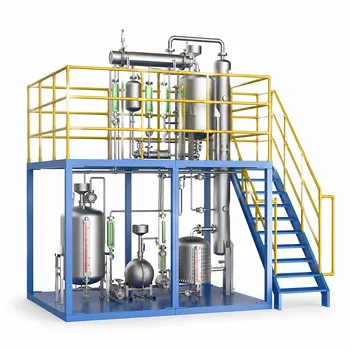
- Dual-Mode Rectification Pilot Plant for Practical Training Unit Operations
People Also Ask
- How do distillation pilot plants validate VLE data? Achieve reliable solvent separation scale-up.
- What are the primary reflux ratio control strategies? Master Distillation Unit Operations
- How to select the right activity coefficient model (Wilson, NRTL, UNIQUAC) for distillation pilot plants?
- Why is vacuum operation capability an essential feature for a distillation unit operations pilot plant? Unlock Efficiency
- Why is the column performance diagram critical? Optimize distillation pilot plant safety & efficiency.