Liquid flow maldistribution is the silent efficiency killer on column trays. It causes dead zones and back-mixing that disrupt the countercurrent contact essential for separation. In a pilot plant unit, these non-ideal flows directly lower the Murphree plate efficiency ((E_{MV})), a relationship students can quantify by varying tray geometry, measuring residence time distributions (RTD), and observing how Péclet number ((Pe)) and flow path length ((Z_L)) control the lost performance.
Maldistribution turns a well-designed tray into a patchwork of over- and under-utilized zones. Pilot plants make this hidden failure visible—using tracers and comparative tray designs to connect flow symptoms like bypassing directly to a measurable drop in mass transfer efficiency.
The Physics of Maldistribution: How Dead Zones and Bypassing Erode Efficiency
The Link Between Liquid Flow and Mass Transfer
A column tray works by bringing a descending liquid stream into intimate contact with rising vapor. Mass transfer happens at the interfacial area where concentration gradients exist. When the liquid flows uniformly across the entire active area, every vapor molecule meets fresh, absorbent liquid.
Maldistribution shatters this uniformity. Recirculation zones (dead zones) trap liquid, holding it stagnant while vapor passes through with little interaction. Backflow sends liquid in the wrong direction, mixing already-stripped solution with fresh feed. The result is a reduction in effective contact time and area, directly cutting the amount of solute that can move from one phase to the other.
The Consequences of Non-Uniform Residence Time
In an ideal tray, all liquid elements spend the same time on the plate. Maldistribution creates a broad residence time distribution (RTD). Some liquid races through a preferential high-velocity path, bypassing the active region. Other liquid lingers in dead corners well past the point of equilibrium.
This spread of residence times is devastating. The early-exiting liquid carries unprocessed solute, while the over-aged liquid achieves no further transfer because its driving force is exhausted. The overall tray efficiency collapses because the average outlet composition is dominated by the short-circuiting fluid, not by the well-mixed cores.
Quantifying the Damage: The Role of Péclet Number and Murphree Efficiency
Péclet Number: A Measure of Dispersion
The Péclet number ((Pe = uZ_L / D)) combines the liquid velocity ((u)), flow path length ((Z_L)), and a dispersion coefficient ((D)) that captures back-mixing and dead zones. A high (Pe) means plug-like behavior—liquid moves through the tray in an orderly front. A low (Pe) signals heavy axial dispersion, where maldistribution smears the residence time.
Because (Pe) directly degrades the concentration driving force along the tray, it becomes the bridge from observable flow structure to performance. In a pilot plant, students can manipulate (Z_L) by altering weir placement or tray layout and then observe how a shorter, more tortuous path reduces (Pe)—exactly the same degradation that large-diameter columns suffer at industrial scale.
Murphree Plate Efficiency: The Bottom Line
The Murphree plate efficiency ((E_{MV})) compares the actual composition change on a tray to the maximum thermodynamically possible change. With perfect plug flow and no maldistribution, (E_{MV}) can approach unity. As maldistribution grows, (E_{MV}) plummets.
The link is clean and demonstrable in an educational pilot plant. By measuring inlet and outlet liquid and vapor compositions from a single tray under different hydraulic conditions, researchers can calculate (E_{MV}). Plotted against (Pe) or against directly observed dead-zone areas, the trend is unmistakable: more maldistribution equals less theoretical work accomplished per tray.
How Unit Operations Pilot Plants Bring the Problem to Life
Visualizing Flow Maldistribution with Tray Geometry
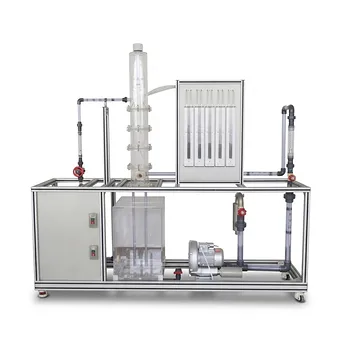
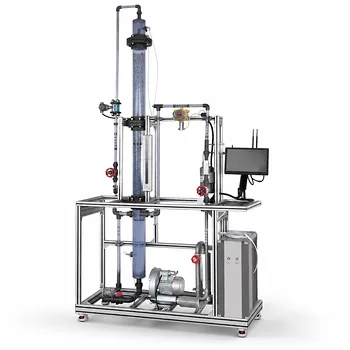
Modern pilot plant columns are designed with transparent sections and interchangeable internals. This allows direct observation of liquid flow patterns across a tray. Students can compare a standard sieve tray—which tends to develop stagnant regions near the walls and corners—against a valve tray engineered to keep liquid moving.
By injecting a dye or using a light-scattering tracer, they can see recirculation eddies form and measure the bypassing path. The ability to swap tray types in minutes makes the abstract concept of “maldistribution” a visible, tactile lesson.
Tracer Studies: Uncovering Dead Zones and Bypassing
Tracer experiments offer a quantitative window inside the tray. Injecting a non-reactive tracer at the downcomer and measuring its concentration at the tray exit yields the experimental RTD curve. The shape tells the whole story: an early peak indicates bypassing, a long tail reveals dead zones, and an intermediate peak matched to a dispersion model gives the Péclet number.
In a unit operations pilot plant, this exercise moves from theory to practice. Students can operate a single-pass crossflow tray, inject a salt or dye pulse, and record conductivity or absorbance at the tray outlet. They then fit the RTD to an axial dispersion model and see how lower (Pe) values directly correlate with worse (E_{MV}) measured from simultaneous composition samples.
Demonstrating Mitigation Strategies with Advanced Tray Designs
Once the baseline maldistribution is quantified, the pilot plant becomes a testbed for solutions. Fitting the same column with a valve tray or with a tray that incorporates longer flow path length via multiple passes shows how specialized structures mitigate poor flow.
In the standard educational column (diameters under 2.2 m), a single-pass crossflow configuration already delivers high efficiency because the short lateral distance suppresses liquid-level gradients. However, students can deliberately install a tray with a poorly designed weir or a circular downcomer that promotes uneven draw‑off, then measure the drop in (E_{MV}). By comparing performance under identical boil‑up and reflux ratios, they learn exactly how tray hydraulics and geometry prevent—or invite—mass transfer losses.
Understanding the Trade-offs: When “Better” Maldistribution Mitigation Has a Cost
The Complexity vs. Efficiency Equation
Advanced tray designs that suppress dead zones and back-mixing are not free. Valve trays and multiple-pass layouts increase fabrication cost, add moving parts that can stick or corrode, and often raise the dry‑tray pressure drop. In pilot-plant education, a more complex tray may also obscure the basic physics students are meant to learn.
Moreover, high‑efficiency trays sometimes require narrower operating windows. They might suffer weeping or entrainment earlier than a simple sieve tray, constraining the range of flow rates a pilot plant can demonstrate. For a research facility that needs to explore broad parameter sweeps, the simpler tray—the one that exhibits maldistribution readily—can actually be the more instructive choice.
Common Pitfalls in Scale-Up from Pilot to Plant
Maldistribution tends to worsen as diameter increases, because liquid-level gradients grow and uniform distribution becomes harder. A pilot plant tray that performs beautifully at 0.3 m diameter may see severe bypassing at 2 m. Students must learn that pilot-plant data cannot be naively scaled up without accounting for how (Z_L) and (Pe) change.
Another trap is misinterpreting RTD data. A narrow RTD from a small tray can be mistaken for proof of good distribution, when in reality the tray’s short path length masks the dispersion that would explode at larger scales. Pilot plants that allow side-by-side comparison of different diameters—or at least different (Z_L) values on the same tray—teach this nuance directly.
Making the Right Choice for Your Demonstration or Research Goal
Use the pilot plant’s flexibility to match the learning objective to the tray design and diagnostic method.
- If your primary focus is demonstrating the fundamental link between flow and efficiency: Start with a simple sieve tray in a single-pass, transparent column. Inject a visual tracer to reveal dead zones, measure (E_{MV}) from composition samples, and calculate the Péclet number from an RTD test.
- If your primary focus is evaluating advanced tray technology for process improvement: Compare a baseline sieve tray against a valve tray or a multi‑pass configuration under identical operating conditions. Document the improvement in (E_{MV}) and tie it quantitatively to a higher (Pe) or a narrower RTD.
- If your primary focus is scale-up methodology and troubleshooting: Operate trays with different flow-path lengths ((Z_L)) while keeping all other conditions constant. Show how the Péclet number scales with (Z_L) and how that scaling predicts the efficiency shortfall expected in a full‑sized column.
- If your primary focus is operator training on maldistribution diagnosis: Conduct tracer tests under deliberately faulty conditions—a blocked downcomer, a tilted tray—and have participants use the RTD curve to identify the nature and location of the flow defect.
When you make maldistribution measurable, you turn a subtle column‑kill into a crisp, quantitative lesson—and that is exactly what a well-designed unit operations pilot plant is built to deliver.
Summary Table:
| Flow Phenomenon | Physical Cause | RTD Curve Indicator | Impact on Efficiency (EMV) |
|---|---|---|---|
| Bypassing / Short-circuiting | High-velocity preferential liquid paths | Early tracer concentration peak | Drops sharply (untreated solute leaves the tray) |
| Dead Zones | Stagnant fluid trapped in corners/walls | Long tail in the RTD curve | Drops (stagnant fluid achieves no driving force) |
| Back-mixing / Dispersion | Liquid mixing in the reverse direction | Low Péclet number (Pe) | Drops (erodes concentration driving force) |
Visualize and Quantify Complex Hydraulics with LABPARK
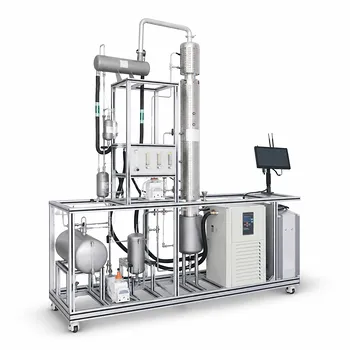
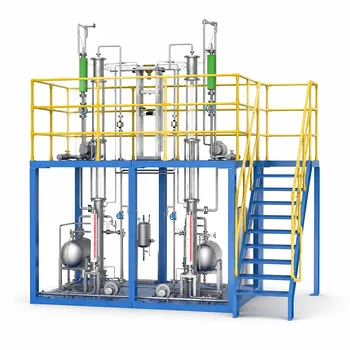
At LABPARK, we design and manufacture premium Educational and Vocational Unit Operations Pilot Plants in chemical engineering, bioprocess & biotech, and environmental & water treatment. Built for universities, research institutes, and enterprises, our systems enable you to:
- Observe Real-Time Hydraulics: Use transparent tray columns to visualize bypassing and dead zones.
- Conduct Accurate RTD Studies: Easily inject tracers, calculate Péclet numbers, and measure Murphree plate efficiency.
- Compare Tray Geometries: Swap standard sieve trays for advanced valve layouts to test scale-up and mitigation strategies.
Ready to elevate your engineering lab? Contact our experts today for a custom quote.
Related Products
- Plate Column Hydrodynamics Tray Demonstration Educational Pilot Plant
- Continuous Sieve-Plate Distillation Pilot Plant for Unit Operations Laboratory Education
- Multi-Functional Special Distillation Educational Pilot Plant
- Multimodal Absorption and Desorption Pilot Plant for Unit Operations Training
- Packed Bed Absorption Educational Unit Operations Pilot Plant
People Also Ask
- How to update chemometric calibration models in pilot plants? Best practices for process engineers.
- Why Correct Sig Figs & Rounding Matter in Educational Pilot Plants: Ensure Data Accuracy
- How can educational pilot plants be used to teach process safety and risk assessment in chemical engineering curricula?
- How does nuclear yield inefficiency translate to chemical engineering education? Optimize kinetics with pilot plants.
- Why Calculate Sieve Tray Pressure Drop? Optimize Distillation Pilot Plant Performance