It's the line between an efficient, compact design and a costly, oversized miscalculation. In a shell-and-tube heat exchanger, dropping the shell-side Reynolds number ($Re$) below 2100 causes the tube wall film heat-transfer coefficient ($h_o$) to fall sharply. A lower $h_o$ directly reduces the overall heat transfer rate, which means the exchanger must use a significantly larger tube bundle to meet the same thermal duty—an economically unacceptable outcome in any industrial setting. Chemical engineering pilot plants bring this principle to life by letting you vary flow, measure temperatures, and watch the overall heat transfer coefficient collapse as $Re$ enters the laminar or transitional region.
Core Takeaway: A shell-side Reynolds number of 2100 is not an arbitrary number—it’s the practical threshold for turbulent flow that sustains a high film coefficient. Falling below it forces you to specify more heat-transfer area for the same job, ballooning capital cost. In pilot plants, you can quantify precisely how a drop in $Re$ erodes $U$ and drive home the real-world design imperative: keep the shell side turbulent.
Why a Single Number Governs Heat Exchanger Economics
In shell-and-tube design, the overall heat-transfer coefficient $U$ is dominated by the sum of resistances on the tube side and shell side. The shell-side resistance $(1/h_o)$ often becomes the bottleneck when flow is sluggish.
The Film Coefficient Fall-Off
Below $Re \approx 2100$, the flow regime shifts away from fully turbulent conditions. The boundary layer thickens, and the film heat-transfer coefficient $h_o$ drops disproportionately.
This isn’t a gradual decline—for many geometries, $h_o$ scales roughly with $Re^{0.6-0.8}$ in turbulent flow but plummets once the flow turns laminar. A smaller $h_o$ means the same tube bundle transfers far less heat per square meter.
The Area Penalty
To deliver the required duty $Q = U \cdot A \cdot \Delta T_{lm}$, a lower $U$ forces $A$ to increase proportionally. In practice, a shell-side $Re$ of 1500 can translate to a required area that is 30–50 % larger than the design at $Re = 2100$.
That extra area comes in the form of more tubes, a larger shell, and higher material and fabrication costs. For anything beyond a laboratory curiosity, the economic penalty is severe.
Design Limits You Can’t Ignore
The shell-side flow geometry is complex, with leakage streams and bypass currents, but the $Re$ threshold helps define a minimum design criterion. If your calculation shows $Re$ dipping toward 1500–1800, you are already in the danger zone where the cost of the exchanger escalates rapidly.
How a Chemical Engineering Pilot Plant Makes the Concept Tangible
A well-instrumented unit operations pilot plant turns the abstract Reynolds number into a vivid, data-driven lesson.
Setting Up the Demonstration
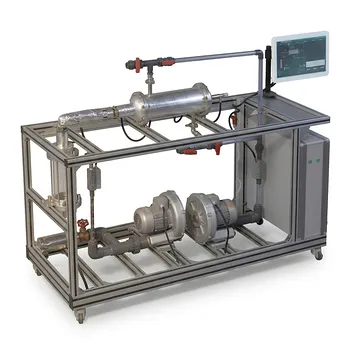
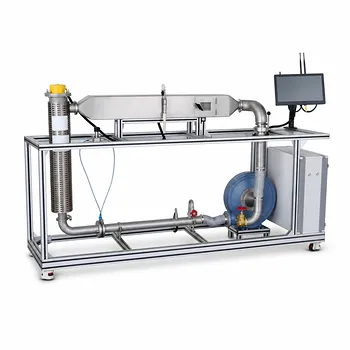
A typical setup runs a hot fluid (e.g., heated water) on the tube side and a cold fluid (e.g., plant water) on the shell side. Students control the shell-side flow rate via a variable-speed pump or control valve, while holding the tube-side conditions constant.
They measure:
- Inlet and outlet temperatures for both streams
- Flow rates (volumetric or mass)
- Pressure drops across the shell side
From Measurements to the Reynolds Number
The shell-side Reynolds number is calculated as: $$Re = \frac{D_e \cdot G_s}{\mu}$$ where $D_e$ is the equivalent diameter of the shell-side flow path, $G_s$ is the mass velocity (mass flow rate per unit free-flow area), and $\mu$ is the fluid viscosity at the bulk temperature.
By reducing the shell-side flow step by step, $G_s$ declines proportionally, and $Re$ falls with it. The whole experiment may span from turbulent conditions ($Re > 4000$) down to transitional ($Re = 1000 – 2100$) and even laminar ($Re < 1000$).
Observing the Heat Transfer Collapse
At each steady state, the students compute the overall experimental heat-transfer coefficient $U_{exp}$ from the heat duty and the log mean temperature difference. A plot of $U_{exp}$ versus $Re$ shows a plateau in the turbulent region, then a steep drop as $Re$ falls below approximately 2100.
This steep drop is the direct visual evidence that the shell-side film coefficient has collapsed. The exchanger that performed admirably at high flow suddenly delivers far less heat, and the students can immediately see the required temperature approaches are no longer met.
Linking Lab to Plant Economics
With the data in hand, students can back-calculate the shell-side $h_o$ using the Wilson plot method or by isolating the shell-side resistance. They then calculate the required area for a fixed duty under each flow condition.
Seeing the area requirement double or triple when $Re$ slips below 2100 drives home the economic lesson: industrial heat exchangers are designed to stay turbulent because nobody will pay for a unit three times larger than necessary.
Understanding the Trade-offs and Pitfalls
Maintaining $Re \geq 2100$ isn’t free, and a blind adherence without considering the complete picture can create fresh problems.
The Pumping Power Penalty
Pushing the shell-side flow high enough to guarantee turbulence comes with a pressure drop cost. Shell-side pressure drop scales roughly with the square of velocity, so higher $Re$ means the pump or blower must work harder.
For liquids, acceptable pressure drops typically run 10–100 kPa, and for gases 1–10 kPa. Exceeding these limits adds operating expense and can force a larger pump or higher-pressure-rated shell, eroding some of the savings from a smaller tube bundle.
Baffle Spacing and Leakage Streams
In real exchangers, not all of the shell-side flow follows the ideal cross-flow path. Leakage through baffle-to-shell clearances and tube-to-baffle holes creates bypassing, which effectively reduces the true cross-flow velocity.
Because of these “short-circuiting” flows, the calculated $Re$ based on ideal cross-flow can be misleadingly high. In pilot plants with realistic clearances, students can observe that $U$ doesn’t recover as steeply as theory predicts, underlining the need for conservative design margins.
When You Can’t Reach 2100
For very high-viscosity fluids or extremely low flow rates dictated by the process, achieving $Re \geq 2100$ may be impossible without unacceptable pressure drops. In those cases, other strategies—like using a shell-and-tube exchanger with a tighter tube pitch, reducing baffle spacing to increase velocity, or switching to a plate-and-frame design—may be necessary.
The pilot plant is the perfect place to explore these alternatives and understand that while the threshold is valuable, it is a guideline tied to economic optimization, not an inviolable law of physics.
Making the Right Choice for Your Project or Lab Exercise
Use the $Re = 2100$ rule as a design starting point and an educational teaching tool, but tailor your approach to the specific fluid and economic constraints.
- If your primary focus is teaching heat-transfer fundamentals: Design the pilot-plant experiment so that the shell-side flow can be varied from strongly turbulent (e.g., $Re \approx 5000$) down to clearly laminar ($Re < 1000$). Let the students discover the inflection point around 2100 themselves and have them compute the required area in each region to cement the economic rationale.
- If your primary focus is optimizing a pilot-plant design: Start with a hydraulic calculation that sets the shell-side $Re$ at 2500–3500 at the nominal flow rate. Then verify the pressure drop is within your budget. If it’s too high, explore a larger baffle spacing or a different tube layout before sacrificing the $Re$ target.
- If your primary focus is troubleshooting an existing exchanger with low performance: Measure the actual shell-side flow and back-calculate the operating $Re$. If it’s below 2100, first try increasing the flow rate (if your pump can handle the extra pressure drop). Alternatively, consider retrofitting with tighter baffle spacing or smaller tube pitch to raise the mass velocity into the turbulent range.
By treating the Reynolds number not as a mere calculation but as a direct lens into heat-exchanger economics, you turn a dry theory into a decisive design tool—one that saves both steel and money in every real plant.
Summary Table:
| Flow Regime | Reynolds Number (Re) | Heat Transfer Coefficient (U) | Design & Cost Impact |
|---|---|---|---|
| Turbulent | $\ge 2100$ | High and stable | Efficient, compact design; optimized capital costs |
| Transitional / Laminar | $< 2100$ | Plummets sharply | Requires 30–50% more area; oversized and costly units |
Bring Heat Transfer Theories to Life with LABPARK
Understanding the transition from laminar to turbulent flow is crucial for practical engineering design. LABPARK provides state-of-the-art Educational and Vocational Unit Operations Pilot Plants in chemical engineering, bioprocess & biotech, and environmental & water treatment for universities, research institutes, and enterprises. Our plants help students and researchers visualize fluid dynamics, calculate real-time Reynolds numbers, and master heat exchanger economics firsthand.
Contact LABPARK today to customize your pilot plant and elevate your laboratory learning!
Related Products
- Shell and Tube Heat Exchanger Heat Transfer Coefficient Determination Educational Pilot Plant
- Three-Tube Heat Transfer Educational Pilot Plant for Unit Operations Training
- Comprehensive Multi-Modal Heat Transfer Unit Operations Pilot Plant for Engineering Training
- Dual Mode Heat Transfer Pilot Plant for Unit Operations Training
- Circulating Wind Tunnel Drying and Convective Heat Transfer Coefficient Determination Educational Pilot Plant
People Also Ask
- Why Apply LMTD Correction in Shell-and-Tube Pilot Plants & How to Determine It
- How is the fouling factor (Rd) evaluated? Key Pilot Plant Insights for Students
- How is fouling factor demonstrated using shell and tube pilot plants? Practical Lab Guide
- Why is simulating and calculating fouling factors crucial when operating educational heat exchanger pilot plants?
- How do tube pitches affect equivalent shell diameter (De)? Math & pilot plant impact explained.