For crossflow trays, the selection hinges on a single trade-off: managing the liquid flow path to prevent hydraulic bottlenecks without overcomplicating the tray design. A single pass arrangement works for the majority of standard industrial columns with moderate diameters and liquid rates. You switch to a U-flow (reciprocating) tray only when the liquid flow is so low that a normal linear path would be too short for efficient contact. A two-pass (or double-flow) design becomes necessary for very large-diameter columns or extremely high liquid loads, where a single flow path would create an unacceptably high liquid gradient and pressure drop.
The core task is to ensure the liquid level on the tray remains even and the vapor distribution stays uniform. Each flow arrangement tackles a specific hydraulic failure mode: U-flow prevents weeping in low-rate services, two-pass prevents flooding or maldistribution in high-rate services, and single pass is the simplest, most cost-effective choice when neither extreme applies.
Understanding Liquid Flow Arrangements on Crossflow Trays
Crossflow trays are the workhorse of distillation, where liquid moves across a perforated deck while vapor bubbles up through it. The way you direct that liquid flow is not a trivial detail—it directly dictates the tray’s hydraulic stability, mass transfer efficiency, and turndown capability.
The Physics Behind the Choice
The liquid on a tray forms a froth, and it must maintain enough residence time for vapor-liquid contact while preventing either liquid backup into the downcomer (flooding) or vapor bypassing through the downcomer (weeping). The tray’s liquid flow path length and width govern these phenomena.
A path that is too short for the given liquid rate starves the contact zone. A path that is too long, especially with high liquid rates, creates a significant hydraulic gradient from the inlet to the outlet, causing uneven vapor distribution and premature jet flooding. The three standard arrangements exist to keep this flow path within an optimal operating window.
The Three Standard Configurations
Each design solves a distinct problem related to how much liquid must travel, and how far.
Single Pass: The Default for Moderate Conditions
This is the simplest and most common configuration. Liquid enters from an inlet downcomer on one side, flows horizontally across the entire tray, and exits into an outlet downcomer on the opposite side.
When to select it: For moderate column diameters and typical liquid flow rates where the flow path length naturally provides sufficient contact time without building an excessive liquid head. Supplementary practical data indicates single-pass trays are typically used for column diameters from roughly 1,000 mm to 6,000 mm, handling liquid loads up to about 110 m³/h, though the upper diameter limit depends heavily on the liquid rate. The key is that a single linear path is hydraulically stable and economical. It keeps the tray layout simple and minimizes manufacturing costs.
U-Flow (Reciprocating) for Low Liquid Rates
A U-flow tray uses a central baffle that splits the tray into two parallel halves. The liquid enters on one side, flows to the far wall, makes a 180-degree turn, and flows back to an outlet downcomer on the same side as the inlet.
When to select it: When the liquid flow rate is so low that a single-pass path would be too short, leading to poor mixing, weeping, and mass transfer starvation. By doubling the flow path length without reducing the weir loading, the U-flow artificially increases residence time and ensures the tray stays active. It’s the go-to choice for low-rate services, especially in smaller-diameter columns where liquid velocity might otherwise drop below the tray’s weep point.
Two-Pass (Double-Flow) for High Liquid or Large Diameters
A two-pass tray splits the liquid flow into two parallel streams. A central downcomer feeds liquid in two opposite directions, or two side downcomers feed inward toward a central one, effectively halving the flow path length per pass.
When to select it: For large column diameters or high liquid flow rates that would create an unacceptable hydraulic gradient if forced along a single long path. By splitting the load, you dramatically reduce the liquid head difference from inlet to outlet, which minimizes pressure drop and prevents vapor from preferentially bubbling through the lower-head area. Supplementary data suggests a switch to two-pass is common for columns above 2,000 mm in diameter and liquid rates in the 90–250 m³/h range, though the decision must be based on a tray hydraulic analysis, not just diameter.
Understanding the Trade-offs
While these arrangements solve critical problems, they introduce their own complexities and limitations. Blindly following a rule of thumb without understanding the downsides will lead to underperforming or expensive columns.
The Complexities of Multi-Pass Trays
A two-pass tray is more expensive to fabricate and harder to install than a single pass. It requires additional downcomers and precise partitioning to distribute vapor equally. Any maldistribution can create dead zones or cause localized flooding. Furthermore, the tray’s turndown capability can suffer, because at low liquid rates the split flows may become too thin to seal the downcomers properly, leading to vapor bypass.
The Limitations of U-Flow
The U-flow tray’s extended path is a double-edged sword. The longer path increases pressure drop relative to a single pass, even at low liquid rates. The 180-degree turn can also lead to a slight backup of froth, potentially restricting capacity if the column operates near its upper hydraulic limit. For services with solids or foaming tendencies, the baffle can become a fouling or stagnation point.
The Hidden Cost of Oversimplification
Choosing a single pass just because it’s simple can be disastrous in a large column with high liquid loads. The resulting hydraulic gradient will cause vapor to flood the section near the outlet weir while starving the inlet side, crashing the column’s separation efficiency. Conversely, using a two-pass tray in a smaller column can make the liquid weirs too short, leading to poor liquid distribution and weeping across a significant portion of the deck.
Making the Right Choice for Your Goal
The selection must tie back to the specific liquid and vapor loads your column will see at its design point and throughout its expected operating range. Use these scenario-based recommendations to guide your initial tray layout, and always validate with a rigorous tray hydraulic calculation.
- If your primary focus is maximizing contact time for very low liquid rates: Select a U-flow arrangement. The doubled path length is the most direct way to keep the tray active and prevent weeping without resorting to exotic weir geometries.
- If your primary focus is handling a very large column diameter (typically >3–4 meters) or a high liquid load: Prioritize a two-pass tray design. It’s the best way to cut the hydraulic gradient by half, maintain uniform vapor distribution, and keep the column’s pressure drop within reasonable limits.
- If your primary focus is overall capital cost and ease of maintenance in a column with moderate loads: Start with a single-pass layout. As long as the hydraulic analysis shows no weeping at the lowest turndown and no excessive gradient at the maximum design rate, it remains the most reliable and economical choice.
A properly selected liquid flow arrangement is invisible—the column simply runs smoothly. The moment you discover it was the wrong choice, though, it becomes the root of every operational headache. Design to the hydraulic limits, not just to tradition.
Summary Table:
| Flow Arrangement | Column Diameter | Liquid Flow Rate | Key Advantage | Best For |
|---|---|---|---|---|
| Single Pass | Moderate (1,000–6,000 mm) | Moderate (up to ~110 m³/h) | Simple, cost-effective tray layout | Standard industrial columns |
| U-Flow | Small | Very Low | Prevents weeping, increases residence time | Low-rate services |
| Two-Pass | Large (typically >2,000 mm) | High (90–250 m³/h) | Reduces pressure drop and liquid gradient | High liquid loads |
Enhance Your Chemical Engineering Lab with LABPARK
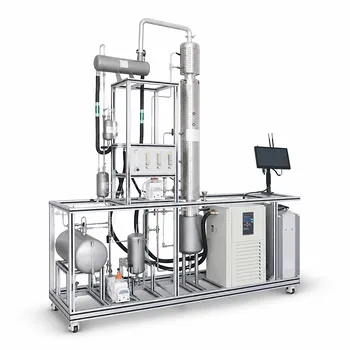
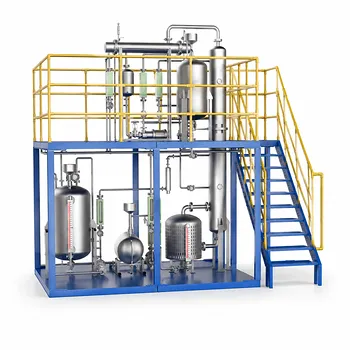
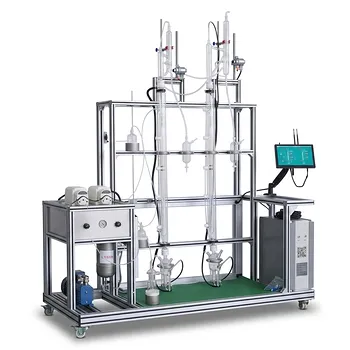
Mastering distillation column hydraulics requires hands-on practice with real-world equipment. LABPARK provides premium Educational and Vocational Unit Operations Pilot Plants in chemical engineering, bioprocess & biotech, and environmental & water treatment.
We help universities, research institutes, and enterprises bridge the gap between theory and industrial practice by offering custom pilot plants equipped with diverse tray geometries and configurations.
Ready to upgrade your laboratory training systems? Contact LABPARK today to request a quote!
Related Products
- Continuous Sieve-Plate Distillation Pilot Plant for Unit Operations Laboratory Education
- Multi-Modal Distillation Unit Operations Training Pilot Plant
- Multi-Functional Special Distillation Educational Pilot Plant
- Dual-Mode Rectification Pilot Plant for Practical Training Unit Operations
- Plate Column Hydrodynamics Tray Demonstration Educational Pilot Plant
People Also Ask
- How do distillation pilot plants validate VLE data? Achieve reliable solvent separation scale-up.
- Why is condensate subcooling critical in pilot plants? Expert Design & Control Guide
- What are the primary reflux ratio control strategies? Master Distillation Unit Operations
- Why is the column performance diagram critical? Optimize distillation pilot plant safety & efficiency.
- Why is experimental validation on a distillation unit operations pilot plant essential? Reduce azeotropic scale-up risk