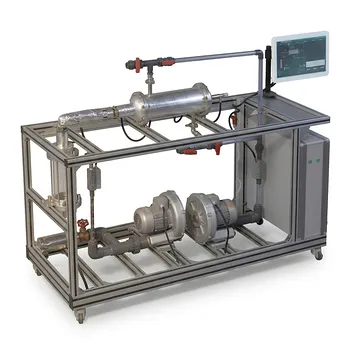
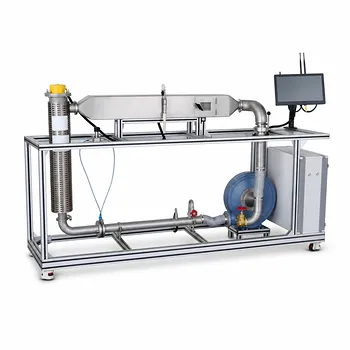
The decision of whether to route a fluid through the tube side or the shell side of a shell-and-tube heat exchanger is never arbitrary—it’s a deliberate engineering choice that balances safety, maintenance, and thermal performance. In educational pilot plants, operators should apply a clear hierarchy: fluids that are fouling, corrosive, toxic, or at high pressure go through the tubes. Saturated steam, viscous fluids, and low-flow-rate streams typically belong on the shell side. These rules ensure the system is safe, cost-effective to maintain, and thermodynamically efficient.
The core insight: always send the fluid that presents the greatest operational risk—whether from fouling, corrosion, toxicity, or pressure—through the tube side, where cleaning is simpler and mechanical strength is inherent. Reserve the shell side for clean, low-pressure fluids or those whose heat transfer relies on the turbulence created by baffles.
Why the Routing Rules Matter
The assignment of fluid paths in a shell-and-tube exchanger is a backbone concept of unit operations. The reasoning behind each rule teaches operators not just what to do, but how to think like a process engineer.
Maintenance and Safety: Problematic Fluids Go Inside
The tube side is the most accessible part of the exchanger. That makes it the logical home for fluids that degrade performance or pose a hazard.
Fouling Fluids
Fouling—the accumulation of scale, debris, or biological growth—destroys heat transfer. Tubes can be mechanically cleaned with brushes or hydroblasting, whereas the shell side is difficult to access. Placing a dirty or scaling fluid inside the tubes gives operators the ability to restore efficiency quickly.
Corrosive Fluids
A corrosive stream can eat through metal. By routing it through the tubes, you confine the material demand for expensive corrosion-resistant alloys to just the tubing and the tube sheets. The shell can remain ordinary carbon steel, dramatically lowering capital cost without sacrificing safety.
Highly Toxic Fluids
Every gasket and joint on a heat exchanger shell is a potential leak point. Placing a toxic fluid inside the tubes minimizes the number of external connections that contain that fluid, reducing the risk of a release into the pilot plant environment. Tubes provide a more secure envelope.
Mechanical Design and Cost: The High-Pressure Argument
The vessel-code math is straightforward: a larger diameter requires a much thicker wall to contain the same pressure. The shell side, with its comparatively vast diameter, would become prohibitively heavy and expensive if forced to handle high pressure.
High-Pressure Fluids
A high-pressure stream can be managed inside the small-diameter tubes with relatively thin walls. This keeps the exchanger lightweight and safe, an essential consideration in an educational setting where students may be working close to the equipment.
High-Temperature Fluids
While not always a primary selector, routing a high-temperature fluid through the tubes also minimizes heat loss to the surroundings. The outer shell remains cooler, reducing insulation needs and making the pilot plant a safer place to learn.
Heat Transfer Optimization: When the Shell Side Wins
The shell side isn’t just a leftover; it offers a specific thermal advantage through baffle-induced turbulence. This makes it the ideal location for fluids that struggle to achieve good heat transfer on their own.
Viscous or Low-Flow-Rate Fluids
Highly viscous fluids, or those moving at low velocities, tend to form smooth, insulating films inside tubes. On the shell side, however, baffles force the fluid to change direction repeatedly. This turbulence enhances mixing and raises the heat transfer coefficient dramatically, even at low Reynolds numbers. Operators can see this difference firsthand by monitoring outlet temperatures.
Saturated Steam
Steam for heating is almost always placed on the shell side. It is clean, so it won’t foul the inaccessible areas, and the open volume of the shell provides ample space for condensate to drain by gravity, preventing water hammer and maintaining stable heat transfer. This is a classic configuration that students should learn as a standard practice.
Understanding the Trade-offs
Real pilot-plant fluids don’t always fit neatly into a single category. When properties conflict, you must prioritize.
- Corrosive and viscous? Safety wins. Route it through the tubes, even at the expense of lower heat transfer, because containing a hazardous material is non-negotiable.
- Both streams are clean and low pressure? The choice may be guided by the fluid that benefits most from shell-side turbulence, or simply by logistics (e.g., which stream is easier to connect to existing piping).
- No single factor dominates? In an educational context, this is an opportunity: students should be taught to perform a weighted evaluation, balancing maintenance frequency, material cost, and thermal performance to make a defensible engineering judgment.
These rules create a reliable starting point. Complete reliance on them without understanding the underlying physics can lead to poor decisions in borderline cases—exactly the kind of critical thinking a pilot plant is designed to develop.
Making the Right Choice for Your Learning Objectives
The configuration of the heat exchanger should align with what you want your operators to observe and internalize. Here’s how to connect fluid routing to pedagogical goals.
- If your primary focus is teaching maintenance and safety: Route a fouling or mildly corrosive fluid (like water with suspended solids) through the tubes. Students can disassemble, clean, and inspect the tube bundle, learning why accessibility matters.
- If your primary focus is demonstrating mechanical design constraints: Use a high-pressure gas or liquid on the tube side. Have students calculate the shell thickness that would be required if the high-pressure fluid were on the shell side instead, revealing the dramatic material savings.
- If your primary focus is heat transfer fundamentals: Select a viscous oil for the shell side and cooling water for the tubes. The students will clearly see the difference in heat transfer coefficients and how baffles compensate for low Reynolds numbers.
- If your primary focus is industrial utility systems: Set up steam as the heating medium on the shell side. This ingrains a near-universal industrial practice while demonstrating condensate drainage and steam-trap operation.
By choosing the routing with purpose, you transform the heat exchanger from a simple piece of hardware into a powerful training tool that teaches the why behind every engineering decision.
Summary Table:
| Fluid Characteristic | Recommended Side | Key Engineering Reason |
|---|---|---|
| Fouling, Corrosive, or Toxic | Tube Side | Easier mechanical cleaning; limits expensive alloy needs; reduces leak points. |
| High Pressure / High Temp | Tube Side | Requires thinner walls for small-diameter tubes, saving material costs and increasing safety. |
| Viscous or Low-Flow-Rate | Shell Side | Baffles induce turbulence, dramatically improving the heat transfer coefficient. |
| Saturated Steam | Shell Side | Clean utility; open volume allows gravity drainage of condensate to prevent water hammer. |
Optimize Your Engineering Labs with LABPARK
Are you looking to bridge the gap between classroom theory and industrial practice? LABPARK designs and manufactures premium Educational and Vocational Unit Operations Pilot Plants in chemical engineering, bioprocess & biotech, and environmental & water treatment.
We help universities, research institutes, and enterprises build safe, durable, and pedagogically effective laboratory systems. Whether you need shell-and-tube heat exchangers configured for student training or comprehensive chemical process units, our team is here to support you.
Contact LABPARK today to discuss your laboratory requirements!
Related Products
- Shell and Tube Heat Exchanger Heat Transfer Coefficient Determination Educational Pilot Plant
- Three-Tube Heat Transfer Educational Pilot Plant for Unit Operations Training
- Comprehensive Multi-Modal Heat Transfer Unit Operations Pilot Plant for Engineering Training
- Dual Mode Heat Transfer Pilot Plant for Unit Operations Training
- Circulating Wind Tunnel Drying and Convective Heat Transfer Coefficient Determination Educational Pilot Plant
People Also Ask
- Why Apply LMTD Correction in Shell-and-Tube Pilot Plants & How to Determine It
- How is the fouling factor (Rd) evaluated? Key Pilot Plant Insights for Students
- How is fouling factor demonstrated using shell and tube pilot plants? Practical Lab Guide
- Why is simulating and calculating fouling factors crucial when operating educational heat exchanger pilot plants?
- Why Estimate Tube Wall Temp in Heat Exchangers? Master Pilot Plant Thermal Resistance