A non-conventional tray design is a strategic way to pack more vapor-liquid contact area into a distillation column without changing its diameter. The core advantage is that it converts the downcomer outlet “shadow” beneath the tray above into active area — using valves, sieve holes, or bubble caps — boosting the total contacting surface and thereby improving tray efficiency. However, the trade-off is that this geometry forces you to derate the effective tray spacing parameter by 20–30% in design calculations, even though the physical distance between trays stays the same.
By reclaiming the area under the downcomer, you gain extra efficiency from essentially “free” real estate. But because the near-tray active zone reduces the disengagement space for droplets, you must treat the column as if it has a smaller spacing to avoid premature flooding — a derating that offsets some of the capacity benefit you’d normally expect from that physical gap.
Understanding the Non-Conventional Tray Deck Design
How It Increases Active Area
In a conventional chord-type downcomer design, the area directly below the downcomer of the tray above is a dead zone. No vapor-liquid contact occurs there, because it’s only a liquid passage.
A non-conventional tray rethinks that. It places bubble caps, sieve holes, or valves directly under the downcomer outlet. That inactive footprint suddenly becomes part of the bubbling area. The result is a larger total active area — and, for the same column diameter, more effective stages or a higher point efficiency. This is a powerful advantage when you cannot increase tower diameter and need every square centimeter of contact.
Why This Translates to Better Tray Efficiency
Tray efficiency depends on how well vapor and liquid mix and approach equilibrium. More active area means more holes, more bubbles, and better vapor distribution across the column cross-section.
By eliminating the dead zone, the design can push a column toward higher overall tray efficiency without altering the weir length or liquid path. For revamps or pilot-scale columns limited by shell size, this can be the difference between meeting a separation target and falling short.
How Tray Spacing Configurations Are Affected
The Derating Requirement for Pilot and Lab Columns
The primary reference makes a critical point: when designing these trays for pilot-scale or laboratory columns, the tray spacing parameter used in capacity calculations must be derated by 20% to 30%. The physical fabrication spacing — say, 18 inches between trays — remains unchanged. But in your sizing equations, you use an effective spacing of only 12.6 to 14.4 inches.
This is not a manufacturing shortcut; it’s a recognition that the vapor-liquid contact is now happening much closer to the tray above. The reduced clearance changes the fluid dynamics in a way that mimics a tighter tray deck.
The Link to Flooding and Vapor Capacity
Tray spacing directly defines the allowable vapor capacity parameter (KSB), which sets the maximum vapor velocity before entrainment flooding takes over. A wider spacing allows a higher KSB and more throughput. Derating the spacing reduces that KSB proportionally.
Why? With active area now directly under the downcomer, large droplets ejected from that zone have a shorter path to the tray above. The effective disengagement height is smaller than the physical spacing. If you ignored this, you’d risk premature flooding because droplets would entrain upward much sooner than a conventional spacing model predicts. Derating the spacing is the practical correction that keeps the column from operating in a flood-prone regime.
Practical Impact on Design Decisions
So what does this mean for your tray layout? The physical column is built with the same tray spacing as before — no extra supports or altered shell flanges are required. But the allowable throughput is calculated as if the trays were closer together.
This can offset some of the capacity gain you might have assumed from adding active area. In some cases, the net benefit is a more efficient column at roughly the same vapor and liquid loads as before. In others, the derating might make the design unattractive if throughput is the absolute limiting factor.
Understanding the Trade-offs
Efficiency Gain vs. Capacity Penalty
The non-conventional design offers a real, measurable increase in tray efficiency. But the derated spacing acts as a capacity brake. If your bottleneck is column diameter and you need more stages, the trade-off is often worth it. If your bottleneck is vapor load, a conventional design with its full effective spacing might handle more throughput, even with slightly less active area.
When the Derating Bites Hardest
The 20–30% derating is most impactful in pilot-scale and laboratory columns where tray spacings are already small (e.g., 12 inches). Taking 30% off 12 inches leaves you with only 8.4 inches of effective space, which severely limits KSB. In such cases, the non-conventional design might become capacity-constrained too quickly, and the efficiency advantage could be negated by the need to run at lower vapor rates.
Cost and Complexity Considerations
While the primary advantage is functional, changing tray geometry can increase fabrication complexity. Although not a direct result of the active area design itself, many non-conventional trays use valve or bubble cap elements under the downcomer. From the supplementary cost data, switching from basic sieve plates to valve trays adds a 0.3 factor to the tray cost multiplier ($F_t$), and bubble caps add 1.6. This should be weighed against the performance gain, especially when the spacing derating might already be forcing you to consider a taller column.
Making the Right Choice for Your Goal
- If your primary focus is maximizing separation efficiency within a fixed diameter: Use a non-conventional tray design. The added active area under the downcomer can give you the extra stages you need, as long as you derate the spacing parameter to stay safe from flooding.
- If your primary focus is maximizing vapor throughput or you have very tight tray spacing: Stick with a conventional chord downcomer design. The full physical spacing keeps your KSB high, and the slight loss in active area is unlikely to bottleneck a capacity-driven project.
Ultimately, non-conventional tray active area design is a powerful tool — but it’s not free. By understanding that the true gain is in efficiency, and that the derating is a necessary guard against flooding, you can decide whether that extra bit of contacting area is worth the trade-off in your specific column.
Summary Table:
| Feature | Conventional Tray Design | Non-Conventional Tray Design |
|---|---|---|
| Downcomer Shadow Area | Inactive (dead zone) | Active (uses valves, sieve holes, or bubble caps) |
| Tray Efficiency | Standard | Higher (maximizes vapor-liquid contact) |
| Effective Spacing Parameter | 100% of physical spacing | Derated by 20% to 30% in calculations |
| Entrainment Flooding Risk | Standard prediction limits | Higher risk unless spacing is properly derated |
Optimize Your Distillation Systems with LABPARK
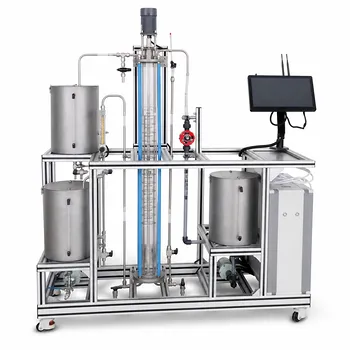
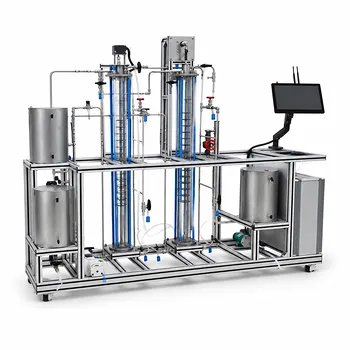
Are you looking to enhance separation efficiency and master column fluid dynamics in your laboratory? LABPARK provides state-of-the-art Educational and Vocational Unit Operations Pilot Plants in chemical engineering, bioprocess & biotech, and environmental & water treatment.
Designed specifically for universities, research institutes, and enterprises, our pilot plants offer hands-on experience with advanced tray configurations and real-world process scaling.
Contact our technical experts today to find the perfect pilot plant solution for your institution!
Related Products
- Continuous Sieve-Plate Distillation Pilot Plant for Unit Operations Laboratory Education
- Multi-Functional Special Distillation Educational Pilot Plant
- Multi-Modal Distillation Unit Operations Training Pilot Plant
- Continuous Batch Extractive Distillation Educational Pilot Plant
- Plate Column Hydrodynamics Tray Demonstration Educational Pilot Plant
People Also Ask
- How does catalyst water concentration affect distillation pilot plant design? Key separation train choices.
- How can real-time carbon number prediction improve distillation pilot plants? Optimize control.
- What are the primary reflux ratio control strategies? Master Distillation Unit Operations
- How to select the right activity coefficient model (Wilson, NRTL, UNIQUAC) for distillation pilot plants?
- Why is vacuum operation capability an essential feature for a distillation unit operations pilot plant? Unlock Efficiency