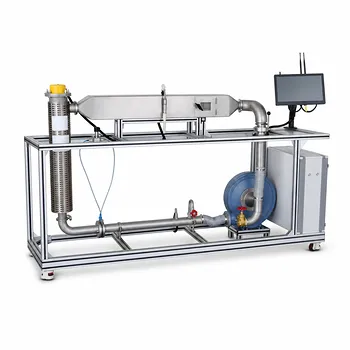
Selecting the right tube diameter and length is the cornerstone of a well-designed laboratory-scale shell-and-tube heat exchanger. Standard tube outer diameters range from ⅝ inch to 2 inches (16 mm to 50 mm), with the smaller ⅝‑inch and ¾‑inch sizes preferred for most pilot‑plant designs because they yield a compact, cost‑effective unit. For tube length, industry norms include 6 ft, 8 ft, 12 ft, 16 ft, 20 ft, and 24 ft—but pilot‑scale installations almost always default to 6 ft or 8 ft to fit typical laboratory space. The final integrated design should target a length‑to‑diameter ratio between 5 and 10.
Start every pilot‑plant design with ⅝‑inch or ¾‑inch OD tubes at a 6‑foot length. These choices give a compact, affordable exchanger that teaches fundamental heat‑transfer principles. Only deviate to larger diameters or longer tubes when you must handle severely fouling fluids or accommodate a very low shell‑side pressure drop—and always verify the resulting length‑to‑diameter ratio stays inside the 5–10 range.
What Tube Diameter Should You Choose?
Standard Sizing Ranges
The primary reference defines a practical spectrum: ⅝ inch to 2 inches (16–50 mm) outside diameter. These dimensions are universally available and allow direct comparison across different pilot‑plant builds.
When to Choose Small Diameters
For a clean, compact design, start with ⅝‑inch or ¾‑inch tubes.
Smaller diameters pack more heat‑transfer area into a given shell diameter, lowering material cost and minimizing the exchanger’s footprint. They also generate higher tube‑side velocities, which boost internal heat‑transfer coefficients.
When to Upgrade to Larger Tubes
Large‑diameter tubes (1 inch and above) are reserved for fouling services.
When the process fluid forms scale, sludge, or sticky deposits, the tube ID must allow mechanical cleaning—brushes or drills need unobstructed passage. Thicker deposits call for even larger bores, even though this raises the shell diameter and cost.
How Long Should Your Tubes Be?
Standard Lengths for Pilot Plants
Industry stock lengths run from 6 ft (1.83 m) to 24 ft (7.32 m), but laboratory‑scale equipment overwhelmingly uses 6 ft or 8 ft tubes.
These lengths align with the ceiling heights and bench‑top layouts of typical unit‑operations labs. An 8‑ft tube is still compact enough to be housed in a vertical shell sitting on the floor, while 6 ft often fits in a benchtop frame.
Why Shorter Tubes Fit the Lab
Space is the controlling constraint. A pilot‑plant skid must also accommodate pumps, piping, instrumentation, and student traffic. Shorter tubes drastically reduce the overall shell height, making the module easier to install, move, and reconfigure between experiments.
The Cost and Performance Trade‑off of Longer Tubes
Longer tubes reduce shell diameter—and therefore shell cost—for a given heat‑transfer area.
However, they increase the shell‑side pressure drop because the flow must travel a longer path around baffles. For a laboratory-scale unit where pressure‑drop demonstrations are valuable, you might deliberately select an 8‑ft or 12‑ft length to show students this effect, provided the lab can accommodate the height.
The Critical Length‑to‑Diameter Ratio
Optimal Range and Why It Matters
Keep the exchanger’s overall L/D ratio between 5 and 10.
This ratio (tube‑bundle length divided by shell diameter) balances heat‑transfer effectiveness against fabrication cost. A ratio inside that window avoids excessively squat or needle‑like exchangers that suffer from poor flow distribution or uneconomical shell construction.
Consequences of Straying Outside 5–10
Below 5, the shell becomes so wide that fluid bypassing around the tube bundle can undermine performance. Above 10, the shell gets very slender, which raises manufacturing complexity and may lead to vibration issues even at pilot‑plant flow rates. During tube‑length selection, quickly check that the chosen diameter and length produce a bundle L/D in this range—if not, adjust either the tube count or the length iteratively.
Understanding the Trade‑offs: Compactness vs. Maintainability
The Double‑Edged Sword of Small Tubes
Small tubes create a tight, economical bundle, but they are difficult to clean internally and can plug quickly with even moderate fouling. If your pilot plant must run a slurry, a polymer solution, or untreated cooling water, the cost savings vanish the first time the bundle must be rodded out—an operation that demands a larger bore.
When Footprint Can’t Be Compromised
If the lab has a strict 6‑ft vertical clearance, you may be forced to stay with 6‑ft tubes and small diameters. In that scenario, manage fouling by pre‑filtering the tube‑side fluid and limiting run times. This is a common compromise in teaching labs: the educational value of a compact, self‑contained rig outweighs the need for industrial‑grade cleanability.
Balancing Length and Shell‑Side Pressure Drop
Longer tubes shrink shell diameter but raise pressure drop.
For a given duty, moving from 6 ft to 8 ft tubes can cut shell diameter by roughly 25 %, but the shell‑side flow path doubles in length, often doubling the pressure drop. In a pilot plant where students measure ΔP across the shell, this can be a deliberate teaching point—or an unacceptable limit if the available pump head is small.
Beyond Dimensions: How Tube Layout Complements Diameter Choice
Layout Matches Cleanability Needs
While not a direct diameter guideline, your tube‑layout pitch works hand‑in‑hand with diameter. If you select larger tubes for fouling, you almost certainly need a square or rotated‑square layout to create continuous cleaning lanes. A triangular layout would block access, negating the benefit of the larger bore. For educational pilot plants that will test both clean and dirty fluids, a square layout with a minimum ¼‑inch (6.4 mm) lane width is a versatile starting point.
Equivalent Diameter in Student Calculations
Students will calculate the shell‑side hydraulic (equivalent) diameter (d_e) to determine the Reynolds number. The formula changes with tube layout:
- Square pitch: (d_e = \frac{1.27}{d_o}(p_t^2 - 0.785,d_o^2))
- Triangular pitch: (d_e = \frac{1.10}{d_o}(p_t^2 - 0.917,d_o^2))
Choosing a layout early constrains the tube diameter and pitch, so your selection of a ⅝‑inch tube with a 1‑inch square pitch, for example, yields one educational data set; swapping to ¾‑inch tube and triangular pitch produces another. This reinforces why you pick the diameter first—it sets the stage for all subsequent analysis.
Designing Your Lab‑Scale Exchanger: A Goal‑Driven Guide
Your final tube dimensions should reflect what the pilot plant is meant to teach and demonstrate.
- If your primary focus is teaching heat‑transfer fundamentals in the smallest possible footprint: Use ⅝‑inch or ¾‑inch OD tubes at a 6‑ft length with a triangular layout. This delivers a compact, low‑cost exchanger that highlights high coefficients.
- If your primary focus is demonstrating fouling, mechanical cleaning, and maintenance procedures: Choose 1‑inch or larger tubes at a 6‑ft or 8‑ft length and force a square layout. Accept the larger shell and higher cost for the ability to pull the bundle and rod each tube.
- If your primary focus is exploring pressure‑drop and thermal‑stress effects: Select 8‑ft tubes (or even 12‑ft if space allows) with a moderate diameter like ¾‑inch, and use a square rotated layout. The longer shell path lets students measure meaningful pressure drops, while the layout provides some cleanability.
- If your primary focus is a versatile, multi‑experiment station: Stay with ¾‑inch tubes, 8‑ft length, and a square pitch with at least ¼‑inch lanes. This gives enough internal clearance for light mechanical cleaning and fits in most lab spaces while still showing the impact of tube‑side velocity.
The right tube diameter and length transform a pilot plant from a simple hardware assembly into a robust teaching instrument. Start small, validate the L/D ratio, and only trade compactness for cleanability when your process fluids demand it.
Summary Table:
| Parameter | Standard Industrial Range | Lab/Pilot Scale Preferred | Key Selection Considerations |
|---|---|---|---|
| Tube Outer Diameter | 5/8" to 2" (16 to 50 mm) | 5/8" or 3/4" | Smaller for heat transfer & compactness; larger (1"+) for fouling/cleaning. |
| Tube Length | 6 ft to 24 ft | 6 ft or 8 ft | Dictated by lab ceiling height, space limits, and target pressure drop. |
| Length-to-Diameter (L/D) | 5 to 10 | 5 to 10 | Balances heat-transfer effectiveness, fluid distribution, and fabrication costs. |
Build Your Next-Generation Unit Operations Lab with LABPARK
Designing a high-performance, educational heat transfer system requires the right balance of scale, safety, and functionality. LABPARK provides state-of-the-art Educational and Vocational Unit Operations Pilot Plants in chemical engineering, bioprocess & biotech, and environmental & water treatment.
Specifically engineered for universities, research institutes, and enterprises, our pilot plants bridge the gap between academic theory and industrial practice.
Ready to elevate your engineering curriculum or research capabilities? Contact LABPARK today to discuss your laboratory specifications and custom pilot-plant configurations!
Related Products
- Shell and Tube Heat Exchanger Heat Transfer Coefficient Determination Educational Pilot Plant
- Three-Tube Heat Transfer Educational Pilot Plant for Unit Operations Training
- Comprehensive Multi-Modal Heat Transfer Unit Operations Pilot Plant for Engineering Training
- Dual Mode Heat Transfer Pilot Plant for Unit Operations Training
- Circulating Wind Tunnel Drying and Convective Heat Transfer Coefficient Determination Educational Pilot Plant
People Also Ask
- Why Apply LMTD Correction in Shell-and-Tube Pilot Plants & How to Determine It
- How to Estimate Shell-Side Pressure Drop in a Shell-and-Tube Heat Exchanger Pilot Plant: Key Parameters Explained
- Why adjust baffle spacing in shell-and-tube heat exchanger pilot plants? Master heat transfer & pressure drop.
- How is the fouling factor (Rd) evaluated? Key Pilot Plant Insights for Students
- How is fouling factor demonstrated using shell and tube pilot plants? Practical Lab Guide