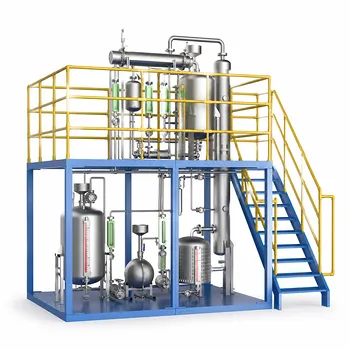
The neutral zone in a two-position controller is not a flaw—it's a deliberate engineering feature that prevents self-destruction. Without it, the actuator would chatter, switching on and off with every microscopic fluctuation around the setpoint. This leads to catastrophic wear and frequent component failures. A correctly sized neutral zone introduces an intentional tolerance band. It allows the controlled variable—such as liquid level or temperature—to drift within an acceptable window before the controller takes action. This simple design choice transforms a fragile, short-lived system into a robust, maintainable one.
In chemical engineering pilot plants, the neutral zone (dead band) directly trades off tight control precision for hardware longevity. By permitting the measured variable to oscillate within a defined range, it dramatically reduces switching frequency, minimizes mechanical wear, and extends the lifespan of solenoids, relays, and pumps—a critical consideration when reliability must coexist with educational or process development goals.
Understanding the Role of the Two-Position Controller
A two-position (on/off) controller is the simplest form of feedback control. It sends a binary command: the final control element is either fully open or fully closed. While easy to implement, its raw behavior presents a fundamental problem in real-world pilot plants.
The Chaos Without a Neutral Zone
Imagine a liquid level setpoint sitting at exactly 50% of a tank. Without a dead band, the moment the level ticks above 50.01%, the controller shuts off the inlet solenoid. A second later, it falls to 49.99% and the controller activates it again. Real systems exhibit process noise, turbulence, or sensor flicker that cause the measurement to flutter around the setpoint.
This leads to rapid cycling—hundreds or even thousands of switching events per hour. Solenoid valves hammer open and closed, relay contacts arc and pit, and pump motors endure punishing start-stop cycles. The result is not just accelerated wear, but often catastrophic failure within days, rendering the pilot plant unusable for critical teaching or research runs.
How the Neutral Zone Restores Order
The neutral zone inserts a gap between the “on” and “off” switching points. For a heating application, the controller might turn the heater on when the temperature drops 1°C below the setpoint, and turn it off when it rises 1°C above. Between those boundaries, the system coasts.
This approach converts a high-frequency, high-wear oscillation into a low-frequency limit cycle with a predictable amplitude. The average value still hovers near the setpoint, but the actuator cycles only a few times per minute—or even per hour. For a pilot plant relying on solenoid valves or small diaphragm pumps, this is the difference between a component that lasts a semester and one that fails mid-experiment.
The Direct Impact on Component Lifespan
Component lifespan in a pilot plant is not just about the rated number of cycles; it's about the brutal reality of frequent, hard switching under load. The neutral zone directly addresses the root cause of failure.
Reducing Mechanical Wear
Every actuation event inflicts microscopic damage. In a solenoid valve, the plunger slams against the seat. In a relay, contacts bounce and experience inrush current stresses. In a gear pump, the sudden torque spike strains the shaft and couplings.
By slashing the number of switching events by an order of magnitude or more, the neutral zone spreads the same total operational cycles over years instead of weeks. This is especially critical in university pilot plants, where equipment often sits idle for months and must work reliably the first time a new student team runs it.
Preventing Secondary Damage from Arcing and Fluid Hammer
High-frequency switching is not just a mechanical issue. Frequent electrical switching without proper snubbing causes contact arcing, welding relay contacts or eroding them until they fail open. In fluid systems, instantaneous valve closures create water hammer pressure spikes that can rupture tubing, destroy pump seals, or crack glass sight gauges.
A neutral zone smooths these impulses into gentle, infrequent transitions. The fluid momentum has time to dissipate during the idle period, protecting fragile lab-scale sensors and fittings.
Understanding the Trade-offs
The neutral zone is a powerful tool, but it is not a free lunch. You must size it against your pilot plant's specific requirements, because a blind implementation can sabotage your process objectives.
Process Variability vs. Hardware Protection
The cost of reducing switching frequency is increased amplitude of oscillation. A wider dead band means the liquid level will swing further from the setpoint. For a simple surge tank in an extraction pilot plant, a 5% level swing is perfectly acceptable. For a sensitive reactor where residence time must be tightly controlled, that same swing might ruin the kinetics.
The key is to identify the maximum allowable deviation (often dictated by process safety or product quality) and then tune the neutral zone to be as tight as possible without falling back into chatter. Overtuning for tightness destroys hardware; overtuning for lifespan destroys data integrity.
Sensor Noise Interaction
Poor sensor placement or electrical noise can corrupt the dead band’s effect. If a thermocouple reads a jumping signal due to a ground loop, the controller sees the temperature bouncing out of the dead band prematurely. The solution is never to widen the dead band to mask noise—that hides a real measurement problem. Always ensure a clean, damped sensor signal before adjusting the controller's neutral zone. Otherwise, you are compensating for a hardware fault with a control strategy that sacrifices control quality unnecessarily.
Making the Right Choice for Your Pilot Plant
The neutral zone design is not a fixed number; it is a decision you must make based on the dominant goal of that specific unit operation. Here is how to approach it:
- If your primary focus is maximizing hardware longevity and minimizing maintenance: Tune for the widest acceptable dead band your process can tolerate. Let the level or temperature swing comfortably within the safe operating limits. This is the correct default for educational equipment where many unskilled users interact with the system.
- If your primary focus is tight control for kinetic data or product quality: Start with a narrow dead band, but install robust components rated for millions of cycles (e.g., proportional valves with zero-crossing solid-state relays instead of simple solenoids). A two-position controller may even be the wrong architecture for this goal—consider transitioning to PID control with an analog final element.
- If your primary focus is safe operation with hazardous materials: Engineer the neutral zone to ensure the oscillation never crosses a safety limit. This often means a narrow band with high-reliability actuators, because component lifespan becomes secondary to containment.
A well-designed neutral zone is the silent guardian of a pilot plant, absorbing the chaos of real-world transients so that your students and researchers don’t have to troubleshoot a smoking relay or a flooded bench. Respect its role, and it will repay you with years of trouble-free operation.
Summary Table:
| Neutral Zone Size | Impact on Lifespan | Control Precision | Best Use Case |
|---|---|---|---|
| Narrow (Tight) | High wear, rapid cycling | High precision (low deviation) | Kinetic reactors, high-safety processes |
| Wide (Loose) | Low wear, extended lifespan | Low precision (high deviation) | Surge tanks, educational pilot plants |
Maximize Hardware Lifespan with LABPARK Pilot Plants
Are you looking to balance precise process control with long-term hardware reliability in your lab? LABPARK provides high-quality Educational and Vocational Unit Operations Pilot Plants in chemical engineering, bioprocess & biotech, and environmental & water treatment. Designed specifically for universities, research institutes, and enterprises, our systems are built to withstand rigorous training and research environments.
Contact LABPARK today to discover how our robustly engineered pilot plants can elevate your teaching and research capabilities.
Related Products
People Also Ask
- How does polyphosphate hydrolysis affect scale and corrosion in pilot plants? Essential Monitoring Guide
- How do predictive thermodynamic models integrate into pilot plants? Bridging Theory and Practice
- Why Use Center Points in Process Analyzer Calibration? Key Benefits Explained
- Which cross-validation strategy should be selected for pilot plant time-series & batch data? Avoid Data Leakage
- How can process control schemes be configured to teach basic and advanced control?