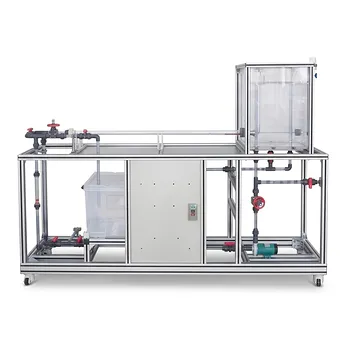
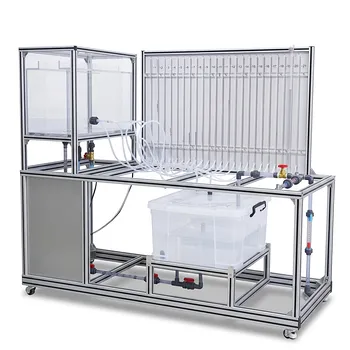
Mapping the curve: Students calculate water surface profiles for nonuniform flow in a lab flume by dividing the channel into discrete reaches and applying a step‑by‑step energy balance. In each reach, the Manning equation supplies the friction slope from average velocity and hydraulic radius, while the energy equation links the change in water depth to the reach length. The result is a computed profile that can be compared directly with observed water depths along the flume.
The core method transforms a continuously varying water surface into a series of small, manageable steps. By averaging hydraulic properties within each reach, students solve for the length needed to produce a measured change in depth—all without complex calculus. This hands-on approach makes the physics of backwater curves tangible and reveals the power of energy principles in open-channel flow.
Understanding the Step‑by‑Step Calculation Process
The core of the lab exercise lies in translating textbook equations into a practical, iterative calculation. The following breakdown walks through the essential steps.
What You Must Measure First
Before any calculation, students need four types of data from the demonstration flume:
- Channel geometry: The bed slope ($S_0$) and the cross‑section shape (usually rectangular, so width and sidewall dimensions).
- Discharge: A steady flow rate ($Q$) measured with a weir or flow meter.
- Roughness: A Manning’s $n$ value, which may be provided or estimated from published tables for the flume material.
- Water depths: A set of depths ($y$) at known distances along the channel, starting upstream and moving downstream toward the obstruction.
The experiment typically creates an M1 backwater profile: a mild slope ($y_0 > y_c$) where a downstream obstruction raises the depth above normal depth. Recording where the depths change is the raw material for the calculation.
Solving for the Reach Length
The familiar energy equation for open channels relates two cross‑sections:
$$y_1 + \frac{V_1^2}{2g} = y_2 + \frac{V_2^2}{2g} + (S - S_0)L$$
Here $V_1$ and $V_2$ are average velocities at each section, $g$ is gravity, $S$ is the friction slope, and $L$ is the unknown length of the reach.
Accurate use of Manning’s equation is the key link. Because the flow is nonuniform, $S$ is not equal to the bed slope. Instead, students compute the friction slope from averaged reach properties:
$$S = \left(\frac{n V_{\text{mean}}}{R_{\text{mean}}^{2/3}}\right)^2$$
where $V_{\text{mean}} = Q / A_{\text{mean}}$, $R_{\text{mean}}$ is the average hydraulic radius (area divided by wetted perimeter) of the two end sections, and $n$ is Manning’s roughness. This averaging trick keeps the calculation simple while capturing the changing conditions.
Putting It All Together in the Lab
The laboratory procedure follows a logical sequence:
- Choose reach boundaries between two measured water depths (e.g., $y_1$ and $y_2$).
- Compute the specific energy ($E = y + V^2/(2g)$) at each section.
- Calculate the friction slope $S$ using the mean hydraulic radius and velocity.
- Solve the energy equation for the reach length $L$.
- Compare the computed $L$ with the actual measured distance between the two stations.
Repeating this for successive pairs of depths yields a series of $L$ values that, when accumulated, map the full water surface profile. Students often tabulate these steps and then plot the calculated profile against the observed data.
Why the M1 Backwater Curve Matters
In a teaching flume, the M1 profile is the most intuitive demonstration because it shows how an obstruction forces the flow to adjust over a long distance upstream.
The Physical Picture
On a mild slope, the flow naturally tends toward the normal depth $y_0$. A downstream weir or sluice gate pushes the local depth above $y_0$, creating a backwater condition. The depth then gradually decreases in the upstream direction, approaching $y_0$ asymptotically. This curve is easily visible as a smooth, rising surface that becomes steeper near the obstruction.
Validating the Energy–Manning Framework
The lab calculation teaches that the shape of the curve is not arbitrary—it is a direct consequence of energy conservation and bed friction. When students see that the computed reach lengths match the physical profile, they validate the underlying assumptions: the Manning equation holds even in gradually varied flow, and the energy equation with a friction term can map real‑world changes.
Understanding the Trade‑offs and Limitations
Every simplified method carries trade‑offs. Being aware of them builds a deeper, more trustworthy analysis.
- Reach‑averaging accuracy: Using average $A$ and $R$ for a reach approximates the true friction slope. The error grows if the depth change between sections is large, so small reach increments improve precision—but require more measurements.
- Steady‑flow assumption: The energy equation as applied assumes the discharge is constant and truly steady. Flume pumps can introduce minor fluctuations that affect results, especially near the obstruction.
- Manning’s $n$ uncertainty: The roughness coefficient is rarely known with high precision in a lab setup. Small variations in $n$ can noticeably shift the calculated $L$ values, a lesson in parameter sensitivity.
- Gradually varied flow validity: The method assumes that streamlines are nearly parallel and hydrostatic pressure applies. Very steep surface slopes near a sharp drop or obstruction violate this, so data points in such regions may deviate.
- End effects: The flume’s entrance region may still be developing from uniform inlet conditions. Measurements taken too close to the inlet can produce systematic offsets.
Making the Lab Exercise Work for Your Goal
Your approach to the calculation can be tailored to the lesson you most want to take away.
- If your primary focus is understanding physical principles: Use a moderate number of reaches and concentrate on the energy balance. Observe how a change in depth alters the velocity head and the friction slope—and how the water surface responds accordingly.
- If your primary focus is precise mapping of the profile: Take many closely spaced depth measurements and reduce reach lengths to a few centimeters. Expect some remaining mismatch and use it to discuss the limits of the Manning‑averaging approximation.
- If your primary focus is parameter sensitivity: Vary the Manning’s $n$ within a plausible range (e.g., ±10 %) and recalculate the profile. This reveals which errors dominate and why professional models calibrate roughness carefully.
- If your primary focus is connecting lab to field: Link the M1 profile to real‑world backwater effects behind dams or bridges. Recognize that the same stepwise energy method, just with more complex geometry, is used in practice.
A single lab session transforms a textbook abstract into a tangible, measurable reality—empowering you to think in energy terms about any nonuniform open‑channel flow you’ll encounter.
Summary Table:
| Step | Action | Key Parameters & Equations |
|---|---|---|
| 1. Baseline Data | Measure channel geometry, roughness, and steady flow rate | Bed slope ($S_0$), Width ($b$), Roughness ($n$), Flow ($Q$) |
| 2. Specific Energy | Calculate specific energy at each measured cross-section | $E = y + \frac{V^2}{2g}$ |
| 3. Friction Slope | Compute friction slope using averaged reach properties | $S = \left(\frac{n V_{\text{mean}}}{R_{\text{mean}}^{2/3}}\right)^2$ |
| 4. Solve Length | Calculate the theoretical distance ($L$) between depths | $L = \frac{E_2 - E_1}{S_0 - S}$ |
| 5. Validation | Compare cumulative computed lengths against physical layout | Observed vs. Computed profile plot |
Elevate Your Engineering Lab with LABPARK
Bring fluid dynamics and open-channel hydraulics to life for your students. LABPARK provides premium Educational and Vocational Unit Operations Pilot Plants in chemical engineering, bioprocess & biotech, and environmental & water treatment. Designed to meet the rigorous demands of universities, research institutes, and enterprises, our advanced demonstration systems bridge the gap between textbook theory and real-world application.
Ready to upgrade your laboratory capabilities? Contact us today to discuss your custom training equipment needs!
Related Products
- Fluid Reynolds Number Demonstration Educational Unit Operations Pilot Plant
- Cavitation Phenomenon Demonstration and Analysis Educational Unit Operations Pilot Plant
- Bernoulli Equation Demonstration Unit Operations Pilot Plant
People Also Ask
- How to use Reynolds number to demonstrate flow transition? Visual Lab Guide
- How does nozzle geometry affect energy efficiency and jet performance in fluid mechanics laboratory demonstration units?
- How do educational pilot plants help visualize Reynolds numbers? Master laminar & turbulent flow.
- How to demonstrate rapid vs slow valve closure? Clear water hammer transient experiments for engineering labs.
- What is the difference between static and stagnation pressure? Master Pilot Plant Flow Measurement