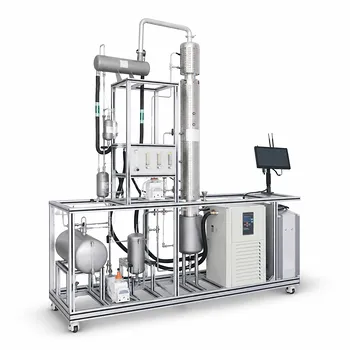
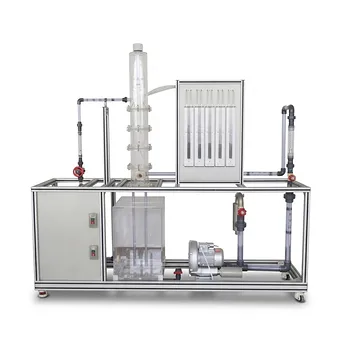
Balancing downcomer and active area flood is the central rule that separates a robust, educational laboratory column from a temperamental one. When rating or designing trays, the goal is to size the downcomer and the active bubbling area so that they reach their hydraulic limits at roughly the same operating point. This prevents either zone from becoming a premature bottleneck, ensuring the column remains hydraulically stable and efficient across a wide turndown range—especially at the low vapor and liquid loads commonly encountered during teaching demonstrations.
The core insight is this: a fractionation tray is only as strong as its weakest hydraulic link. If the downcomer floods long before the active area, you lose separation because liquid backs up and the weir loading becomes chaotic. If the active area jets or entrainment floods first, vapor bypasses the liquid and mass transfer collapses. Equalizing their flood points builds a tray that can gracefully handle the wanderings of a student-operated column without mysterious performance dips.
The Hydraulic Partnership: Downcomers and Active Areas
Every cross-flow tray operates on a delicate partnership between two zones, each with its own flooding mechanism.
How the Active Area Floods
The active area, where vapor contacts liquid through the holes or valves, fails when excessive entrainment carries liquid droplets to the tray above, or when high vapor velocity causes the froth to expand and choke the space between trays. This is largely a function of vapor load and tray spacing. When the active area floods, the column loses fractionation efficiency rapidly because liquid is being recycled upward rather than flowing downward.
How the Downcomer Floods
The downcomer, which transports clear liquid from one tray to the next, fails when liquid backup height exceeds the tray spacing plus weir height. This backup is driven by the combination of clear-liquid height on the tray, the hydraulic gradient, and pressure drop under the downcomer apron. A downcomer flood is catastrophic: liquid accumulates above the tray, pressure surges ripple through the column, and all control is lost.
The Danger of an Isolated Bottleneck
If one zone floods at, say, 60% of design throughput while the other could handle 110%, the weaker mechanism will trip first. The result isn’t just an early flood—it’s that the still-functioning zone is forced to operate in a state of hydraulic maldistribution. A column that limps along with a partially flooded downcomer or an active area in semi-entrainment looks like it’s working until students compare theoretical and actual stages and find a baffling discrepancy.
Why Balance Is Non-Negotiable in Laboratory Columns
In large-scale industrial columns, operators often push throughput and accept that one zone will approach its limit first. Laboratory and pilot-plant fractionation columns face a fundamentally different demand: unpredictable, low-load operation.
The Peril of Premature Flooding Under Variable Loads
Educational demonstrations rarely run at a single design point. Students adjust boil-up rates, change reflux ratios, and test extremes. If the downcomer is undersized relative to the active area, liquid backup becomes the tripwire at every turn. Even a modest increase in liquid rate can choke the small downcomer, flooding the column long before vapor-handling capacity is even close to being used. Conversely, an undersized active area that blasts vapor through a tiny bubbling zone will entrain liquid at boiler settings that should be perfectly safe.
Preserving Efficiency at Turndown
The primary reference highlights a critical point: with balanced flood percentages, a tray maintains efficient operation even at low loadings below 50% of flood. In a laboratory, where columns are often run at fractional capacities to demonstrate startup, shutdown, or partial separations, this balance keeps the trays from weeping excessively or dumping liquid. When the downcomer and active area are equally sized for the design point, neither one becomes an oversized, sluggish zone that kills froth density at reduced rates.
A Laboratory-Specific Imperative
Balanced designs also serve an educational purpose. When students encounter a flood in a well-balanced column, the symptoms are clear and the root cause is learnable—it’s simply too much boil-up. In an unbalanced column, the column floods at an oddly low rate, confounding troubleshooting. The supplementary references note this: understanding hydraulic balance helps students identify operational limits and avoid hydraulic instability during experimental runs.
Understanding the Trade-offs
Perfect balance is an ideal, not always a physical possibility, and chasing it blindly can create new problems.
The Limits of a Single Design Point
A tray can only be balanced for one specific vapor-liquid ratio. In a fractionation column handling a wide range of mixtures or operating pressures, the flood point of each zone shifts differently. A downcomer sized for equality at total reflux may become restrictive at a high reflux ratio, while the active area becomes the bottleneck at a high boil-up. Designers must choose the most representative condition—usually the expected normal operating point or the worst-case hydraulic scenario—and accept some imbalance elsewhere.
The Pitfall of Chasing Exact Percentages
Literature sometimes mentions ideal ranges like 70-73% active area flood and 69% downcomer flood. These are practical targets, not immutable laws. Over-focusing on the numbers can lead to a tray with excessively large downcomers that steal active area, reducing the bubbling zone and lowering overall capacity. The real goal is to ensure that no zone is so excessively limiting that it shuts down the column before the other reaches a reasonable upper limit.
Multi-Pass Tray Complications
The supplementary references warn that in multi-pass trays, unequal downcomer areas cause the smallest downcomer to flood prematurely. In such cases, balance means equalizing the hydraulic gradient and liquid backup across all passes, not just matching a single active-area flood percentage. A lab column with a single-pass tray is simpler, but the principle holds: any imbalance between the liquid-handling capacity of the downcomer and the vapor-handling capacity of the active area will hide a weak link that breaks under student experimentation.
Making the Right Choice for Your Goal
To apply balance principles when rating or designing a lab column tray, tailor your approach to how the column will actually be used.
- If your primary focus is educational demonstrations with variable loads: Prioritize balancing flood percentages at a moderate design point so the column remains forgiving. A tray sized for roughly equal downcomer and active area flood at 70% of maximum capacity will tolerate student mistakes without abrupt flooding.
- If your primary focus is a pilot-plant campaign with a narrow operating window: You can allow a slight bias toward the downstream limit—for example, a downcomer capable of handling a bit more liquid if the expected runs will occasionally push toward high reflux. Balance is still crucial to avoid early failures, but you can shift the equilibrium slightly toward the known dominant load.
- If your primary focus is retrofitting an existing column and you cannot physically alter the tray layout: Use a hydraulic rating spreadsheet to calculate the imbalance. If the downcomer is the bottleneck, reduce tray pressure drop by switching to larger valves or a different hole pattern in the active area; if the active area floods first, consider raising the weir or increasing the downcomer clearance. The principle remains: move the two flood points toward each other.
A laboratory fractionation column is a teaching instrument first and a separation device second. By balancing downcomer and active area flood, you hand students a machine that behaves predictably, fails gracefully, and reveals the hydraulic principles that govern all distillation.
Summary Table:
| Flooding Zone | Primary Cause | Key Impact | Prevention Strategy |
|---|---|---|---|
| Downcomer Flood | Liquid backup exceeds tray spacing & weir height | Catastrophic liquid accumulation & pressure surges | Optimize downcomer area & clearance |
| Active Area Flood | High vapor velocity leading to liquid entrainment | Loss of fractionation efficiency & vapor bypass | Adjust active bubbling area & tray spacing |
Optimize Your Lab’s Unit Operations with LABPARK
Building a reliable, educational fractionation system requires precision engineering. LABPARK provides premium Educational and Vocational Unit Operations Pilot Plants in chemical engineering, bioprocess & biotech, and environmental & water treatment.
Tailored specifically for universities, research institutes, and enterprises, our pilot plants are designed to deliver stable, predictable hydraulics that enrich student learning and support advanced research.
Ready to elevate your laboratory setup? Contact us today to request a quote or custom consultation!
Related Products
- Multi-Modal Distillation Unit Operations Training Pilot Plant
- Continuous Sieve-Plate Distillation Pilot Plant for Unit Operations Laboratory Education
- Plate Column Hydrodynamics Tray Demonstration Educational Pilot Plant
People Also Ask
- How can energy balance equations for condensers & reboilers be validated experimentally? Guide
- How can real-time carbon number prediction improve distillation pilot plants? Optimize control.
- What are the primary reflux ratio control strategies? Master Distillation Unit Operations
- How does catalyst water concentration affect distillation pilot plant design? Key separation train choices.
- Why is vacuum operation capability an essential feature for a distillation unit operations pilot plant? Unlock Efficiency