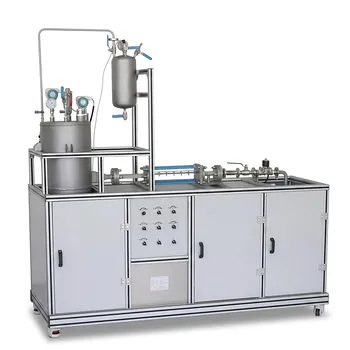
The Mach number at any point in a frictionless, converging-diverging Venturi nozzle is found by measuring the local static pressure and knowing the inlet stagnation conditions. You use these measurements to first compute the local static temperature from an isentropic relation. Then, you determine the flow velocity from the energy equation and the local speed of sound from the ideal gas law. Finally, you take the ratio of these two values to get the Mach number.
For a teaching or gas dynamics test rig, the standard approach assumes frictionless, adiabatic flow. You record the inlet pressure and temperature (acting as stagnation values), measure the static pressure at the section of interest, and then step through the isentropic and energy equations. This yields the Mach number without any direct velocity or temperature measurements at the throat or exit – only pressures and a single inlet temperature are needed.
Why This Calculation Works in a Teaching Rig
The method taught in unit‑operations labs leverages the fact that a well‑designed Venturi nozzle with a large upstream settling chamber closely approximates isentropic flow. This lets you replace difficult‑to‑measure dynamic quantities with simple pressure and temperature readings.
The Starting Assumptions
The entire procedure rests on three simplifying conditions.
- Frictionless flow: No viscous shear inside the core flow, so no pressure loss from wall friction.
- Adiabatic process: No heat transfer between the fluid and the nozzle walls.
- Negligible inlet velocity: The upstream reservoir is large enough that the inlet velocity is effectively zero, making (p_1) and (T_1) the stagnation (total) properties.
Measurable Inputs from the Equipment
You need only three numbers from a typical thermodynamics teaching unit.
- Inlet pressure (p_1): The static pressure in the settling chamber, equal to the total pressure (p_0).
- Inlet temperature (T_1): The stagnation temperature (T_0).
- Local static pressure (p_2): Measured via a pressure tap at the exact cross-section of interest (e.g. throat or a diverging‑section location).
Step‑by‑Step Determination of the Mach Number
With the measurements in hand, the calculation follows a clear chain. Each step uses a fundamental principle of compressible flow.
1. Find the Local Static Temperature Using the Isentropic Relation
For an ideal gas undergoing an isentropic change, temperature and pressure are linked by the ratio of specific heats ((k = c_p/c_v)).
[ T_2 = T_1 \left(\frac{p_2}{p_1}\right)^{\frac{k-1}{k}} ]
Here (T_2) is the static temperature at the measurement point. This relation is the key that unlocks the entire process, because it converts a pressure reading into a temperature without a thermocouple.
2. Compute the Flow Velocity from Energy Conservation
The steady‑flow energy equation for a calorically perfect gas, with negligible inlet velocity, gives:
[ v_2 = \sqrt{2c_p(T_1 - T_2)} ]
You can express the specific heat (c_p) in terms of the specific gas constant (R) and the ratio of specific heats: [ c_p = \frac{kR}{k-1} ]
For air, (k = 1.4) and (R = 287\ \mathrm{J/(kg\cdot K)}). This step yields the actual fluid speed at the cross‑section.
3. Determine the Local Speed of Sound
The speed of sound in an ideal gas depends only on the local temperature:
[ c_2 = \sqrt{kRT_2} ]
This is the velocity at which pressure disturbances travel through the fluid at that exact point in the nozzle.
4. Calculate the Mach Number
The Mach number is simply the ratio of the flow velocity to the local speed of sound.
[ M_2 = \frac{v_2}{c_2} ]
At the throat, this value will indicate whether the flow is choked ((M = 1)) or subsonic. In the diverging section, it tells you whether you are observing supersonic expansion or subsonic deceleration.
Understanding the Trade-offs and Limitations
Even in a pristine teaching environment, the frictionless, adiabatic model has practical boundaries you must acknowledge.
The Real Nozzle Isn’t Truly Frictionless
Wall boundary layers grow along the nozzle contour, slightly reducing the effective flow area and causing a small stagnation pressure loss. This can make the measured static pressure (p_2) a fraction of a percent different from the isentropic value, leading to a minor error in the calculated Mach number. For an instructional apparatus, this error is usually negligible but becomes important in high‑stakes research.
Heat Transfer Assumption Must Be Validated
The adiabatic condition requires that the nozzle and fluid be at thermal equilibrium before the run. If the apparatus is not pre‑heated or if the flow is very slow, heat exchange with the metal walls can invalidate the temperature relation. Always let the rig reach steady state before recording data.
The Inlet Velocity Cannot Always Be Neglected
A small reservoir or a nozzle connected directly to a blower may have a non‑zero inlet velocity. In that case the measured (p_1) and (T_1) are not true stagnation values, and you would need to use the full energy equation with a measured inlet velocity to avoid a systematic error.
Making the Right Choice for Your Lab or Analysis
The method you select depends on what you aim to demonstrate or measure, and on the rig you have available.
- If your primary focus is demonstrating compressible flow theory: Use the frictionless, adiabatic method exactly as described. Its clarity reinforces the core physics and makes the math intuitive for students.
- If your primary focus is benchmarking equipment with higher accuracy: Instrument the nozzle with a total‑pressure probe and a thermocouple at the measurement plane to directly capture local stagnation properties, then pair that with the static pressure tap to compute Mach number without the full isentropic assumption.
- If your primary focus is minimizing experimental uncertainty: Use a micromanometer or digital pressure transducer with high resolution, and measure the inlet temperature with a calibrated RTD. Combine these with an average of several pressure readings to reduce random scatter.
The frictionless approach remains the cornerstone of nozzle flow analysis because it teaches the inseparable link between pressure, temperature, velocity, and the speed of sound. Once you master this calculation, you can confidently diagnose and predict how any Laval nozzle will behave—and you will always know exactly where the assumptions start to drift from reality.
Summary Table:
| Step | Objective | Key Equation / Relation |
|---|---|---|
| 1. Local Static Temperature ($T_2$) | Find temperature at the measurement point | $T_2 = T_1 \left(p_2 / p_1\right)^{\frac{k-1}{k}}$ |
| 2. Flow Velocity ($v_2$) | Compute actual fluid speed | $v_2 = \sqrt{2c_p(T_1 - T_2)}$ |
| 3. Local Speed of Sound ($c_2$) | Determine speed of sound at local $T_2$ | $c_2 = \sqrt{kRT_2}$ |
| 4. Mach Number ($M_2$) | Calculate final ratio of velocities | $M_2 = v_2 / c_2$ |
Bring Thermodynamics Theory to Life with LABPARK
Looking to equip your lab with precision instrumentation for fluid dynamics and thermodynamics? LABPARK provides premium Educational and Vocational Unit Operations Pilot Plants in chemical engineering, bioprocess & biotech, and environmental & water treatment.
Designed specifically for universities, research institutes, and enterprises, our pilot plants help students and researchers easily bridge the gap between theoretical calculations and practical observations.
Ready to upgrade your laboratory capabilities? Contact LABPARK today to explore our unit operations solutions!
Related Products
- Cavitation Phenomenon Demonstration and Analysis Educational Unit Operations Pilot Plant
- Orifice and Venturi Flowmeter Calibration Educational Pilot Plant for Fluid Mechanics Laboratory
People Also Ask
- How do pilot plants teach U-tube manometers? Master Differential Pressure Calculations
- How to teach pump cavitation vs. gas binding? Interactive pilot plant teaching guide.
- What factors should be considered when selecting float valve types? F1 vs. V-4 vs. T-type Guide
- How does an FIA biosensor improve fermentation monitoring compared to HPLC? Speed & automation.
- What are key parameters for stable biosensor FIA in bioprocess training? Achieve optimal performance.