Shell-and-tube heat exchangers in educational pilot plants require carefully controlled fluid velocities. For liquids, the tube-side velocity should be 1 to 2 m/s (with a hard maximum of 4 m/s) and the shell-side should be 0.3 to 1 m/s. For gases, the velocity is pressure-dependent: 50–70 m/s under vacuum, 10–30 m/s at atmospheric pressure, and 5–10 m/s under high pressure.
In an educational pilot plant, the goal isn't just to transfer heat—it's to create a stable, safe, and instructive operating window. The recommended velocity ranges ensure you simultaneously demonstrate industrial relevance, protect equipment from erosion, maintain measurable pressure drops, and provide students with a clear, safe experimental baseline.
Operating Guidelines for Educational Pilot Plants
The primary challenge in a pilot plant is scaling down industrial reality into a safe, observable, and repeatable teaching moment. Fluid velocity is the single most critical parameter you will set, as it directly controls heat transfer rate, fouling resistance, and equipment longevity.
Target Velocities for Liquids
Liquid velocity fundamentally dictates the flow regime and the cleanliness of your heat transfer surfaces. In a lab setting, the goal is to maintain turbulent flow without damaging the thin-walled tubes.
-
Tube-Side Liquid Flow: The core operating range is 1 to 2 m/s. This range is high enough to prevent the sedimentation of particles and scaling, which would otherwise introduce a confounding variable into your students’ heat transfer experiments. For clean water, you can push this to 2.5 m/s to clearly demonstrate turbulent flow dynamics, but never exceed 4 m/s—the point where erosion of tube inlets becomes a real risk, especially with particulate-laden fluids.
-
Shell-Side Liquid Flow: Target a much lower velocity of 0.3 to 1 m/s. The shell side is designed for lower volumetric flows but complex cross-flow patterns. Keeping velocity in this range ensures that the pressure drop across the baffles remains measurable but not dominant, helping students clearly isolate the shell-side heat transfer coefficient without the data being lost in noise from an excessive pressure ratio.
Target Velocities for Gases
Gas velocity is dictated by pressure, because gas density—and thus its volumetric flow rate for a given mass flow—changes dramatically with pressure. A single velocity target is meaningless without this context.
-
Atmospheric Pressure (10–30 m/s): This is the standard window for a pilot plant exhausting to ambient conditions. It provides a safe, low-noise operating mode while still generating a measurable outlet temperature change for students to analyze against theoretical models.
-
Vacuum Conditions (50–70 m/s): Under a vacuum, gas density is extremely low. High linear velocities are required to achieve any meaningful mass flow and convective heat transfer coefficient. Operating here teaches the real-world challenges of high-volume, low-pressure-drop systems.
-
High-Pressure Systems (5–10 m/s): When your gas is compressed, its density is high, and its energy content is significant. Reducing the velocity is a critical safety protocol to prevent tube vibration damage and contain the energy of a potential leak or rupture within a manageable safety perimeter.
The Physics of the Trade-off
Choosing a velocity is an exercise in balancing two competing forces: thermal efficiency and fluid resistance. This is the core lesson any pilot plant operator must learn.
Maximizing Heat Transfer and Minimizing Fouling
Higher fluid velocity directly increases turbulence. This turbulence tears away the stagnant boundary layer at the tube wall, which acts as the primary insulator in a heat exchanger. By boosting velocity from the low end to the high end of the recommended range, you can significantly increase the overall heat transfer coefficient. Furthermore, this higher shear stress physically scours the tube surface, preventing the deposition of dirt or crystallizing solids that create a fouling resistance. In an educational context, running the exchanger at a higher velocity is how you try to get your experimental U-value (e.g., for water-water, 800–1500 W/m²·°C) to match the textbook ideal.
Controlling Pressure Drop and Energy Cost
The cost of that perfect heat transfer coefficient is pressure drop, which rises with the square of velocity. The small-diameter tubing common in pilot plants is especially sensitive to this. A velocity that is too high will result in a pressure drop so large that the pump or compressor's energy consumption dominates the system, and the resulting drop in saturated temperature for a condensable vapor can invalidate your heat balance calculations. The recommended ranges are a "sweet spot" where the frictional cost is economically observable but not catastrophically limiting.
Understanding the Trade-offs: Safety, Scale, and Simulation
An educational pilot plant has constraints that a refinery does not. Surface-level velocity numbers can lead to operational failure if you don't adapt them to your specific fluid system.
The Primacy of Safety
Standard velocity rules are immediately overridden by safety considerations. When operating with flammable or low-conductivity organic solvents, a high velocity can generate static electricity capable of causing an internal fire. In a pilot plant, you should impose a hard cap—often below 1 m/s—for flammable liquids, regardless of what the heat transfer optimization suggests. The supplementary rule for gases—calculating velocity as a fraction of pressure over density—is your guide here to ensure safe momentum levels.
Practical Operation and Line Sizing
Your nozzle and pipe diameters are a direct consequence of your velocity choice. The formula d = sqrt(4 * V_s / (pi * u)) is your sizing tool. An educational setup often has a fixed pump or compressor; you must adjust your pipe diameter to ensure the resulting velocity falls into the recommended bracket. A common mistake is to connect a high-capacity pump to a tiny-diameter lab-scale exchanger, instantly forcing a velocity far beyond 4 m/s, which causes vibration, noise, and rapid erosion.
Strategic Flow Path Selection
Velocity targets are meaningless if the fluid is in the wrong place. The rule for educational pilot plants is clear:
- Put the problem fluid in the tubes. If a fluid is corrosive, high-pressure, or heavily fouling, it must go tube-side. This protects the expensive glass or steel shell, makes cleaning easier for students between lab sessions, and enables the higher velocities needed to manage fouling.
- Put the viscous fluid in the shell. Highly viscous oil will struggle to become turbulent in a straight tube. Instead, send it through the shell-side baffles, which promote turbulent mixing even at a low velocity of 0.3–0.5 m/s, making heat transfer measurably effective.
Making the Right Choice for Your Teaching or Research Goal
Your target velocity should be a conscious decision based on your primary learning or research objective. Use the following guide to select your operating point within the recommended envelope:
- If your primary focus is demonstrating heat transfer fundamentals: Target a high tube-side liquid velocity of 2.0–2.5 m/s to maximize turbulence and minimize fouling resistance, giving you a U-value closest to theoretical predictions.
- If your primary focus is process control and energy economics: Operate at a moderate velocity of 1.0–1.5 m/s to create a measurable pressure drop that students must factor into their system energy balance calculations.
- If your primary focus is simulating an industrial vacuum condensation process: Set your gas velocity to the high end of the vacuum range, near 60–70 m/s, to achieve a meaningful mass flow and observe the critical relationship between vapor velocity and condenser performance.
- If your primary focus is handling hazardous or unfamiliar fluids: Always prioritize safety over thermal performance and start your experiments at the lowest practical velocity, carefully increasing it only as you confirm safe operation.
By treating velocity not as a fixed rule but as an active experimental variable, you transform your pilot plant from a simple demonstration unit into a powerful tool for teaching real-world engineering judgment.
Summary Table:
| Fluid Type | Location / Condition | Recommended Velocity | Key Purpose / Constraint |
|---|---|---|---|
| Liquid | Tube-Side | 1.0 – 2.0 m/s (Max 4.0 m/s) | Promotes turbulence, prevents fouling & tube erosion |
| Liquid | Shell-Side | 0.3 – 1.0 m/s | Manages pressure drop across baffles |
| Gas | Vacuum | 50 – 70 m/s | Compensates for low gas density to ensure flow |
| Gas | Atmospheric | 10 – 30 m/s | Standard safe lab operation with measurable delta T |
| Gas | High Pressure | 5 – 10 m/s | Safety protocol to prevent tube vibration & leakage |
Enhance Your Engineering Lab with LABPARK Pilot Plants
Are you looking to provide your students with safe, hands-on experience in heat transfer and fluid dynamics?
LABPARK designs and manufactures high-quality Educational and Vocational Unit Operations Pilot Plants in chemical engineering, bioprocess & biotech, and environmental & water treatment. Specifically tailored for universities, research institutes, and enterprises, our pilot plants ensure safe operations while delivering precise, textbook-matching experimental results.
Ready to elevate your training facilities? Contact us today to find the perfect pilot plant solution for your lab!
Related Products
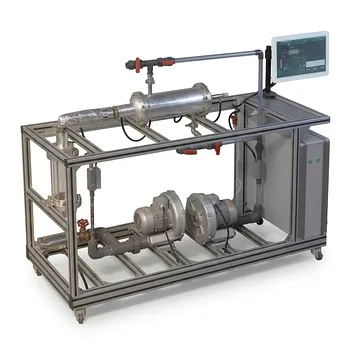
- Shell and Tube Heat Exchanger Heat Transfer Coefficient Determination Educational Pilot Plant
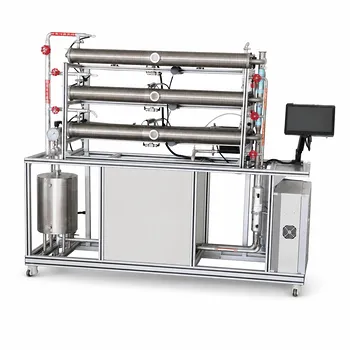
- Three-Tube Heat Transfer Educational Pilot Plant for Unit Operations Training
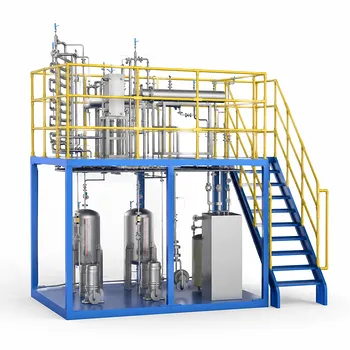
- Comprehensive Multi-Modal Heat Transfer Unit Operations Pilot Plant for Engineering Training
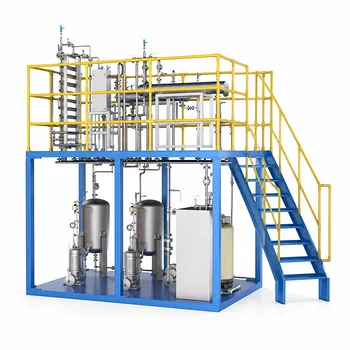
- Dual Mode Heat Transfer Pilot Plant for Unit Operations Training
People Also Ask
- Why Apply LMTD Correction in Shell-and-Tube Pilot Plants & How to Determine It
- Why adjust baffle spacing in shell-and-tube heat exchanger pilot plants? Master heat transfer & pressure drop.
- How to Estimate Shell-Side Pressure Drop in a Shell-and-Tube Heat Exchanger Pilot Plant: Key Parameters Explained
- How is the fouling factor (Rd) evaluated? Key Pilot Plant Insights for Students
- How is fouling factor demonstrated using shell and tube pilot plants? Practical Lab Guide