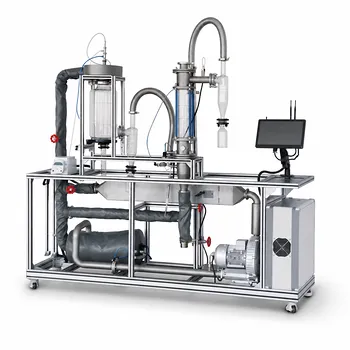
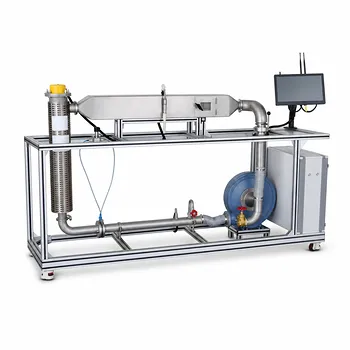
The key difference lies in the energy balance. Isenthalpic drying is an idealized model where the enthalpy of the drying air remains constant—no net heat is added or lost in the dryer chamber. Non-isenthalpic drying is the real-world case where heat losses, supplementary energy input, and material heating cause the air’s enthalpy to change. In a laboratory unit operations system, you simulate the ideal process by assuming adiabatic conditions and plotting a constant-enthalpy line on an $H-I$ diagram, then simulate the actual process by measuring inlet and outlet conditions to plot the deviated operating line.
Isenthalpic drying gives a theoretical baseline that simplifies the psychrometric analysis, but it ignores the energetic realities that dictate dryer sizing, cost, and product quality. The true value of a lab-scale drying experiment lies in quantifying how far the real process deviates from this ideal, making the non-isenthalpic simulation a critical step in moving from textbook principles to practical engineering.
The Idealized Model: Isenthalpic Drying
Why an “Ideal” Assumption Matters in Teaching and Analysis
The isenthalpic model strips away complications. It assumes zero supplementary heat ($Q_D = 0$), zero heat loss to the surroundings ($Q_L = 0$), and zero heat absorbed by the wet material.
Under these conditions, the total energy of the airstream does not change as it passes through the dryer. This lets you draw a single, straight operating line right along a constant enthalpy curve on the $H-I$ diagram.
How You Simulate It in the Lab
In a pilot-scale unit operations lab, you simulate isenthalpic drying by operating the dryer without any extra heating elements active, while insulating the chamber as well as possible to minimize losses. You then take the inlet air conditions (dry-bulb temperature, humidity) and follow the constant enthalpy line to find the theoretical outlet state.
This exercise is not meant to replicate reality. It is a powerful teaching tool that burns the fundamental psychrometric relationships into the student’s mind, providing a crystal-clear reference point.
The Real-World Process: Non-Isenthalpic Drying
The Energy Balance That Changes Everything
The moment you account for real heat flows, the drying line deviates. The equation becomes a balance between added supplementary heat ($Q_D$), heat lost to the environment ($Q_L$), and heat carried away by the heated product.
Depending on which side of the equation dominates, the air’s enthalpy either increases or decreases from inlet to outlet. These three deviations define all practical dryer behavior.
Three Types of Non-Isenthalpic Deviation
When the line falls below the isenthalpic line ($I_1 > I_2$): This happens when your heat losses to the ambient and the energy used to warm up the solid material exceed whatever supplementary heat you are providing. The air leaves the dryer with less enthalpy than it had coming in, resulting in a flatter actual operating line on the chart.
When the line rises above the isenthalpic line ($I_1 < I_2$): This occurs when you supply significant supplementary heat ($Q_D$) directly inside the drying chamber. More energy is added than lost, so the air’s enthalpy increases during the process. On the $H-I$ diagram, the operating line slopes upward relative to the constant enthalpy curve.
The special case of an isothermal line: If you precisely control the supplementary heat to compensate exactly for the evaporative cooling effect, the air temperature remains constant. This is a deliberate design choice in many sensitive drying applications to prevent thermal damage.
Simulating the Actual Process on a Laboratory Dryer
Simulating a non-isenthalpic process requires instrumentation. You measure the dry-bulb and wet-bulb temperatures at both the inlet and the outlet of the drying chamber under steady-state operation.
With that data, you plot the true operating line point-by-point on the $H-I$ diagram. Students can then directly visualise the gap between the ideal constant-enthalpy line they drew earlier and the real measured points, turning an abstract thermodynamic concept into a concrete, numeric deviation.
Understanding the Trade-offs
The Convenience Trap of the Ideal Model
Using only the isenthalpic assumption for dryer design is dangerously simplistic. It will dramatically underestimate the heat energy required to evaporate a given amount of water because it ignores the unavoidable thermal inertia of the equipment and the product itself.
This leads to undersized heaters, unachievable drying rates, and significant discrepancies between pilot-scale data and projected full-scale performance.
The Complexity Cost of Reality
Accurately modelling the non-isenthalpic process in the lab demands careful experimental control. Small, unmeasured drafts or fluctuating ambient temperatures can easily skew the heat loss term ($Q_L$) and wipe out the repeatability of your operating line.
The skill lies in distinguishing meaningful process-induced deviations from random experimental noise. A poorly instrumented lab dryer can therefore hide the very phenomena you are trying to teach, making the ideal model seem more reliable simply because it is less noisy.
Making the Right Choice for Your Goal
The correct approach for your laboratory simulation depends entirely on what you are trying to achieve.
- If your primary focus is teaching psychrometric fundamentals: Start exclusively with the isenthalpic process. Force students to plot the constant-enthalpy line from theoretical inlet conditions before even turning the dryer on, to cement the core chart-reading skill.
- If your primary focus is process design or scale-up: Simulate the non-isenthalpic process rigorously. Use multiple inlet/outlet humidity and temperature probes to quantify the actual enthalpy change, and treat the isenthalpic line only as a baseline for calculating the efficiency loss factor.
- If your primary focus is product quality and heat sensitivity: Map the isothermal operating zone by manipulating the supplementary heater until the chamber temperature holds steady, and compare the drying cycle time against the faster, but potentially hotter, non-isenthalpic alternatives.
Moving from the clean, constant-enthalpy line to the messy, deviated reality is precisely where chemical engineering insight is born—the laboratory dryer simply provides the controlled stage for that critical moment of understanding.
Summary Table:
| Feature | Isenthalpic Drying | Non-Isenthalpic Drying |
|---|---|---|
| Enthalpy | Constant (Idealized) | Variable (Real-world) |
| Heat Transfers | No losses, no added heat | Accounts for losses & supplementary heat |
| Lab Simulation | Theoretical baseline (adiabatic) | Active measurement of inlet/outlet states |
| Primary Use | Teaching psychrometric basics | Industrial process design & scale-up |
Bring Real-World Chemical Engineering to Your Lab
Bridging the gap between theoretical thermodynamics and practical engineering is critical for student success and research accuracy. LABPARK provides state-of-the-art Educational and Vocational Unit Operations Pilot Plants in chemical engineering, bioprocess & biotech, and environmental & water treatment for universities, research institutes, and enterprises.
Ready to upgrade your laboratory with advanced drying systems and pilot plants? Contact LABPARK today to discuss your custom equipment needs with our technical team!
Related Products
- Multi-Functional Drying Educational Unit Operations Pilot Plant
- Circulating Wind Tunnel Drying and Convective Heat Transfer Coefficient Determination Educational Pilot Plant
People Also Ask
- Vacuum vs. Atmospheric Drying: How to Choose the Right Pilot Plant Configuration for Your Lab
- Why is dry-basis moisture content preferred over wet-basis? Simplify your drying pilot plant balances.
- How do seasonal changes affect drying pilot plant blower requirements? Key sizing tips.
- Why Use PTFE & Hastelloy in Chemical Pilot Plants? Prevent Corrosion & Ensure Safety
- How do deviations in estimating latent heat impact pilot plant thermal systems? Avoid hardware mis-sizing.