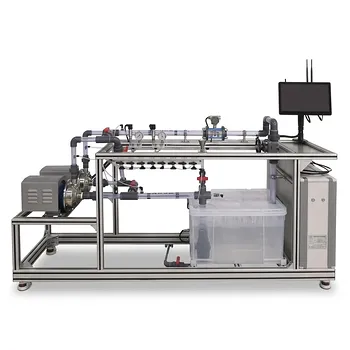
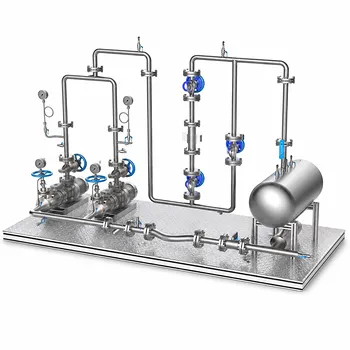
Cavitation and motor overload are not inevitable—they are predictable failures that follow from ignoring four deceptively simple installation and startup rules. In a chemical engineering unit operations pilot plant, the critical guidelines are: install the pump at a height that guarantees the inlet pressure remains above the fluid’s vapor pressure, completely prime the pump and suction line before startup, start with the discharge valve fully closed, and never stop monitoring the pump for abnormal leakage, heat, or vibration. Master these, and you eliminate the two most common causes of centrifugal pump destruction.
The core insight is that centrifugal pumps rely on a delicate balance of pressure and flow at startup. Cavitation is prevented by ensuring the pump’s suction-side energy (installation height, pipe design, and fluid properties) always keeps the liquid in its liquid state. Motor overload is avoided by exploiting the pump’s own characteristic curve—starting at shut-off, where power demand is at its absolute minimum. In a pilot plant, where fluids, temperatures, and operators change, following these rules with a calculated safety margin is not a recommendation; it is the operating philosophy that separates a reliable teaching tool from a recurring maintenance headache.
The Root Cause of Failure: Why Cavitation and Overload Happen
To prevent the problem, you must see it before it happens. Cavitation and motor overload are not random events—they are direct mechanical reactions to violating the pump’s physical limits.
How Cavitation Destroys a Pump from the Inside
Cavitation occurs when the local static pressure at the pump impeller inlet falls below the liquid’s vapor pressure at the operating temperature. The liquid flashes into vapor bubbles that then collapse violently as they move to higher-pressure regions. This implosion generates intense shock waves, creating the classic sound of “gravel” and pitting metal surfaces. In a pilot plant, this means sudden performance loss, destructive vibration, and eventual impeller failure.
Why an Unloaded Start Creates a Surge of Overload
A centrifugal pump’s power consumption is a direct function of flow rate. At zero flow (dead-head), the impeller simply churns, requiring minimal power. The moment you start with the discharge valve open, the motor must instantly overcome full system inertia and deliver maximum hydraulic power. This inrush can exceed the motor’s safe limits, tripping breakers or burning windings. Starting against a closed valve exploits the pump’s own lowest-power point to protect the motor.
Critical Installation Guidelines to Eliminate Cavitation
The installation phase sets the hydraulic destiny of the pump. If you get the suction-side design wrong, no amount of careful startup will save you.
Calculating the Allowable Installation Height
The pump’s allowable geometric suction lift is dictated by Bernoulli’s equation applied from the supply tank’s surface to the pump inlet. You must know the pump’s required Net Positive Suction Head (NPSH) or its rated allowable suction lift ($H_s'$). Factor in the pipeline friction losses, the local atmospheric pressure (which decreases with altitude), and the fluid’s vapor pressure at maximum operating temperature. If the liquid density, temperature, or site pressure differ from the pump’s standard test conditions (20°C water, sea level), the rated $H_s'$ must be corrected. The final installed height must ensure the actual NPSH available always exceeds the NPSH required by the pump.
The Non-Negotiable Safety Margin
In a pilot plant, calculations are only the starting point. Fluctuations in liquid level, varying filter conditions, or small errors in pipe roughness estimates can eat into your margin. The pump must be installed 0.5 to 1.0 meters lower than the calculated maximum allowable suction height. If that calculation yields a negative number, you are not allowed to lift the liquid at all. The pump must be placed below the liquid level in the feed tank—a configuration known as flooded suction or gravity-fed installation. This positive head is the ultimate insurance against cavitation.
Suction Piping: The Invisible Thief of Pressure
Every fitting, bend, and inch of small-diameter pipe on the suction side steals pressure from the pump inlet. In a pilot plant, long horizontal runs, strainers that clog during experiments, or partially open valves are a silent invitation to cavitation. Use suction lines that are one size larger than the pump’s inlet flange, keep them straight and as short as possible, and use full-bore valves. Minimizing suction-side resistance is as critical as the installation height itself.
Layout as a Primary Design Tool
Pilot plants are teaching tools, and their layout must teach proper engineering. Suction vessels like distillation column reboilers or extraction feed tanks must be physically elevated above the pump centerline. This is not just about headroom; it is about providing the gravity head that guarantees stable NPSH. Raising a vessel foundation by a meter is a one-time capital decision that pays for itself in decades of cavitation-free student training sessions.
Startup Procedures That Defeat Motor Overload and Air Binding
Installation sets the stage; startup is the moment of truth. A precise sequence turns a potentially destructive event into a routine operation.
The Iron Rule of Priming: No Liquid, No Start
A centrifugal pump is a kinetic machine that cannot pump air. Before startup, the pump casing and the entire suction line must be flooded with the process liquid. Trapped air pockets cause the pump to “air bind,” spinning without generating flow, which destroys the mechanical seal and causes rapid overheating. Vent plugs at the high points of the casing are there for a reason—use them until a solid stream of liquid appears.
Closed-Valve Startup: Exploiting the Power Curve
This is the single most important startup rule for motor protection. With the discharge valve fully closed, the pump operates at its shut-off point, where the input power requirement is at its minimum—often 30-50% of its peak load. Confirm the valve is closed, momentarily bump the motor to check rotation, and then start. The motor will come up to speed gently, without the mechanical shock of instantly accelerating a full column of liquid. The same rule applies at shutdown: close the discharge valve before stopping the pump to prevent backflow that can spin the impeller backwards and cause severe water hammer.
The Complete Step-by-Step Startup Sequence
- Verify Flooded Suction: Check that the feed tank level provides adequate NPSH and that the suction valve is fully open.
- Prime the Pump: Open vent ports and fill the casing completely with liquid until all air is expelled.
- Confirm Closed Discharge: Ensure the discharge valve is shut tight.
- Start the Motor: Press start and immediately listen for abnormal noise.
- Open Discharge Slowly: Once the pump reaches full speed and discharge pressure stabilizes (usually within seconds), gradually open the discharge valve to the desired flow. Monitor the ammeter during this step; the motor current should never exceed its nameplate rating.
Understanding the Trade-offs: When “Rules” Become Traps
No guideline is absolute. Applying these rules without critical thinking can introduce new risks in a pilot-plant environment.
The Hidden Danger of Extended Dead-Head Running
While starting closed-valve is mandatory, running a pump at zero flow for more than a minute or two can boil the trapped liquid inside the casing due to recirculation. This causes overheating, vapor formation, and potential seal damage. Once started, you must bring the pump onto its curve by opening the discharge valve promptly. For automatic startups, a low-flow recirculation line with an orifice plate is a common safety addition.
Navigating High-Temperature and Volatile Fluids
When handling liquids near their boiling point or with high vapor pressure (like light hydrocarbons), even a flooded suction may not be enough. The NPSH required by the pump must be rigorously compared against the available NPSH after accounting for vapor pressure. In such cases, the safety margin may need to be increased, and a sealless magnetic drive pump (C-type) is often selected to eliminate seal leak risks.
The Misapplication “Safety Margin”
The 0.5–1.0 meter rule is a safeguard against unknown variables, not a substitute for accurate calculation. In a pilot plant where students are learning, never allow the impression that you can solve a severely negative NPSH margin by simply lowering the pump a meter. The physics must be respected first; the margin is the final polish, not the foundation.
Operational Vigilance: The Installation That Never Ends
Monitoring is not a passive activity; it is the feedback loop that proves your installation and startup procedures are still working.
- Check for Leakage: A dripping pump gland or casing gasket is often the first sign of misalignment, cavitation damage, or improper assembly. In a teaching lab, a leak-free pump reinforces a safety culture.
- Listen for Cavitation’s “Gravel” Sound: If a pump suddenly sounds as if it’s pumping rocks, stop it immediately. This is the unmistakable, late-stage audible signature of vapor bubble collapse.
- Touch for Abnormal Heat: Bearing housings and mechanical seals should be warm, not hot. An overheating casing at low flow is a red flag for dead-heading. A hot motor indicates overload or poor ventilation.
Making the Right Choice for Your Pilot Plant Goal
Your specific priority determines how you weigh and implement these guidelines within a unit operations curriculum.
- If your primary focus is student training and safety: Build the layout with an unmistakably visible flooded suction and a simple, bold checklist for the closed-valve startup. Physically label the startup sequence on the pump skid to make the learning automatic and the operation foolproof.
- If your primary focus is flexible research with varying fluids: Equip the pump with a variable frequency drive and ensure you have the instrumentation to log NPSH in real time. Always re-calculate the installation height for each new fluid system, and never assume yesterday’s water configuration works for today’s solvent.
- If your primary focus is maximizing pilot plant reliability and uptime: Select the pump type—corrosion-resistant, magnetic drive, or slurry pump—that matches your worst-case fluid, and then over-spec the suction piping diameter. Invest in the foundation elevation needed for a generous gravity-fed head, eliminating the most common single source of failure.
The difference between a pump that teaches for a decade and one that fails in a semester is not luck—it is an unwavering commitment to these installation and startup first principles.
Summary Table:
| Issue | Phase | Critical Guideline | Main Objective |
|---|---|---|---|
| Cavitation | Installation | Install pump 0.5–1.0m below max suction height (flooded suction) | Keep inlet pressure above liquid vapor pressure |
| Cavitation | Installation | Use short, straight suction pipes one size larger than pump inlet | Minimize suction-side friction and pressure loss |
| Air Binding | Startup | Completely prime the pump casing and suction line before startup | Eliminate air pockets and prevent dry running |
| Motor Overload | Startup | Start the pump with the discharge valve fully closed, then open slowly | Minimize initial startup power demand on the motor |
Equip Your Lab with Reliable Unit Operations Pilot Plants
Avoid operational headaches and ensure a safe, hands-on learning environment. LABPARK provides premium Educational and Vocational Unit Operations Pilot Plants in chemical engineering, bioprocess & biotech, and environmental & water treatment designed specifically for universities, research institutes, and enterprises.
Our pre-engineered systems feature optimal hydraulic layouts to prevent cavitation and overload, giving your students and researchers a robust, hassle-free teaching tool.
Contact LABPARK today to discuss your laboratory equipment needs!
Related Products
- Centrifugal Pump Performance Determination Educational Unit Operations Pilot Plant
- Centrifugal Pump Performance and Orifice Flowmeter Calibration Educational Pilot Plant
- Chemical Pipeline Assembly and Fluid Transport Practical Training Unit Operations Pilot Plant
People Also Ask
- Why start a centrifugal pump with a closed outlet valve? Protect your pilot plant motors.
- How can cavitation and slurry erosion be studied and mitigated using fluid transport and centrifugal pump pilot plants?
- How does fluid density affect pump head and pressure? Avoid Pilot Plant Motor Overload
- How does fluid viscosity affect centrifugal pump performance? Key pilot plant correction methods.
- How does fluid density affect centrifugal pump performance & motor safety in pilot plants?